You'll wake up on a farm and have to make your way up a path. You'll come across some farmer zombies and near them are some shots for you blaster. You should be able to get a Sparkle on them. Kill them, take the shots and then cut through the tree up ahead. You'll also find a rock in the way. The rock needs to be shot. You'll bump into a few more zombies here but nothing too major. Further up ahead, you'll find your sister and you'll have to shoot some zombies off her bus from the porch. Ammo will spawn up here if you run out so just keep shooting. You should definitely have auto-aim on because it's hard to see the zombies on the yellow bus.
You'll just down and a group of zombies will spawn. This is as good a time as any to switch the aim over to manual and go for the headshots. You have plenty of room to aim. Kill these ten with headshots or you can go for Sparkles. Just beside the porch on either side will be lollipops and ammo if you need it. When you clear this area, a zombie body will appear for Nick. Use him to move on.
You'll get a tip that zombies with dynamite explode and can cause chain reactions. What they don't tell you is that they mean this happens when you shoot them. If you shoot a zombie that has dynamite on, they will instantly explode. Kill the guys around here and check the surrounding area for gold medals. When all the small zombies are dead, a zombie named Mark will appear. His big thing is throwing dead bodies at you. The easiest way to kill him is to simply attack him. When he gets ready to throw (starts glowing), leapfrog over him to cancel it. Continue to do this and he will die. A body will appear for Nick so hop on and get rid of the house.
On the other side of the house will be a porch with ammo on it. Below will be zombies that will cross a field and then climb up to you. Kill the ten below with the blaster and then hop down. You'll be attacked by 10 more coming over the fence to the left. The fence will slow them down a lot, giving you plenty of time to go for headshots if you like. After you kill them all, a tractor will crash into the fence. Blow it up to get through. On the other side of the fence will be a lollipop under some wooden scaffolding and a shop just to your left.
When you're done shopping, turn left and go up the stairs to the left. Use the grain bags to get over the fence. You'll find Rosalinds bus again. Then the bus will be attacked by more zombies. Kill the few on the ground and a few will appear flying in the air. Shoot them out of the air while dodging both their charge attacks and their chicken toss attacks. When they are all gone, the bus will disappear again.
Follow after the bus, grab the lollipop on the right and then kill the cows here if you want. Keep hitting them until they die or they'll charge you. They drop some medals and a good amount of stars. Continue up the path and through the fence. Just through the fence will be a large rock on the left. If you go just past it and up to the little ledge above, you'll find a Golden Lollipop on Normal.
Come up behind the bus and follow it. Zombies will try to roll rocks down on top of it and you'll have to shoot them before they do. After a few rocks, a tree will fall down in front of you. Cut through and follow the path to the bus up above. You'll climb up onto the bus and you'll have to shoot more rocks that are being pushed at you. Take the ride with the bus and watch out for both the rocks and the flying zombies.
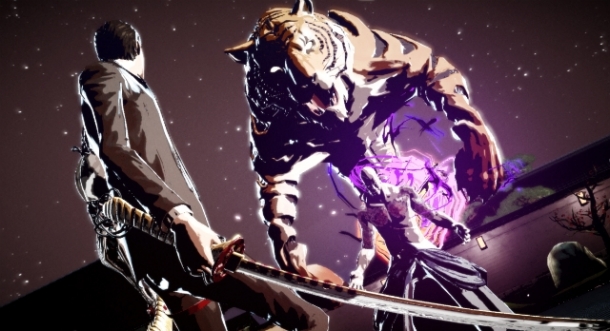
After all that protecting, the bus will throw you off. Try to follow it and you'll come to a cow farm with nothing of interest except a giant mushroom and some ammo. Grab the ammo and cut the shroom in half. You'll wake up in an Arena with a giant called Chat. Shoot him at range. When he gets close, keep dodging his aggressive pecking attacks until he is stuck. Then keep hitting him until you get a "Finish" on him. After he's dead, get on the bus and leave.
You'll wake up once again in a different place. This time, you'll be behind the wheel of a giant harvester and you'll have to kill 100 zombies. There's also an achievement for clearing all the crops from the field before you kill all the zombies. So just make a grid or go in smaller circles towards the middle so you make sure you hit all of the crops. Miss a zombie, clear it all out and then kill him.
*Achievement: Legendary Harvester
When you wake up again, you'll have a tractor bearing down on you. Shoot the zombies off of it and then shoot it. Jump over it and you'll have to save a student from some zombies. It's only a group of four zombies so they shouldn't be too much of a problem. After he is saved, a few more will appear coming out of a small alley. Rush up on them and hit them as they bottleneck at the corner. Should make for some nice points.
Go past them and use the grain to jump over the fence. Kill the four flying zombies and grab the ammo on either side of the area. After you've killed them, saw through the fence and go shopping if you'd like. Move into the next field and kill the two fat zombies in the field. Go around them and into the small alley between the houses. Behind them is a trampoline. Hop on and then you'll do a zombie walk a few times. Eventually, you'll land on a higher level, possibly collecting a Golden Lollipop. Come down and use Nick's head to control the body and move on.
You'll be on a balcony and shooting down on zombies. They will have bombs and be trying to rush the bus up a hill. The bus will actually back up if enemies get too close so it's not too bad. Just keep shooting and ammo will appear as you need it. Once this is clear, you'll just onto the bus. From here, you'll need to shoot three tractors off the side that are trying to drop a giant rock on your head. Unfortunately, they are only active one at a time and if you shoot an inactive tractor, it has no effect making this much slower than it needs to be.
Go through the next area and slice open the mushroom. You'll have to fight three giant chickens this time. I used my special gauge and they all fell in one swing though it's definitely possible to do it the old fashioned way. When they are all dead, their heads will erupt out of the broken bus at the back. They will take turns trying to peck you to pieces. Keep dodging the green bubbles they shoot at you and when the peck, keep dodging until they get stuck. Once they are stuck, cut them up to finish them off.
You'll wake up on another harvester. This time, you'll need to kill 300 zombies in a field. You have to be careful because there are scarecrows on explosive barrels that form a sort of track. Just keep doing loops on this track and you'll get there eventually. Just be very careful around the barrels.
Fall asleep and wake up again somewhere else! Wake up and chase after the bus. Grab the lollipop on the right side under the scaffolding. There's also a shop here. In the next area, you'll get into a fight with a group of 14 zombies, all with weapons. The secret is that there is a pole a little further up the path. Just lead them up to the pole and hop on to clear the area. Cut through the fence and cross the bridge. On the other side will be some medals and a lollipop. Grab those and then jump off the bridge to the lower area.
You'll have to cross through the water to get further on here. This is kind of difficult because of how little space you have. There's also quite a few flying zombies too but they all hover around barrels so shoot those and you'll probably take care of that easily. On the far bank will be another lollipop and a shop. Past the shop will be three big farmers. You can try for a Sparkle but I'd just shoot them. Two shots each and it'll be a lot easier than fighting them. Round the corner to the right for more zombies. Kill them all and then check behind the structures to the right for a Golden Lollipop on normal.
Go through to the next area that's littered with barrels. You'll fight three waves of enemies here. The first is 8, the second is 16, and the last is 32. Save up your special gauge for the last wave. Kill the first few however you'd like and feel free to use the barrels. When the last wave comes around, get into the middle of the zombie pack and activate your special gauge. Your goal is to get 7 zombies in a single Sparkle Hunt which will give you an achievement. You've got good odds and if it doesn't work, just restart the checkpoint before you end the fight and try again. Clean up any stragglers and go through the nearby gate.
*Achievement: Sparkle Hunting Master
You'll fight a mini-boss here. He'll throw more bodies so just fight him the same as before. Cut through the Branch and go over the bridge. Shop if you'd like and then go up the hill.
Mariska
First of all, Mariska is going to shoot bubbles at you and you need to shoot back. If you avoid getting hit by the bubbles for the entire fight, you get an achievement so be diligent. You'll need to shoot her bubble until you knock her out. There's plenty of ammo around the ring. Once you knock her out, you've only got a short time to get to her and Finish her.
Now, whenever you shoot one of her, that one disappears and takes a place as a harvester that moves around the ring until you shoot it or as one of the giant pecking chicken heads. Keep shooting her, the chicken heads, and the harvesters. It only takes one shot each to stop whichever attack. When you've done enough damage, you'll have to Finish her again.
This last round there are a lot of her. They'll spin around in a ring in the center. I would aim for the left or right side because I think it'll go through and hit multiple versions of her. There will be butterflies on the outside of the ring that will light you. When lit up, just keep dodging around until the light falls off. Avoid the giant hand and chicken attacks. When the fireworks come, just keep dodging until it stops. Eventually, there will be less and less of her. Knock her out and finish her one last time.
*Achievement: Dirty Hippy