Missing Marines
After you finish your chat and get your gear together, walk forward into the umbilical. Inside the umbilical, move forward and wait for the door ahead to unlock. You'll see a mess of bodies beyond the door and a couple of marines administering first aid. Here you'll learn how to use the Motion Tracker here so pay attention to the tutorial. Red dots are bad and blue dots are good.
With the Motion Tracker mastered, one of the marines nearby (O'Neal) will open the door into the hangar bay. There's not much going on in here however there is the lower half of an android on the floor which is a reference to the films. In the Hangar, turn right and you'll see a closed door with a glowing blue switch. Open the door with the switch to enter the locker room and go through the doorway and into the mess hall beyond.
Go through the mess and then through the door by the cryotubes to enter an orange lit hallway with construction all around. There is a single door with a blinking red light. Go up to it and hit the button as prompted to cut the door open. Similarly, doors with that same light that are opened can be resealed. You'll be lead down into a heavily alienated area.
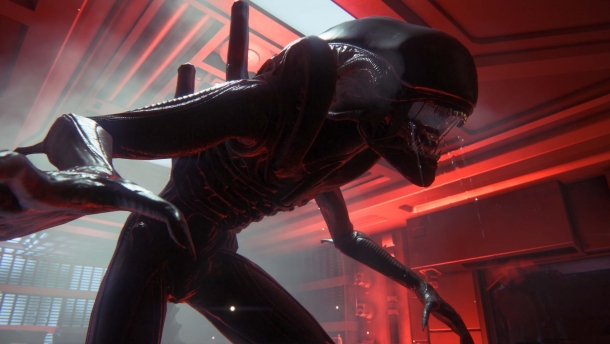
Make your way through these tunnels and when you find the large orange fan, check to the left to find Winter attached to the wall. Try and cut him down but it won't go well. You'll first be knocked back and then pounced on by a Xenomorph. You need to press the X/Square button repeatedly to get him off of you and then you'll be able to shoot him with your pistol from the ground (similar to Call of Duty). The Xeno will run off and you'll have to hunt him down. If you're having trouble finding him, remember that you have a Motion Tracker. Find him and kill him before heading back to Winter.
Cut Winter loose and then follow him as he leads you through the tunnels to the cockpit. He'll eventually open a door into a new area with an orange lighting to it and a number of consoles lit up. You'll cross this room without any event (except a tutorial on secondary firing modes) and enter another room where you'll meet your first few Lurkers. The Lurkers will drop down and come directly at you. The Shotgun may be the weapon of choice here because of how quickly they'll close the distance.
The Lurkers will come at you one at a time (for the most part). Just kill each one as it approaches and you'll be knee deep in dead Xenomorphs before you know it. Before following Winter up the stairs, check the right side of the room (as you entered) at the back near the stairs to find [Dog tags 1-1] on a couple of racks. When you get a chance, follow Winter up the stairs to the left and enter the room Keyes will seal the room and you need to go around to the central console to get the Flight Recording. When you have it, Winter will lead you from the room through the door across the room.
You'll find yourself in a hallway and on the floor to the left will be some [ammo] and [body armor]. Up ahead on the right will be a large open doorway and a Xeno will come through the door. Kill him and then enter the room. Watch the left side because another alien will come through the broken window and over the console. Kill him and go through the door at the back of the room.
Soon, you'll come to a room with a red light on in it and a large observation window to the left. There will be at least one enemy in here and then three more scattered in the hallways beyond. If you wait long enough, they may actually come down the hall and round the corner, allowing you to kill them one at a time. However, it is likely best to stick with the shotgun if you are headed into the hallway since it is so tight in there.
In the hallway, go to the end and take a left. Run down the end and through the door quickly because other enemies will come toward you from the right path. In the next room with the power loaders will be more [ammo] and [health]. Stock up and you'll enter the Hangar.
Things will get a little "dicey" in the hangar so get behind the barricade and be prepared. Aliens will start to attack from the left side of the hangar and then a large group will start coming down the nose of the ship in front of you. These aliens will move around quite a bit and jump around frequently. For the most part, you want to be using your Pulse Rifle here to get a few shots in at long range. If they start getting behind the barrier, switch to the shotgun so you can protect yourself a little better.
| Short, Controlled Bursts |
| In the Hangar, you'll be up for an Achievement. What you need to do is keep the Aliens from getting behind your barricade in the Hangar. It may take a few attempts and it's recommended that you do this A) on Easy and B) with friends. Neither is actually necessary but it will make getting this achievement much smoother.
The first thing to be sure of is to NOT go behind the barricade. Stand in front of it and you should draw most of the Aliens away from the barricade rather than towards it. You want to stand towards the nose of the ship and start off watching the left side for a few Aliens. About halfway through, more of the Xenomorphs will start to attack from the right side. Fight these off as well and when the door opens, the achievement will pop (not when you go through the door but when it opens). If you fail to get this achievement, restarting the checkpoint will allow you to try again. |
Cargo Bay Rescue
Get through the door once it opens and inside the next room, you'll have a moment to collect yourself. Wait for the marines to open the next door leading back to the umbilical. As you cross the umbilical once again, something will happen and control will be wrested from your hands. When you've got control again, return to the previous room and after a chat, O'Neal will open a floor panel. Move through the hallways and then into the lab area.
Inside the lab area, you'll find all sorts of computers and some [shotgun shells]. Continue through the door with the green light as soon as you can and you'll enter another area filled with Alien matter. You'll have to cross through a few hallways but not much will happen until you enter a large room with some kind of generator in the middle. When you do, be ready for an attack.
Aliens will start to come down the walls on the left and across the platforms in front of you. Try to pick them off at a distance if you can. Push forward and go through the door at the bottom of the stairs ahead. You'll enter a small curved hallway with a good amount of [ammo] on the boxes to the left. Stick to the right and you'll enter a room with more computers. Directly ahead of you, a Lurker will drop from the ceiling. Start shooting and you should either kill him or scare him off so that he hides behind the nearby computers.
With the Lurker dead, check the right side of the room for a desk and a computer on top. This computer is [Audio Log 1-1] so pick that up before continuing through the room to the left. Turn right into the next hallway and two more Aliens will attack through the floor ahead. You should hopefully be able to kill the first before he even clears the grates in the floor. Kill the other and walk to the end of the hallway. In the next room, you'll see some [ammo] on the crates to the right. Grab the ammo and then search across the room for [Dog Tag 1-2].
Exit the room to the right and you'll re-enter the room with the generator again. More Aliens will pop out and attack you so be on the watch out for enemies on the wall to the right. There should only be a handful of them (maybe four) here and when you're clear, enter the next hallway. Follow O'Neal but have your shotgun ready because an Alien will pop out of the ceiling. Shoot him with the shotgun to take him out rather quickly and then continue after O'Neal into the next room.
| Coming Outta The Walls! |
| If you manage to kill this alien quickly enough, you should easily get the achievement "Coming Outta The Walls". If not, that's alright because it can be gotten anywhere by killing an Alien that is on the ceiling or walls. This spot just happens to be a predictable and easy kill. This kill will also count towards the "Entry Prohibited" Achievement. |
This hallway will lead you back out to the room with the generator but don't go out yet. In the room with the window that looks back into the generator room, keep your eyes to the right and you'll find a doorway that eventually leads to a room with [armor] and [Hick's Shotgun]. When you have both of these in hand, catch up with O'Neal as he leads you into the next room.
As with the last two times you entered this room, you'll have to fight off aboutfive Aliens while O'Neal opens a door. For the most part, they are going to have to climb over the railings at the ends or the middle to get at you. When you've disposed of the enemies here, O'Neal will finally manage to open the door into an access corridor. Get into the corridor and drop down into the room at the end.
Turn left from this room and enter the rather roomy hallway. At the end of the hallway will be [Armor] and a door on the right. This door will lead you to the Cargo Bay.
Inside the Cargo Bay, follow O'Neal up the stairs. As you climb the stairs, you'll be attacked by a group of Aliens and there will be even more as you cross the upper catwalk. When you get there, O'Neal will start to cut through the door and you'll have to hold off more Xenos as they come up over the railings at you. All in all, you'll probably be attacked by anywhere from 8-12 aliens but they will be coming over the railings right next to you so the Shotgun is the best way to go here.
As soon as O'Neal has the door open, make a run for it will bring you to the control room for the Cargo Bay. There is a control panel in here that you can activate but wait. On the far side of this room and beyond a bunch of terminals, you'll find [Dog Tags 1-3] on a large metal crate. By hitting the switch in the Cargo Bay, you'll open the bay doors, watch a cutscene and finish the mission.


