Trackers
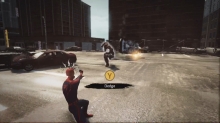
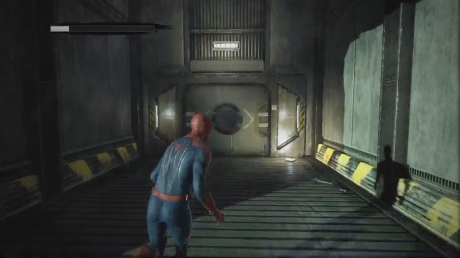
You'll set out to plant three trackers on a different antennas scattered around Manhattan. This is actually a great time to try for the Sky Captainachievement since you'll have a few chances to cross a lot of distance.
To get this achievement, you have to link 10 Web Rushes in a row without stopping or hesitating. The best way to do this is to just tap the Web Rush button instead of holding it and to have a good path in front of you. You must also reach your destination (I believe) or it doesn't count. For instance, if you set your Web Rush for a flagpole in the distance but change to a building to your left mid travel, the first Web Rush will only count if you step on the flagpole before changing directions.
You'll have plenty of opportunities to get this later if you don't want to do it now. However, if you are still having trouble, I recommend that you try to find Time's Square and Web Rush up one of the long streets there because there's plenty of low level things to use and it's very straight.
*Achievement:Sky Captain
Rhino
After you've planted the three trackers, you'll catch something about a Rhino attack. Make your way over to the waypoint to find the Rhino. Fighting him is actually very simple. Just put yourself between Rhino and one of the SWAT trucks. Rhino will rush at you and when he gets close, dodge over him. He will slam into the truck and get stuck. While he's stuck, execute a Web Rush on him. This will deal damage and free him. Do this several times to defeat him.
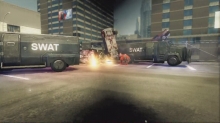
*Achievement:Speed Bump
Oscorp Archieves
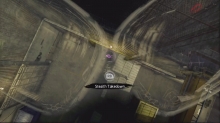
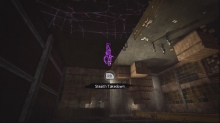
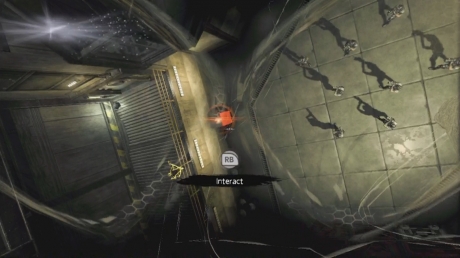
When you get inside, follow the men carrying the research data. You'll enter a vent and then when you come out, you'll be standing behind a guard. You'll be prompted to hit the Web Rush button which, when behind or above an enemy will execute a stealth attack (like here). Take him out and then move forward. Just to the left on the boxes before you come to a large warehouse room, you should find a You can take the simple approach and throw the crate at them or you can try and get a few of them with Stealth attacks. To do that, stick to the ceiling and start taking them out one by one. This still leaves the box for if you fail.
Either method is acceptable. The easiest enemy to start with is the single enemy guarding the doorway ahead. After that, take out anybody else that isn't easily visible but be careful because you won't be able to hide that you got that guy and others will investigate. Use the crate if you have to and the fight should be over quite quickly. Crawl your way into the next room and start again.
The first guard to take down is the one on the upper level. He'd easily be able to see anything that happened below. I'd recommend that you take out the single man standing in the corner ahead and left if you look over the room. He's most likely to be by himself. If you are unsuccessful, you'll just have to fight through them. conveniently, in that same corner is a propane tank. Through that at them and clean up as many as you can.
When they are all down, go back to the boxes that you came over when you entered the room. Between the platform that had the first guard and these boxes will be aMagazine. Now, head back into the previous room and find the balcony high above that connects to the first room with the box hanging down. On one side of this balcony is amagazine.
Head back to that last room. There's a track up above with a box on it. On one end is a vent blocked by boxes. Hop on the set of boxes just in front and below the box on the track. Use your Web Rush to pull the box on the track. This will smash the other smaller boxes and clear the vent. Get into that vent.
After you take a ride on the elevator, turn around and go through the vent on the back wall to get out of the elevator shaft. When you come out, you'll be behind two guards. Use stealth to take them both down easily.
Take a right at the intersection and just to the right of the door will be another Magazine. Grab that and then go through the small vent hole above the door. You'll come into a rather large room with a bunch of guards. directly ahead of you is another door and vent. Web Rush over to the vent and start climbing through it. Climbing through, you'll bump into another Magazine.

When you come out of that vent, you'll be looking over the room proper. Just below you will be a single guard. Take him out. If you have the Thread ability which puts your stealth victims on the ceiling, you can actually clear this room through stealth but it's probably much easier if you hop down, let them crowd around you and then drop the box on them. That should get most of them and leave you very few to clean up. Make your way through the large hole to the next room but do so on the ceiling because there's an even larger group in the next room.
On the far side of the room is a cabinet that you can throw at them. There's other things around the room too. Throwing things will make this fight a lot easier though the fastest way is to use the cabinet to stun everybody, web as many as you can and then alternate striking and signature moves on each enemy. This should start the animation for the Signature move before anyone can hit you. It'll also make you look very talented. Just above this group on a walkway is a Metal Box.Grab that and head into the next area.
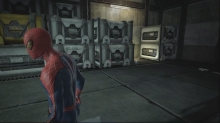
There's only one man in this area. Pull the crate on the track to smash the window. After you've done that, look to the left side under the window you just smashed. Between two boxes will be another Magazine. Web Rush up through the window and then turn right. Go through the vent above the door. When you come out, you'll find someone taking pictures.
After a cutscene, you'll be attacked by a man with a shield. To attack him, you'll have to jump over him and attack his back by puching towrads him and hitting the jump button. Hit him a few times from the back. He may turn around and then you'll have to do it again until you take him out or stun him.
Go through the door behind him and into the hallway. As you make your way forward, you'll be attacked by a turret mounted on the ceiling. You'll automatically dodge out of the way. Wait until the turret is looking a different direction and then Web Rush at the turret to destroy it. There is an upgrade you can get later that will allow you to do this even if it's sighted you. Once it's destroyed, follow the hallway until you bump into Whitney again. She'll have you take a picture of an Oscorp Box.
Go through the door to your right and you'll enter a rather large, long room with a few guards in it. You need to not be seen here or else you'll be in a whole world of pain. Hop up into the vent nearby and follow it. This will drop you off above the walkway above the room. There is one guard up here so take him out. When he's down, move over to the right and take out the lone guard there.
Travel back across to the other side of the room. This part takes patience because the guards will move around the room. It's really not tough though, just wait for one of them to be alone and then take them out. Try to take them out at different parts of the room so they don't notice any bodies you leave behind. If they do notice one, just run away and stay away until they become less suspicious or a good opening appears.
On this side, by the big machines under the maintenance sign will be some Audio Evidenceon the left side. Go up to the walkway in the middle. Looking at the other half of the room, turn left and you should see some boxes with a Metal Boxon top. Grab that. Lastly, hop into the pit and face the big door on the middle. Just to the left of that around the corner will be another Magazine.
After taking out all of the enemies here, a set of doors should have opened. Go through those doors and you'll come to a roughly square room with two levels. Immediately get to the ceiling. On the top floor will be three guards that walk around the ring. Taking these three out shouldn't be too difficult since they tend to be pretty far apart. Now head over to the long section on the bottom floor. You can try for the top of ceiling or you can try to move around under the walkway.
There will be two groups of enemies here. One group on the right side will consist of one guard and one man sitting down. Take them out first. Then head over to the other side and there should be two guards with one man sitting down - one of the guards will have a shield. Take out the group of two if you can and then grab the man sitting fown. Once they are all down, check to the left of the computer the man was sitting at for another Metal Box.Go up to the top floor and find the vents. Go through the vents and it should open to larger section with another Metal Boxand lots of steam. Grab the metal box and exit.
Near where the last guards were on the lower level should be a terminal that you can use. Use this terminal to deactivate the laser field below. Go down into that lower area and attached to the central structure should be another terminal. Use that to open the exit for this room. Go through that door.
You'll bump into Whiteney again. She'll ask you to hit the terminal opposite from her. Activate it to open a door. Follow her through. After the awesome cutscene, go forward to the next doorway. Even though it's open, go through the vent above it anyway. Two guards will walk under you. You can take at least one out easily this way. Continue past them to a large room with an electrified track below and the incinerator. In this room will be a smaller room where Whitney is being interrogated. Before going in, look down and left along the track to find a Metal Box.
Now enter that smaller room through the small opening at the top of the middle wall. Inside, take out one or two of the enemies with a stealth takedown and then beat the other man. After the next cutscene, you'll have to defend Whitney while she digs through the stuff inside the box. Your first instinct might be to fly around the room using Web Rush and taking out enemies but on the higher difficulties, this won't work. The best method is to just stand outside the smaller room on the platform and sweep left and right from one enemy to the next using your web shooters. Once one has been immobilized, move to the next. Doing this should keep Whitney in near perfect health.
After she finds what you're looking for, grab her and then exit through the door with the green sign. Go straight through the hallway and into the next room. Hop off to the lower floor and then follow the wall left to find a Magazine. Swing up the boxes ahead and at the top of one of the boxes in the middle row will be another Magazine.
Exit the room through the door at the top. This will put you on top of a bridge in a familiar room. On one side of the room will be an elevator with a green light on above it. Go over to the elevator to start the "boss" fight. Really, this is quite easy. He's a tough fight head on but he's quite easy to take down in stealth. Use Web Retreat to get up to the ceiling. From here, move towards him but avoid his flashlight. Get above him and execute a stealth takedown. Get on the elevator to finish the level.
When you exit the building, just be careful that you don't get shot. There will be Snipers outside gunning for you but you don't really need to take them out, you can just take off. From this point on, Snipers will appear randomly on rooftops throughout the city. Make your way back to your apartment.