| Row 1 Collectibles | ||
|---|---|---|
| Collectible | Location | Description |
| Trophy | 1985, 2154 | Inside of a containment area with an electrified floor and two sentry guns. Nearby is a Riddler Robot. Use the Voice Synthesizer to get it to destroy the first gun, then blind the second with your Hacking Device. Order the Riddler Robot to pick up the trophy while the sentry gun is blinded, then make it bring it back onto safe ground. Destroy the robot and grab the trophy. |
| Trophy | 1670, 2284 | Located underground, with one possible entrance being at 1889, 2619. You're looking for an area with metal flooring, which is used for one of the parts of the Gun Runner side mission. Grapple up to the office to spot the trophy sitting in the open. |
| Trophy | 1762, 1986 | You will need the Batmobile for this one. Switch to tank mode and press up on the directional pad to start the scanner, aiming it at the device on the wall. This will make question marks appear, similar to when you were tracking the tire marks in the main story. Following these will take you to the broken bridge to the north of your location, with the final marker being a circle on the west side of the piece connecting the pillars. Shoot this with the cannon, then grapple up and grab the trophy inside. |
| Rioter | 1651, 2222 | Find the rioter with bomb in the crowd with your Remote Batarang. The electricity is right below the Hotel sign, so use the Remote Batarang to get some and hit the victim with it to finish. |
| Riddle | 1633, 2240 | Scan the sign that reads "The Deacon's Mission" on the building, which is right next to Dolman's Department Store. |
| Trophy | 2049, 2731 | On a table inside of an office that's above the big Happy Halloween sign. |
| Row 2 Collectibles | ||
| Trophy | 1735, 2103 | There's an anchor point here, so attach the winch and pull back until you can't anymore. You will have revealed a small box-like thing with the trophy inside, so get out of the Batmobile and grab it. |
| Riddle | GCPD Building | In the holding cells area, there is a small room right next to the door leading further inside the station called the Interview Room. Stand a little bit away from the desk and scan the entire thing, which should solve the riddle. |
| Riddle | 2329, 3159 | Stand on the roof and look to the southeast to spot a building that you can barely see. Scan this while zoomed in (supposed to be Arkham Asylum). |
| Trophy | 1774, 2505 | On top of a barrel on a catwalk inside of the building; you need to Batmobile to break through the wooden barrier. |
| Trophy | 2422, 3116 | There's a big train here that you can pull with the Batmobile, so do that and go behind it to find a grate you can enter, letting you reach the trophy. |
| Trophy | 1647, 2779 | The trophy is locked on the wall and you can see a bunch of question marks surrounding it. On a nearby hill is a big switch on the ground you can stand on with the Batmobile, which lights up one of the marks. Shooting it will make another light up; keep doing this until you've hit them all. If you take too long, then the question mark will switch off and you'll have to start over. |
| Row 3 Collectibles | ||
| Riddle | GCPD Building | On top of the GCPD building is the light that they use to signal the Batman. Go to the front of it and just scan the light to solve the riddle. |
| Trophy | 1574, 2957 | Drive the Batmobile up onto the roof via the nearby path and ramp, then make your way all the way to the coordinates to spy a weak wall on the back of small tower. Blast it open, then grapple to get the trophy. |
| Trophy | 1550, 2070 | Located inside of the building, which is accessible via the balcony to the northwest. |
| Trophy | 2003, 3042 | You will need the Batmobile for this little ball maze. Attach the winch and pull back just enough that the block is lined up with the bottom of the path on the left, then let go. This should push the ball high enough to bypass the door, but not enough to circle around. Once it rolls to the right, run up and grab the trophy. |
| Trophy | 2217, 2182 | On the floor in the middle section of the building. |
| Destructible | -- | See Militia Shield Locations |
Batman: Arkham Knight - Second Set (Bleake)
Jump to a section:
Share Second Set (Bleake) with others
Last updated by MasterVG71782, 17th August
Do you want to earn money creating pages just like this? Gamewise is currently looking for writers, find out more here.
Around the Network
Batman: Arkham Knight Brainwaves
-

8th June, 0 replies
GAME Midnight Launches for Batman: Arkham Knight and The Elder Scrolls Online
UK retailer GAME will be opening at midnight for the launches of Batman: Arkham Knight and The Elder...
-

8th June, 0 replies
Batman: Arkham Knight Red Hood Trailer Released
Warner Bros. has released a new trailer for Batman: Arkham Knight. The trailer features Red Hood and...
-
8th June, 0 replies
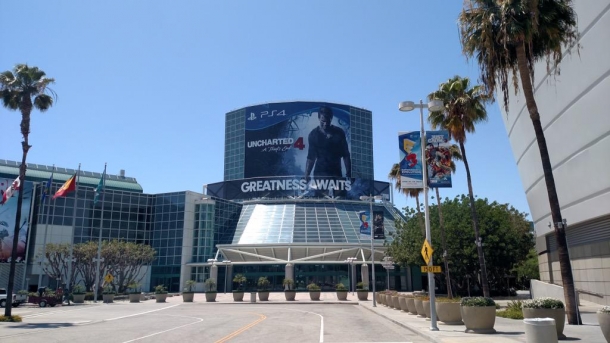
First E3 Banners Appear
You know E3's around the corner when game banners start going up around the LA Convention Center. Here's...
Batman: Arkham Knight Riddler Collectibles
Bleake Island Collectibles
First Set (Bleake) Second Set (Bleake) Third Set (Bleake) Breakables (Bleake)
Miagani Island Collectibles
First Set (Miagani) Second Set (Miagani) Third Set (Miagani) Breakables (Miagani)
Founders' Island Collectibles
First Set (Founders) Second Set (Founders) Third Set (Founders) Breakables (Founders)
Stagg Airships Collectibles
First Set (Stagg) Second Set (Stagg) Third Set (Stagg) Breakables (Stagg)
Panessa Studio Collectibles
First Set (Panessa) Second Set (Panessa) Third Set (Panessa) Breakable (Panessa)
Arkham Knight HQ Collectibles
First Set (Knight) Second Set (Knight) Third Set (Knight) Breakables (Knight)