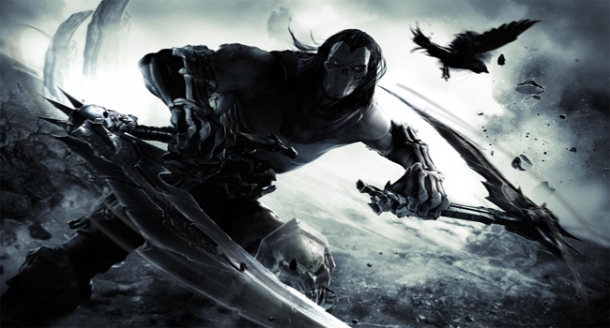
The Charred Council
You'll wake up from your slumber to the faces of the Charred Council. The short version is that these guys are your bosses and they are not pleased with you running around, starting Apocalypses. Protest as you might, they don't believe you and sentence you to death but you manage to convince them to let you have your revenge instead. Worst that can happen is that you die, right? Well, you could be attached to a Watcher for one. The voice will likely sound familiar to Batman fans.
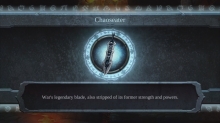
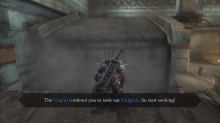
On the right side of this area is going to be your sword, Chaoseater. Unfortunately, your weapon is also weaker than it used to be. You will be told about your Wrath ability called Blade Geyser. You'll be able to acquire more of these abilities later but this easily the best of them. After grabbing your sword, head back to the left and you'll find a round blue portal in the ground. Head for this and before you leave, you'll be told about how Souls will be used for currency, healing, and energy. The Council will advise you to seek out the Demon Merchant Vulgrim. Hop into the portal.
Earth
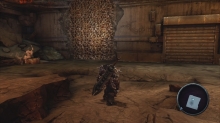
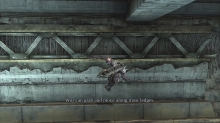
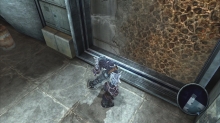
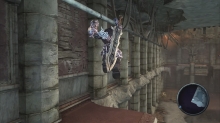
You'll be back on Earth via crash landing. After being told who's who, you'll be pointed directly at a wall covered in Demonic Growth. Climb up to the top and turn right. Walk around this floor until you come to an upward ramp. Climb to the top while learning how to double jump and along the wall in front of you will be some exposed beams. Any beams that look like these can be grabbed onto and then run along. Grab the beam and run to the right. You'll have to jump to the right to cross the gap in the beam. At the end, hit the Activate button to drop down.
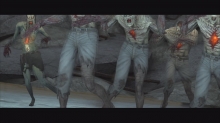
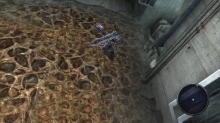
Fun Fact: Zombies can appear in regular Apocalypses too! Here, you will meet your "first" enemy, the zombies. Zombies are very easy for the most part, requiring only one or two hits to kill. Alone, they are a simple kill but when they are paired up with other tougher enemies, they can become something of a nuisance. The best thing about zombies however, is that they are great for racking up kills for the "Improvised Kills" achievement. So start picking things up and throwing them around.
There's an important note here about weaker enemies. Certain types of enemies can be killed just by running up to them and hitting the execute button. These types of enemies are generally very weak types like zombies or baby spiders. The most important part about this is that when you kill an enemy in such a way, the souls that they leave behind will lean heavily towards a particular type. Zombies, for instance, can drop any kind of soul but generally drop blue souls. However, if you use an instant kill on them, they will drop almost strictly green souls. Your gauntlet will glow with a yellow light if you are near an enemy that can be killed in this manner.
 Follow this level around the outside going clockwise until you see a new demon appear. It will run forward and destroy the section of ground in front of you. You'll have to jump up to a pipe above. Using this pipe, you can cross to the other side of the garage. Get to the other side and you'll be attacked by more Zombies. Kill the and open the Elevator Door ahead. Jump across to the Demonic Growth and climb around the shaft to enter the next level of the garage.

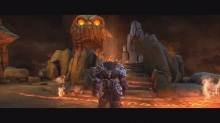
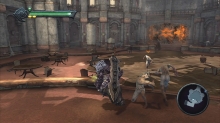
When you get to the top of the elevator shaft, you'll climb out into a rather large room. In the middle of the room will be a large statue and just beyond that will be a huge hole in the ground. In this room will be a few Zombies to start with. Throw the various chairs and tables at them to kill as many as you can. After you kill a few of them, another of those Exploding Demons will appear. At this point, go up to the raised level at the back of the room and start killing zombies from here. Kill as many as you can and work your way back down to the lower level. This should allow you to thin the zombies a little without the bigger guy's attention.
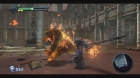
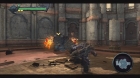
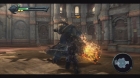
The Exploding Demon has a few different attacks but most of them are relatively close range. He has a backhand attack that does moderate damage, a two swipe attack that does slightly less damage and an attack where he shoot flire out of the hole in his stomach. The backhand attack starts when he crosses his left hand way over to the right side of his body. He'll hold this stance for a second before letting loose. The two swipes take the form of a right-left hook. This starts with him taking his left hand way back and then swinging. The fire attack is rather obvious. He pushes out his stomach and it starts to swell until it explodes outward with fire. This is the only attack that has any significant range. Take a few quick swings and then get ready to dodge his next attack, he's surprisingly fast. After you've dealt enough damage, he'll start running after you very quickly. Just keep dodging away when he does this because he's about to explode and die.
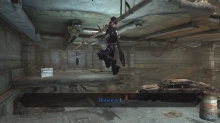
After he explodes, head back to the upper level and you'll find a large block that you can move around. Move it closer to the wall and use it as a stepping stone to get to the higher level. There won't be much of anywhere to go but if you look up a little, you'll see a pipe dangling down on some wires. Grab onto it and use to get across the large gap.
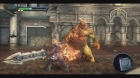
Make your way along the carpet and kill the few zombies here. jump the gap to the other side and walk through the door at the end. You'll see more Demonic Growth in this elevator shaft. Climb that as it wraps around to the right. This will take you to the next level up. The floor will crumble underneath you and drop you into a sealed room with a bunch of zombies and some serious furniture. Use the smaller furniture like tables and chairs to kill as many zombies as possible. After you kill a few, you'll be challenged by a Fire Demon.
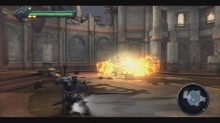
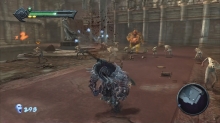
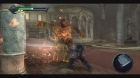
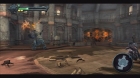
The Fire Demon has a few different major attacks. The first one you'll see (I think it's part of the introduction) is that he will raise both fists over his head and slam them into the ground creating a fiery explosion around him. He also has a directed range attack where he squats down low and digs his hands into the ground. Then he digs his hands into the ground and shoots this current of fire through the ground at you. This is easily dodged to the side. The last attack is a swinging attack. He will simply swing at you with his large fists. Unfortunately, this attack has a surprising amount of range, deals huge damage, and can break through the pillars scattered around the room.
 To start the fight, try to throw some of the bigger objects in the room at him, particularly the pianos. After you've exhausted that option or he's getting too close to use that strategy, get close and use your Blade Geyser on him (You may have to equip it in the pause menu). When you use it, it should not only render you invincible for a short period during the animation, but it should also stun him allowing you to get some good hits in on him. Hit him with the Blade Geyser and then start hacking at him. When he seems to be regaining his compuser, hit him with the Blade Geyser again. Hack at him some more and hopefully he should be ready for an execution at this point. If not, back up and start using dodges and regular attacks. After all of the damage you just dealt to him, he can't have much more health left.
Run up the newly opened stairs and make your way up to the top. As you go, you'll come across some zombies which you can get health from with an instant kill if you're low. At the top of the stairs, you'll come ot a long rectangular room with a hole at the end. Before going to the hole, check to the left for a health chest. You won't be able to get back up here so there's no reason not to take it (and there's an achievement for opening 150 of them).
The Crossroads
Ok, so you remember how I said "nap" earlier? I may have been off by roughly 876579 hours. Anyway, nothing to do about it now that you've over slept, might as well meet Vulgrim. After the cutscene, you should get an achievement.
*Death Dealer | Meet Vulgrim | 10 | Bronze |
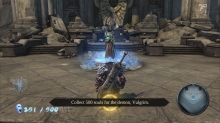
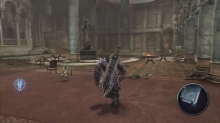
Vulgrim is going to send you on an errand to collect 500 blue souls. This includes any souls that you've already collected so you probably only need 300 or so more. This area, called The Crossroads is important for two achievements. The first is the previously mentioned "Improvised Kills" achievement. This area has tons of things to throw and there are a lot of zombies around here. That means that pretty much each item you throw should result in a kill. Every time you come through the Crossroads, you should try to get as many kills with thrown objects as you can. The other achievement is "Dark Rider" but you can't get that until you find your horse.
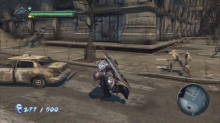
For now, head to the east and you should see a building with large windows. Inside is a chest that should set you well on your way. Explore the area, killing and opening chests as you can. Watch out on some of the side streets as stronger enemies appear like the Soldiers and more Fire Demons. Soldiers are faster and hit harder than zombies but they aren't really all that dangerous even in large groups. They really only become trouble when paired with large enemies because they may stun you while dealing with the bigger threat. The Fire Demons may be a little bit of a problem at first but you've got lots of room to move around. Attack twice and retreat. Rinse and repeat until it's dead.
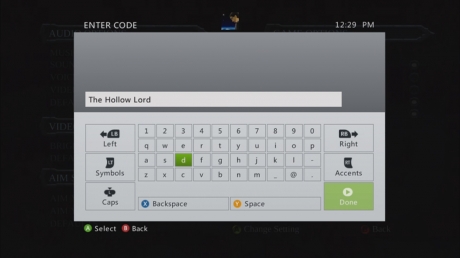
With the souls collected, return to Vulgrim and he'll give you the Earth Caller's Horn in exchange for the 500 souls. Before you use it on the Tormented gate, we're going to get you another achievement. There's a Scythe in Vulgrim's Shop and you need to buy it at some point BUT you can get it for free. Pause the game, go into options and on the right side, choose "Enter Code". Enter the code "The Hollow Lord" exactly that way. Close that, return to Vulgrim's Store and instead of the regular Scythe, you'll find the "Harvester" which is free. Pick it up and you've got another achievement! You don't HAVE to do it this way. You can save up the 1,000 souls it takes to buy the normal Scythe but there is zero difference between them and no detrimental effect to your game. Either way, with the Scythe in hand, it's time to go hunting.
Soldier Artifact #1
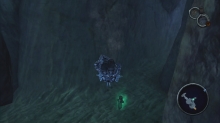
If you head all the way to the west, you should see some subway stairs leading downward. Go down the stairs and you'll find an underground pond. Hop into the pond, turn left and swim to the bottom of the pond to find your very first collectible.
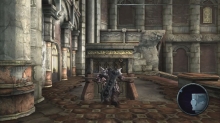
Make your way into the library by using the Earth Caller's Horn on the Tormented Gate.