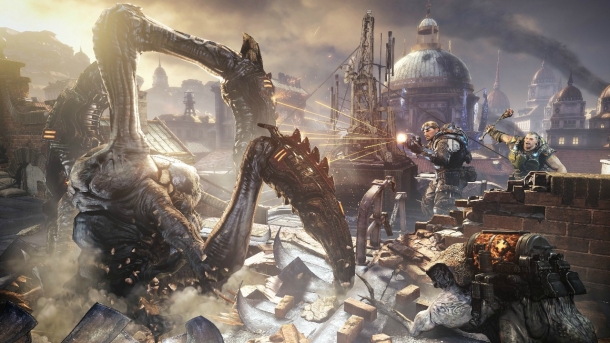
Beast Mode is a new mode to the Gears series that puts you in the boots of the locust Horde in what is essentially a reversal of Horde. The enemies are all humans fighting to survive. They will build fortifications of the same types and in the same places as you would in Horde. Stranded and COG gears are the generic Human types and can be killed from any range but any named characters who have a portrait in the upper left or Onyx Guard enemies are considered heroes and need to be killed either at close range or by a one hit kill. For instance, a shotgun at close range or a direct hit Boomshot from long range can kill a Hero but a Lancer from medium range will not.
The ultimate goal is to make it through 12 rounds of increasing difficulty, killing humans to clear the round. Each round you start with 1:00 on the clock and whatever money you have left from the previous round (including, I believe, a refund for whatever creature you were using when the previous round ended). You gain money and time by destroying any fortification and by downing or killing a Human. If you fail, you incur a time penalty and you are trying to finish all 12 rounds as quickly as possible.
Finally, your selection of creatures starts off at tier 1 every match and you have to work your way up to "the heavies" which is usually right around $8000 earned. You unlock these by killing enemies and destroying fortifications. Each player has their own progression so just because one person has unlocked the berserker doesn't mean everyone has.
Tier 1 Creatures
Wild ticker - The wild ticker is the basic wire destroyer. He isn't slowed by any kind of fence but his melee attack does small amounts of damage and while he is capable of eating grenades and basically becoming a regular ticker, you'll never actually find one lying around. Nobody drops them, so unless someone planted it then you aren't going to find one. And that's rare because this is an offensive game, not a defensive one. I would stick with the regular ticker in almost all cases. Sure the Wild Ticker was designed to destroy things but this is a speed game and the tickers are cheap. As long as you get to a wire, you're probably going to make your money back and do far more damage faster.
Ticker - They are the same speed (though they are slowed by wires) as the wild ticker but they explode at will or on impact. Yes, that means you die, but this is Beast and not Horde. You are trying to kill humans as quickly as possible and you want to make as much progress to that end as you can and do so as quickly as possible as long as you aren't crippling your money reserve. Even as late as the 10th wave, ticker rushing is a decent tactic as long as you have a bigger creature around soaking up most of the damage.
Wretch - Wretches have two attacks and can use cover and scream. Using cover works the same as anything else and the scream is used with the X button to paralyze your enemies in a radius. This is clearly good for ambushes. Possibly the best skill are their melee attacks. The B button executes a regular melee attack which is faster and less clumsy than the RB jump attack. The nice thing about the Jump attack is that it lets you jump over wires. This makes the wretch particularly good for rushing in the early stages (however, the low health keeps it from being viable later in the game).
Savage Drone* - The Savage Drone is one of my favorites. He is basically used just like any Gear in Campaign or anybody in Versus. He can spot, shoot, roadie run, mantle kick. The only thing he can't do is change weapons (and that may simply be because no weapons are ever dropped). He is equipped with a Retro lancer and, in Beast, Ammo regenerates. What that means is that you don't have to be concerned with ammo and can just unload. At most ranges, that means a target in the open will be down in one clip. And like most humanoid creatures, the ability to mantle means you can frequently bypass wires if you keep your eyes open. All this put together create a creature that's less durable but far more deadly than an average Gear.
Butcher - The Butcher can melee and mantle over cover. If you hold A then he can charge at a decent speed. He is usually considered a base destroyer but his only real benefit is his high health. He's a bigger creature who can't duck which means that he's frequently in the open unless the map provides decent high cover. That said, his melee attack is pretty fast and downs in one hit and kills with another. He's usually best in a tight area and toward the end of a round. Think the Concessions area of Thrashball. If there are only a few Gears left, he can clear it out by himself.
Tier 2 Creatures
Kantus* - The Kantus can't take cover but can still mantle over cover, use ink grenades, packs a Gorgon pistol, and, most importantly, can heal. That is the kantus' priority. A Kantus who just keeps healing can literally embolden his allies (because they don't have to fear getting into a jam as much) and make levels go faster. But like I said, it's a priority because if you heal a couple of times, players will often feel confident and attack more aggressively so if you STOP healing, you can essentially wipe out your entire team. That's not to say you shouldn't be attacking, particularly with those Ink bombs. I'm just saying you should do so while waiting for your Chanting ability to regenerate. Keep in mind that if a teammate's health indicator (the cross) above their head is faint, then they are out of range.
Blood Mount - You actually play as the mount, not the ride (however you do come with a rider who shoots things on his own). Think of the Blood Mount as a much faster version of a Butcher that has a slow shooting turret attached to its head. You benefit from maps with lots of big cover (like Gridlock) and your melee attack is devastating. Actually connecting with the melee attack is a little on the difficult side though.
Mauler - The Mauler operates as you would expect. Left Trigger puts him in his shielded position and right trigger or B will execute his Melee attack. You can hit the RT while shielded to attack but it will still drop the shield, you just don't have to let go of the left trigger first. The Mauler actually has a few good uses (though for the most part, he's a little too slow). He is decent at destroying wires but the slow recovery time holds him back though his durability might make him much preferable to a Ticker or Butcher. Secondly, his melee attack has some range to it and explodes. He makes for a pretty good hero clean up. And Pro-top, on Thrashball, you can reach the Gears by the mortar spawn from the field with the Mauler's Melee Attack.
Tier 3 Creatures
Giant Serapede - The Giant Serapede is an interesting creature. Using the serapede is like an aggressive game of Snake. You constantly want to try to get your head in the right place without leaving your tail exposed. The serapede does fantastic damage to enemies as well as defenses and takes no damage anywhere except for its tail. It can't be healed as you may have suspected. A good Serapede player can go a whole round without dying but you can die very quickly and all it really takes is an enemy getting behind you meaning that no matter how good you are, playing Serapede is also more chance than any other creature.
Savage Corpser - I have to be honest, I'm not a good Corpser. You are, for the most part, invulnerable from the front and your melee attack is great for destroying wires. It can sometimes be hard to find moving enemies under your feet but you do pretty good damage. You can also use the X button to dig underground to heal. By far, it's best use as for destroying wires though.
Savage Grenadier* - You only lose a little bit of range from the Savage Drone but you make up for it with immense close range killing power and the ability to kill Hero's from long range (which you'll be happy to have at this point). The only other creatures to have long range hero killing capabilities are the boomer and Savage Boomer (tier 4). In some ways, I consider this creature to be a mini-boomer. When you are going inside, he smokes the boomer by a long shot since he's capable of going on a hero killing spree on a single reload but if you're in the open, the Boomer is far superior. Just remember to use those grenades to take out downed Heroes from a distance.
Boomer* - Yes, I have two favorites in this tier. Like I said previously, I would choose the Savage Grenadier for close quarters and the Boomer for outdoors. He CAN take down wires but it's a waste of his ammo since he only carries three shots at a time. However, when used properly, you can take down as many as 5 enemies with a single shot and if you're fast enough, the second shot will kill them all. The Boomer is tricky to play though. You need to keep in mind that it's hard to find cover, you have a slow reload and limited ammo, and, most importantly, that you shoot from the hip. Don't be surprised if even after a dozen outings or so, you still forget that waist high barriers are still high enough to block your shot if you're right on top of it.
Tier 4 creatures
Berserker* - This is the creature you want. Hold A for a charge attack (which, if hit dead on can cause damage to enemies) and hit B or Trigger to smash the ground. While it is one of the simplest creatures in terms of button layout, it's also the most devastating when used correctly. The Berserker can destroy any wire just by walking over it (if it does damage to her, it's not something that you'd notice). Almost all damage bounces off of her. The biggest things to be careful of are flamethrowers, the Hammer of Dawn, the OneShot, and the sentries that shoot electric shots. These are the only things that can do any real damage on their own and fire and the Hammer of Dawn both cook your armor so that regular guns do more damage. Two last things: Don't charge into walls and work your way through a crowd, don't run into the middle of it. You might be nearly indestructible but when you draw the attacks of over a dozen enemies, all that damage can really add up quickly and there is nothing sadder than throwing away $5,500 and all those kills you could have gotten because you got over zealous.
Armored Kantus - Coming in at a close second to the Berserker for different reasons, the Armored Kantus is rather similar to the regular Kantus but much more aggressive. It's probably the most balanced creature there is. You can still heal allies (for way more damage too) but you now come equipped with an extra gorgon, incredibly resistant armor (I would estimate it gives you half the HP of a Berserker... which is a lot), and a rolling attack. To do your roll attack, simple tap A instead of holding it. You will immediately roll forward which will down or kill any enemy in the way. It's fantastic for cleaning up enemies. You would never need more than one Armored Kantus.
Savage Boomer - After playing the campaign you may ask, "What is a Savage boomer? I don't remember him." A Savage Boomer is the one who shoots Diggers. I guess since the Digger Launcher (the gun) shoots Diggers, you aren't really left with a whole lot of good names for the Boomer (and remember that there are already Miner drones). Anyway, he plays exactly the same as the Boomer except that he uses a Digger Launcher. What's the benefit to that you may ask? At first, it might appear that the only real benefit is that it allows you to get directly behind cover that the arch of a boomshot wouldn't but that's not all that useful. Really, the best use is that any given shot will continue until it hits something allowing for multiple chances for it to connect with something. The downside is that diggers travel much slower the Boom Shots. I find it useful at the beginning of a round when enemies are much more densely packed but otherwise, I'd stick with a regular Boomer. They're cheaper and are just as useful.
Beast Mode Tips
Remember that the game will tell you how many people have picked which creatures when you are picking yours. In the early rounds you can pick whatever you would like but in the later rounds you don't want to bunch up too much on certain classes.
You never, ever need more than one Kantus of any type at a time. Even Kantus you put on the map is one less creature that can't be healed and since it's a lump heal (as in +100 points instead of +20 points over 5 seconds), you're going to be bumping into your teams' health ceiling anyway. The same can go for most base destroyers. One Savage Corpser is enough; two will just get in each other's way and not really move along any faster.
Just because certain creatures can't "take cover" doesn't mean you can't put something between you and the enemy. Try and be in cover whenever you can. This is particularly important for creatures like the Boomer which have an extremely long reload time.
Don't forget, if you can aim with the left trigger, you can still spot. Make sure, particularly at the end of a round, that you are spotting so you can clean up stragglers that much faster.
Remember that ammo regenerates so be sure to use it and don't be shy about blind firing, particularly on harder difficulties.
Remember, more than anything, Beast is a "for fun" mode. Just enjoy smashing stuff.


