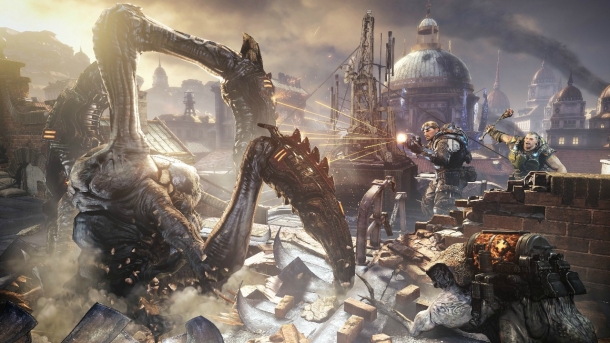
Horde mode 2.0 is actually a combination of Horde Mode from Gears of War 2 and a sort of Tower Defense game. You still have 50 waves of enemies that attack you with increasing difficulties (more on that in a moment) but you now also have Boss Waves and Fortifications.
The difficulty increases in much the same way that it did in Gears of War 2 except that the waves are almost completely random now. There are different groups of enemies that can spawn at any given time. You might have Lambent or locust or even Savage Locust and just because a certain group (say the Lambent) have spawned, doesn't mean you'll get all types of enemies (you may not get former, for instance). In this way, waves can be highly unpredictable but they still have more enemies as you continue on and you are more likely to get harder enemies as you go. You'll also have modifiers that appear (called poisons) that make the enemies tougher. They appear after waves 10, 20, 30, and 40 as 2x HP, 2x Accuracy, 2x Damage and finally 2.5x all three categories.
Boss Waves are new and they can be very difficult and appear every 10th wave. You could get anything from a Brumak to gunkers. You could get Berserkers or lambent Berserkers. Whatever you get, if you fail that wave, you will likely get the same boss again. Eventually, if you keep failing, it should change bosses but I'm not sure when or if it's even guaranteed to happen. If you kill the boss first, it's possible that if there are respawns left that it could respawn so be careful when attacking the boss and maybe even go for the little guys first, then the boss.
Fortifications are also new and they come in five upgradeable flavors. There are Wires which slow down (and later reject) enemies, manable turrets, decoys that draw enemy fire (surprisingly well), sentries which are auto-turrets, and finally the silverback, which is the same as the one in the campaign but can be made tougher.
You have a certain skill in each fortification. If you build a lot of wires, you'll be able to build better wires, you'll be able to build them cheaper, and you'll eventually unlock decoys. The progression of unlocking different types of fortifications seems to be linear and isn't actually dependent on what you build so much as how much you've built. Your skill in building fortifications is also persistent. If you finish a match of Horde with wires at Level 5 then the next match you play, you will start with a skill of Level 5 in wires.
Lastly, to build fortifications, you need to found a Base first. Bases are the giant flag poles scattered around the level. There are always 5 of them on a map and the first one is free. You have to pay $2000 for each base after the first. Once the base is open, it allows you to build fortifications in an area around the base. The base itself can't ever be destroyed but the fortifications can. The only downside of having more than one base is stretching your team and cash too thin. For example, if you start all 5 bases at the very beginning of the match, you won't be able to afford any fortifications for the first round.
Fortifications
Wires
| Level | Type | Cost | Level Req | Unlocks |
|---|---|---|---|---|
| 1 | Caltrops | $500/$1,000 | 0 | |
| 2 | -8% repair | $2,000 | Decoys | |
| 3 | Razor Wire | $1,500/$2,500 | $8,000 | |
| 4 | -8% Repair | $20,000 | Turrets | |
| 5 | Electric | $2,000/$4,000 | $45,000 | |
| 6 | -8% Repair | $75,000 | ||
| 7 | Laserwire | $3,000/$5,000 | $120,000 | Silverback |
| 8 | -8% Repair | $170,000 | MAX |
Note: Wires can vary in price depending on the distance they span.
Caltrops and razor wire both slow enemies down and they also deal damaged to the enemy as they cross. They are just fine for the first 20 rounds or so but later you definitely want to get those up to laser wires. Laser wires will both shock and push back enemies who try to cross. They must be destroyed or turned off before crossing and the only way to turn them off is to have an ally cross them. In other words, don't cross a laser wire if you don't want it going off on you.
Decoys
| Level | Type | Cost | Level Req | Unlocks |
|---|---|---|---|---|
| 1 | Cole Train | $500 | 0 | |
| 2 | Dummy | $1,000 | $5,000 | |
| 3 | -Repair | $20,000 | Sentry | |
| 4 | Explosive | $1,500 | $35,000 | |
| 5 | -Repair | $75,000 | ||
| 6 | Boombox | $2,000 | $110,000 | |
| 7 | -Repair | $170,000 | ||
| 8 | Onyx Guard | $5,000 | $220,000 |
Decoys are probably my favorite fortification. If you couple them with sentries then you are essentially adding extra stationary teammates. The best thing is when a decoy is destroyed, you know it's because it worked. With the Horde Mode DLC, an additional level of upgrade will be added called the Onyx Guard. These are like the Onyx Guard from Beast mode meaning they actually move around and fight for you.
Turrets
| Level | Type | Cost | Level Req | Unlock |
|---|---|---|---|---|
| 1 | Retro Lancer | $1,500 | 0 | |
| 2 | +Accuracy | $15,000 | ||
| 3 | Lancer | $2,500 | $50,000 | |
| 4 | -Repair | $90,000 | ||
| 5 | Troika | $4,000 | $140,000 | |
| 6 | -Repair | $200,000 | ||
| 7 | Armored Troika | $7,000 | $270,000 | |
| 8 | -Repair | $360,000 | Command Center (DLC req) |
Turrets can put out some serious damage and gradually get more accurate. You also have to buy ammo for them when they are used. It's pretty good for most waves if you keep your team tight. It's not particularly useful for boss waves though since those tend to keep you moving.
Sentry
| Level | Type | Cost | Level Req | Unlocks |
| 1 | Light Sentry | $1,000 | 0 | |
| 2 | -11% Repair | $15,000 | ||
| 3 | Heavy Sentry | $1,500 | $30,000 | |
| 4 | -11% Repair | $90,000 | ||
| 5 | Static Sentry | $3,000 | $105,000 | |
| 6 | -11% Repair | $135,000 | ||
| 7 | Incendiary | $3,500 | $200,000+DLC |
Like I said with the Decoys, if you double up on both, you'll essential add extra teammates to the field. Can't go wrong with that. As if it wasn't enough, when you upgrade these enough, they actually stun enemies. The Fire bolt upgrade which will be available with the Horde Mode DLC will weaken Berserkers as well, though we're not sure if it will retain its stunning ability.
The Silverback
| Level | Type | Cost | Level Req | Unlocks |
|---|---|---|---|---|
| 1 | Silverback | $12,500 | 0 | |
| 2 | -11% Repair | $200,000 | ||
| 3 | Rockets | $10,000 | $500,000+DLC | |
| 4 | -11% Repair | $900,000+DLC | ||
| 5 | -11% Repair | $1,500,000+DLC |
The Silverback is a powerful weapon but it's very expensive to keep repaired. Later on in the game, though, I would highly recommend getting one instead of using wires. It works just like in the campaign. It walks around and uses two turrets and then when unfolded it can be used as cover. Just make sure that if you get one, you're committed to it because it's too expensive to not use or let it be destroyed. The addition of Rockets to the Silverback makes it quite a powerful asset. Just be careful to find a good spot for it because it is immobile when deployed to use rockets.
The Command Center
| Level | Type | Cost | Level Req | Unlocks |
|---|---|---|---|---|
| 1 | Sniper/Boomshot | $1,000 | 0 | |
| 2 | Mortar/BS+Frags | $2,000 | $5,000 | |
| 3 | Mortars+ | $25,000 | ||
| 4 | Hammer of Dawn | $3,000 | $40,000 |
The Command Center allows you to call for support. The first type (for instance snipers) is what will be used outdoors while the second (Boomshot) is indoors. This is an incredibly useful tool that should be upgraded as soon as possible. You can only use it once per round so I wouldn't use it too much, lest you not have it when you need it most. Otherwise, after you satisfy the Turret requirement, it's quite inexpensive and very useful.
Horde tips
Even though Horde is rather robust, it's also largely random so I can't really do more than give you good tips.
Firstly, I prefer to pick maps with enclosed ends rather than larger bowl like maps. In other words, maps like Gridlock and particularly Checkout are nice because you can put your back to a wall with wires, turrets, decoys all in front of you. I imagine inside the hotel would work well too. Most maps have points like that (like the OneShot spawn on Trenches) and making use of them is good but frequently players will be too eager and just build the first base they come across and so Checkout can avoid that problem. I wouldn't recommend anything like Drydock.
As much as I like the Hammerburst in versus, I highly recommended the Lancer in Horde. Beyond still being a weapon when you run out of ammo, it will also be a great weapon in the later stages for its one hit kill ability. In the later rounds, you will find that enemies will just keep soaking up ammo and you never have enough for the round. If you use a hammerburst, you have to run in and grab ammo, then run back out. If you have a lancer, you can use the chainsaw a lot and you probably won't even run out of ammo. I got a little crazy once with the chainsaw for a challenge and then the next few rounds, everyone came around to using the chainsaw as I primary weapon.
The Silverback is a great tool in the later rounds. It may take more than one person's cash to keep it running but if you treat it right, you won't have to rebuild it every round like most fortifications and you can more than double your kills, easily. However, even up to round 30 it might be worth NOT getting it since those are the rounds where things like wires are most useful.
Remember, you can share money by aiming at someone and hitting the B button. You can also repair any emplacement, even if it's well outside your skill level to build it.
DO NOT SPREAD OUT. Your best bet is probably to build up two bases. This usually allows for the right spacing and control. You should be spaced enough to not get destroyed all at once but still close enough that nothing should slip behind you.
It's not necessarily a bad idea to save up enough money to buy back in for a particularly difficult wave but I would only do so for a boss round and ideally just round 50.
If you are wounded and near a wire, run through the wire before taking cover because it will almost certainly slow the enemy down enough that you'll be healed before they come through.
There are lots of Boomers throughout Horde. Make good use of the Boomshots, it can be a life saver, especially on boss waves. In fact, it might be beneficial to use Boomshots and other power weapons on the small enemies of a boss wave to clear it all up as quickly as possible before dealing with the boss.
Remember to spot. If something pops up behind everyone, everyone will hear the "spotted" sound. Don't let something like that go unnoticed.
Sometimes, before a boss round, it might not be worth building fortifications because a lot of the bosses can destroy the fortification just by walking over it.


