After seeing the barge, follow the path downward. When the barge returns, run strait into the bunkers. Turn 90 degrees left to find the next bunker. Wait for Dom's signal and then run for the next bunker. Once there, turn around and look about 30 degrees to your left (the tac-com will actually list the next bunker). Run through the opposite side of this bunker during the next pause to get beyond the range of the barge. You'll see a small hill in front of you as you come out of the last bunker and to the right will be some crates. If you circle around behind the crates, you'll find a collectable on the ground. It looks kind of like an Ice Pick. Turn around and go up the hill for a
*cutscene*
Of course he can do it! What kind of question is that? Did you see his hair? If his IQ was any higher, it'd be over 9000! Anyway, follow the path a little bit for reinforcements (them, not you). They attack from the left and the path splits in two with a strait and then an elbow path to the left which has ammo and a good flanking position. At the far side of the bridge, follow the path down and open the big door.
You'll enter a wild ticker pen. You can open up the cages with handles to set them free but I don't really see any point. As you walk across the room, you'll run into something rather unique. A grub is actually walking across the room carrying an ammo crate. Kill him and the locust that come in behind him, including the Digger. Feel free the kill the tickers if you'd like, or not. There's no actual reason to.
Next you'll be in an open room with tickers hanging from the ceiling. You can shoot the tickers down and have them explode or just cause them to explode where they hang. If you manage it, the former is more useful. Cross on either side. If you're playing with the AI, they'll probably just follow you but this would work pretty will splitting up on co-op. Once on the other side, you'll see enemies advancing below you. Use your height advantage to take care of them. There will be some Therons but they'll only be rocking hammerbursts. However, it is a rather large group, so be careful. Once you are finished with them, head down the ramp to the right.
Now that you've gone down a ramp, go up the hill and you'll come to a grub who thinks he's hot s*** for closing you in a room. You'll actually be attacked by a Corpser Hatchling. Remember, Diggers work wonders as do the Retro, Gnasher and Lancer. Once it's down, watch behind you for two grubs and a butcher. Drop back and shoot and they should be no problem. Go through the door they came in (what was the point of locking you in...?) and follow the hall. You'll come across a pretty nice assortment of weapon. You want to pick up whatever you feel most comfortable taking corpsers with because you get a few in the next section. Don't be concerned with ammo.
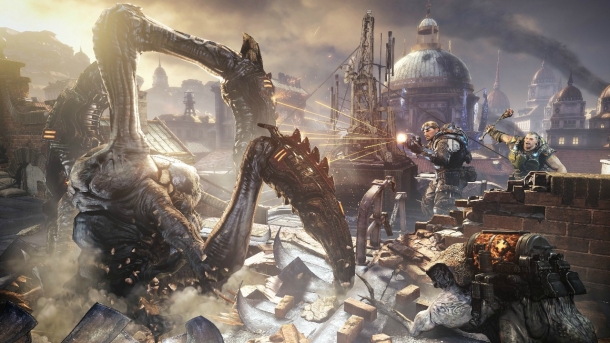
Continue on into the next room. You see all those things on the ground? Those are Corpser Hatchlings. And you get to fight them ALL. Ain't they cute? Ok, that aside, you will get attacked by a Mama Corpser who is actually a little tough without a pool of immulsion to toss her into. First you will fight the babies, then she will appear and you need to aim for her eyes. You ideally want to bait her with one character so that the others can take aim at her eyes. After you destroy each eye, you will be attacked by babies and then by the actual Corpser Hatchlings that you've been fighting up to this point. If at any point you need ammo, there's plenty on either side of the room, along with assault rifles for shooting the eyes. After the fourth eye, rather than releasing more hatchlings, she will go berserk and start running around the room. Try to avoid her as you make your way to the exit. Only one person actually needs to make it to the exit even if someone has been downed (dead is a different story).
*cutscene*