After the brief introductory video to briefly recap the previous game and to set the scene for our hero's current quandary we will quickly find ourselves being attacked by a necromorph. Thanks to his condition, Isaac finds himself without the use of his arms thanks in no small part to the straightjacket he is wearing, so we'll need to make a run for it. Use the sprint button to run straight down the corridor laid out in front of you dodging the various necromorphs as they burst through the windows on either side of the room andfrom the ceiling. After going through the first door, turn to the left and then at the dead end follow the hallway along to the right. As you approach the next door you will need to mash the button indicated on screen to get rid of an attacker and to lock the door behind you.
Continue down the hallway to the save station (SS1) and save if you feel so inclined. Enter the door to the right of the save point and when the room in front of you is clear, continue onwards to the corridor on the far side of the area from the entrance. Climb the stairs here and enter the unlocked door nearby. Make your way to either side of the room and across the glass to thefar end of the room. There is a computer here showing a video loop that will fill you in on a bit of back story if you are interested. When you are ready, enter through the unlocked door and follow the hallway to the end.
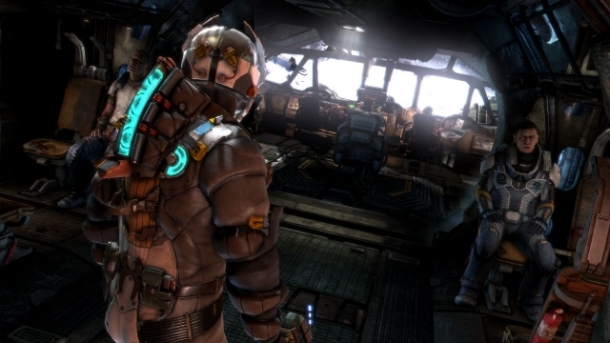
After the short story sequence, we will have full arm control again, so openthe locker indicated and pick up the flashlight and med-kit. Use the med-kit as requested before continuing through the unlocked door when you are able. After being contacted by our new pal Dana, climb in the elevator and ride it to the next area.
Use your flashlight to navigate through the dark room and when you exit out into the lit hallway, look behind the crate to your right to find an audio log (Log 1 - Popsicle Sticks). Continue down the hallway to find a save station (ss2), save here if you wish before heading into the door opposite. Cruise through the room here and climb into the vent in the small room at the back of the area.
After you fall out of the vent, you will see a man in stasis in front of you, head up to the glowing blue terminal on his left and use the terminal to gain the kinesis ability. This will allow Isaac to pick up objects in the environment and use them to solve puzzles or to hurl at baddies.
Pick up the body, or one of the other objects in the room and toss it through one of the windows on either side of the room. As the window breaks, this will alert a slasher who will appear and make its way to the broken window. Pick up another one of the objects and use it to either impale and kill it, or knock it down so you can run over and curb stomp it to death. This will trigger a second slasher to enter the room, so repeat the process with the second baddie before continuing to the elevator nearby. Pick up the med-kit inside and use it, then hit the button to travel to the next area.
After exiting the lift, quickly turn right and move to the dead end. Below three slashers will appear and make their way up to you. In the dead end there are two spikes and a body you can use to deal with the baddies. Once the room is clear, follow your suit locator to the exit. Continue through the corridor and head through the door at the far end.
As you enter the next room, you will hear someone crying for help, they are in the circular room just to the left. Cruise on in there and use the panel behind him to acquire the plasma cutter. Use this to deal with the slasher immediately in front of you. A second one will come through the door afterwards, so turn your attention to this next target when you have the opportunity. Exit the room, killing the slasher in the bed outside before continuing through the unlocked door. Head onwards to the next room to find a save station (SS3).Continue through the door here.
Enter the hallway on the right and follow it a short way until you see a locked door on your left. You will now be attacked by three slashers. One will come from behind, one will come from in front of you and the third will enter the area via the right hand hallway. Upon killing these enemies, the locked door will become unlocked. Enter this and follow it through into the next room.
As you enter the hallway, look in the room directly to the left of where you entered for a text log (Log 2 - Orderly TPS Report: 1411), then continue onwards and through the unlocked door at the end of the area. An alarm sound will come on and another patient will call to you and tell you to follow him. Head down the ramps on either side of the room and head over to the guy who just spoke to us. The door will close behind him and you will be attacked. Keep the locked door at your back and kill the slashers as they enter. The first one will come from the right, the second from the left, one more from the right and two from the left will come pretty much straight away so use your plasma cutter to good effect and once all five are dead, the alarm will stop.
Enter either door opposite your current position and look in the circular room between them for a power node (1) and a text log (Log 3 - Anxiety Spike). Enter the next door and follow the corridor around to the left to find a save station (SS4). Exit through the door.
As you move into the next room, look on the floor to your right for a text log (Log 4 - Heisenberg) and then head over to the glowing panel on the left. Activate it and complete the hacking mini-game. As soon as you have finished, immediately use stasis on the charging necromorph, move to the side and kill it. Next, you will need to step up to the security door panel in the centre of the room. If you open the door using the switch and then step close to it, it will shut on you before you can enter. We need to open the door, and then use stasis on it so that it closes ultra slowly and we can cruise through with ease. Enter the unlocked door here.
Continue past the body on the floor and into the next large room to meet a newtype of necromorph - the spitter. They will spit acidic projectiles at you that will hinder your movement for a few seconds. Kill both of the spitters here and then look on the shelf at the back of the room from where you entered for a power node (2). Continue through the next door and into the awaiting elevator at the end of the hall. Ride it down to the next stop.
Exit the elevator and look behind the desk directly in front of you on the farwall for a text log (log 5 - Secrecy) and a power node (3). Follow the right hand hallway around and enter the next door, as you do something will blow out the window on the far side of the room creating a vacuum. Use your plasmacutter to aim at the small red triangle above the window and shoot it. This will cause a door to drop, rendering the room safe once more. Enter the door on the left.
Upon entering the next room, you will see a save station (ss5) in front of you, shoot the body on the floor to the right - it's a slasher playing dead. Then gather the power node (4) from behind it. Save the game if you wish, then enter the shop to the left and drop $1000 to buy the Engineering suit.
Note: Purchasing the suit will net you the achievement/trophy 'Patient on the Loose' Note: If you have bonus content from the special edition, downloaded Dead Space 2 DLC, have an original Dead Space new game + save or have a Dead Space: Ignition cleared save on your console you will be able to grab the itemsfrom the store here.
Enter the next door and you will be in a vacuum, look straight ahead to see a glowing purple object - use kinesis to grab it - it's a power node (5).Follow the path around until you find your way back inside. Get your weapon ready.
Make your way towards the burning tram at the far end of the room and as you approach you will be attacked by a big, new necromorph - a tripod. They move quite fast and can do some serious damage in a hurry if you let them. Your best bet is to put it into stasis ASAP and then go nuts on the yellow parts of its legs with the plasma cutter. Repeat for both legs and you are done, there is a stasis refill machine at the back of the room opposite the tram if you require it. Defeating the tripod will award you with a gold semiconductor (sell at shops for $5000).
Enter the door opposite where you entered, and cruise down the ramps here until you reach the room at the end. Use kinesis to rip the panel off the wall at the far end and then crawl through the vent behind it to access the next area.