Turn left and follow the catwalk to the end. Quickly turn around and kill the pair of leapers that appear from the vents on the wall and the slasher that climbs up onto the walkway near where you entered the area. Take the elevator up to the next platform and follow the passage round to the left, eliminate the slasher here and then follow the path back out onto the catwalk. You will see a group of crawlers ahead, so go ahead and kill them until they stop coming. Enter the door to the right of where they were dropping down.
After defeating the spitter and the two lurkers in here, look against the far wall for an audio log (Log 27 - Ellie's Story 3). Use the shop over to the left if you wish and then continue through the unlocked door here. As you turn the corner you will meet your first divider necromorph. Killing this guy is difficult because he is very durable and successfully doing so will result in a bunch of small spider necromorphs to attack, they will try and jump on and strangulate our hero, so be careful. Continue through the room and enter the elevator at the far end.
As you exit the elevator, you will be able to see a weak window to the left. Keep that in mind and walk around the corner immediately to the right. Once you see the baddies starting to come out of the walls, simply shoot the glass to get rid of them and making sure to shoot the red triangle, to seal the window off before it's too late. Once the room has been sanitised of baddies, check out the right hand corner where the super-slayer dropped in from the roof to find a power node(27). Continue past the broken window and enter the open door here.
Take the first right and use kinesis to toss an object through the laser mine shere, climb the ramp to the top and move all the junk on the right out of the way to find a schematic (Schematic 17 - Flame Fuel) and an audio log (Log 28- Ellie's Story 4). Go back down the ramp and take the next right.
Turn left at the top of the ramp to spot a guardian on the wall at the end of the catwalk in front of you. Remove all its tentacles and continue into the elevator to the right of it (don't forget to pick up the gold semiconductor it drops). Ride the elevator up to the next level.
Kill the slasher patrolling the catwalk here and turn to the left to see a pregnant and another slayer coming from the door here. Slice them both up and head inside. You can use the bench here to upgrade or use the save station (ss32) to save the game. We now need to solve a quick puzzle, if you had already tried it, you would know that the control panel facing the window is malfunctioning; we need to fix that up. If you look at the wall behind said panel you will notice two large yellow cylinders flanking a blue and red display. The red sections indicate pieces missing.
Look on the floor to the right of the right hand yellow cylinder to find a large blue cog, use kinesis to pick it up and place it into the highest red slot on the blue display. A necromorph spider was asleep under it, so be sure to kill it when it comes to party. For the next missing piece, use kinesis to lift up the right hand cylinder, then use stasis to keep it from dropping back down too fast. Use kinesis to grab the spare part from inside and place it in the appropriate section of the blue display. Repeat the process on the left hand cylinder to replace the final missing part. Use the now working console to summon the tram.
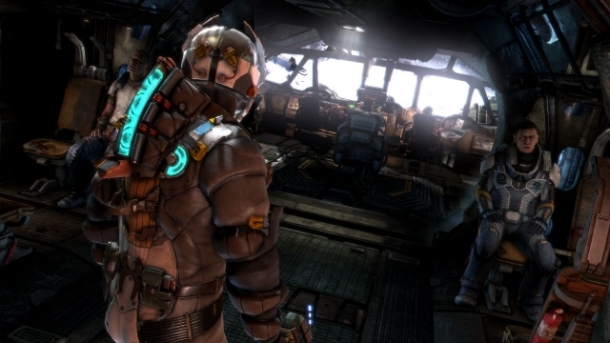
Exit onto the catwalk outside and kill the two super-slashers that appear. Once you feel safe doing so, head into the tram. Turn right and hit the switch at the end of the car. Once the tram stops and you can see Ellie and Stross outside, use the control panel next to the door to open it.
After you get off the tram, head over to the save station (ss33) if you so wish before heading through the door here. Turn left immediately as you enter the room to find a power node (28). Make your way along the left hand wall, destroying or avoiding the cysts as best you can. Just beside the closest cyst to the left hand wall you will find an audio log (Log 29 - Ellie's Story 5). Sprint as far as you can up the left wall until you see the corner. Destroy the exploder necromorph here and turn to face towards the entrance, hugging the crate on the left side. You will have to kill 5-6 stalkers here and by staying in this position it means they will have to run for a good distance down a long narrow corridor to get you, this means it will be quite easy to pick them off.
Follow your suit locator over to the other side of the room, kill the legless spitter and the exploder here and when you see stalkers again, run back to the previous area that we used to take them out. Be patient, they will find you soon enough. Once they are all dead, follow the waypoint over to the far side of the room again and continue along the wall here until you find a guardian, as per usual remove all of its tentacles to bring it down, then look behind the wall it is on for a schematic (Schematic 18 - Seeker Shells). Return to the guardian's corpse and enter the elevator here and ride it down.
Follow the corridor to the end, destroying cysts as you go and eliminating the slasher that appears about half way down. When you reach the end, you can use the shop and save station (ss34) if you so wish. When you want to continue, proceed through the door here.
The elevator to the right is offline, and there seems to be nothing else to do, so pick up one of the explosive canisters with kinesis and launch it at the green cylinder being groped by the tentacle in the distance, repeat this again until a large explosion occurs and the tentacle retreats. The lift will become active, so proceed down to the lower level. Here there is a similar story, another large tentacle is grabbing on a cylinder here. Pick up the explosive canisters from the wall on the left side of the room and drop them near the cylinder, and then grab another from off the wall close to the cylinder. Fire both of these canisters using kinesis into the cylinder here and you will b eattacked by a tripod. Use stasis on it and lop off its arms, being sure to re-apply stasis if it breaks free. Once it is dead, return to the wall near the cylinder and pick up and launch one more explosive canister into it.
Once this is done, the whole area will start to self destruct and if you do not hurry poor Isaac will get all kinds of messed up in the resulting explosion. Sprint across the room to the elevator on the opposite site of the area from where you entered from and ride it up to escape the explosion below. Sprint across the catwalk to the left and into the awaiting tram car. Once the tram stops, head through the next few doors until you reach another tram, activate it and ride into the next section of the level. Follow the hallway to the very end and use the cargo elevator to take you up to chapter 10.