Continue down the ramp and through the unlocked door. Here you will find a save station (ss29) a shop and an audio log (Log 25 - Ellie's Story 1).
Climb up the ramp to the unlocked door and cruise on through, immediately turn to the right and examine the cabinet on the wall for a power node (24).Continue through the room and the unlocked door. Immediately to your right is a locked storage room, ignore this for now as on the other side of the glass in front of you, you will see a pair of infectors causing a bit of mischief. Chill here for a minute and prepare yourself, you will have to fight two slashers and three super-slashers that will jump in through various vents.
Once they are all dead, use a power node to unlock the storage room. Inside you will find a schematic (Schematic 15 - Vintage Suit) and a power node (25).Return to the main area, make your way around the hologram and enter the door on the other side of the room. Follow the short hallway until you see a room on the left. Kill the pregnant here quickly, then turn around and kill the slasher that has entered the hallway behind you. If you look in the back right corner of the area the pregnant was hiding you will find an audio log (Log 26 -Ellie's Story 2). Exit through the unlocked door nearby.
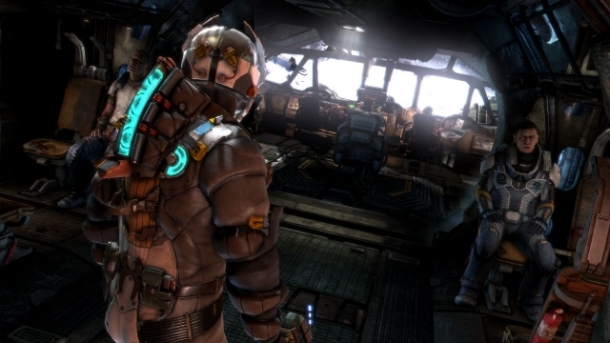
Follow the room around to the left and open the door here. Enter the hallway and when the lights come back on, again take the left-hand door, follow the walkway up the ramp and you will find yourself in a room with a window and our buddies are on the other side. After a short story sequence, save your game at the save station (ss30) if you wish and then continue through the door to the right of the window.
As soon as you enter the door here look to your left and pick up the schematic (Schematic 16 - Detonator Mines) before continuing around the catwalk to the door on the opposing side from the entrance. As you walk over there, the machinery will suddenly come on and a group of necromorphs will take the opportunity to attack you. A super-slasher, two normal slashers and a spitter will climb up over the railings and you will need to take them out. Before heading through the door, in the centre of the room you will find an upgrade bench, so if you need to do a bit of upgrading, now is a good a time as any! When you are done head through the door to the next area.
We are now in a zero gravity zone. Float out towards the yellow door and look around for one of those thrusters we used when moving the debris out of the way for the elevator earlier. Use kinesis to grab it, then manoeuvre it over to and attach it to the door. Shoot the thrusters to activate it and then boost on through the opening.
Turn to your left and follow the passage here. As you enter the next zone the lights will pop on and the machinery here will become active. Look again to the left to see some spinning blade pillars. You will need to be exceptionally careful here and move very slowly, the slightest bit of extra boost means instant death. You can use stasis if you want, but you shouldn't need it unless you are heavy on the gas. There are three vertical pillars at the front, manoeuvre Isaac between the first and second pillars from the left and then boost upwards. You now face a series of horizontal blades and near the top of the area there is a big enough gap between the uppermost blade and the next blade down for Isaac to fit through. Afterwards, there is another set of three vertical pillars, like the first set have Isaac float between the first and second pillars from the left.
Kill the lurker in the room here before turning your attention to the energy streams nearby. As you can see, the object moving up and down on the left side of the beams blocks them when it passes. All you need to do is use stasis on the moving object, then boost past it whilst it is blocking one of the energy beams. Easy! Kill the two lurkers in this area. When they are dead, use stasis on one of the circular blades on the right and boost on through when a safe gap opens for you.
Kill the two lurkers lurking about in this room, then float down to the floor and use Isaacs's kinesis to pick up a thruster canister from the floor. Place the thrusters on the door on the ceiling, shoot it and boost through the gap as we did earlier.
We now enter a large tube-like room with a nest necromorph at the far end and three glowing rings in front of it. The glowing rings will take turns shooting a good deal of fire into the centre of the rings, so as you progress, make sure, that if you have to stop you do it between the rings and not within the range of one. The simplest way to do it is to wait for the first one to fire up and as soon as it finishes start boosting towards the far end, you will be able to reach other side of the tube before the three rings have a chance to cycle through again. Quickly eliminate the nest here (and pick up the ruby semiconductor) and then grab one of the thrusters and use it to open the door on the left of the area.
Float over to the platform here, land, cruise down the blue hallway and walk through the door at the far end. Inside, turn to the right and kill the legless spitter here, and then check the left hand wall for a power node (26). Open the other door here and walk through to rendezvous with Ellie and Stross. After a bit of a chat, look in the left hand corner of the room behind a table to find a schematic (Schematic 16 - Large Med Pack). Head to the opposite side of the room and save your game at the save station (ss31) if you wish and then use kinesis to move the obstructions before continuing through the unlocked door nearby.