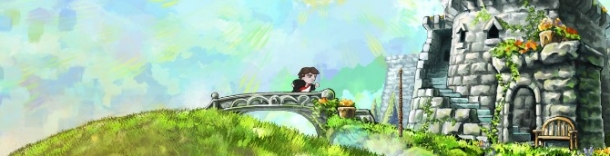
Begin the stage by going to the left and bombing the barrel to free Captain Gaff, then hitting the hook with Pikarina to get the PIRATE'S HEAD, which is one of the Moon Heroes. You use Triangle to basically grab enemies, as well as anything with a hook on it. Go through the tutorial with the Witch, then go through the gateway. You will find three paintings of ships in the following rooms, so use Pikarina on them all to get the JOLLY LAMBHAM HEAD.
Here, use the hook on the chest straight across, then you can get the one in the upper left, which has Moonsparkles. Grab the next hook to drop some barrels to allow you to get across. For the next screen, you need to hook the one above you to make a platform appear, which you can hook to make it swing. Hook the next platform and then jump on it while the first is swinging to get to the gateway.
You're now in a room with a giant cannon. Use the hook above to make the cannon fire, then use the smoke to get to the other side of the room. If you hit the other two paintings, the third one is here for the Jolly Lambham Head. Use the hook on the right side of the cannon to make it shoot straight up, then watch the ensuing cutscene.
Go right, using the cannon's smoke to cross, then use the hooks and clothing to keep moving to the right. When you get to the end, use the hook on the cannon to blast General Pig away. You're now inside the ship again, so use the hook on the platforms to continue on, making sure you use R2 on each blowfish you come across in this section.
Just pass the first blowfish will be some fishing lures on the wall, so use R2 on them to find the FISHING ROD HEAD. When you come across a broken bottle, use the Jolly Lambham Head's action to access a bonus stage. Pass the two blowfish will be a chest that won't open with R2 unless you hit every blowfish along the way, with it housing the BLOWFISH HEAD. When you get above deck again, use the cannon to blast away General Sheep this time.
The next section will have waves that will come crashing down on the ship, which will harm you if they hit. Some are slow, while others are quick, meaning you will have to use other methods to get past them, such as ducking behind debris or using bird feathers to go above them. When you see the fishing rod in the distance, use the Fishing Rod Head's action to grab the SHARK HEAD. There will be two cannons for the Generals at the end.
Once you finally regain control, use R2 on the sword stuck in the mast to get the SWORD HEAD, then use the hooks to make flags appear, allowing you to cut your way up to the gateway. On the next screen, be careful of the swinging blades while trying to use the hooks to get to the next gateway. For this screen, you have to tilt the platforms in your way to get to the hooks and jump to the next platform and then to the top with the gateway.
You'll see the Generals in barrels here, with a Sword Head icon flashing for both, allowing you to use its action to gain some Moonsparkles. Keep going up to get to the portal, with the next two screens having you dodge the fire on the flags while cutting your way to the end. Hook the chest at the end of the second screen to make the next gateway appear. If you hit the gong, a genie shows up and allows you to pick between some random heads or Moonsparkles.
Pirate Weaver
The Weaver begins by throwing its sword that will sweep across the ground from the right, so either jump over it or guard using the shield. It will then shoot a beam from its eye, so reflect it back until it gets hit, after which you can use the hook to bring it down. Use the tapestry to go up, where you'll be on a ledge that's chained to the Weaver.
Up here, it will throw the sword from the left once and then one more time from the right. After that, its weak point will be exposed, so cut it all the way across to damage it and you'll fall all the way back down. It will attack the ground with its sword, so either roll when it takes a small break or use the shield. Once again, it will fire the laser, so reflect it back and do the same thing to damage it again.
For the third round, it will throw the sword like the first time, then toss the sword into the ground. This will make its way across the arena, but you can stop it by using the hook on top of the sword. Reflect the eye beam back and attack it the third time up top like before to make the soul balloons appear. Get them all and you'll finish off the Weaver, as well as gain the TREASURE CHEST HEAD.