Go through the door, and up the stairs and then up the next set of stairs (searching as you go of course, should go without saying at this point). You will then come up a set of stairs and see a splicer. When you try to approach him (or kill him), the door will close and lock. Go up to the door and take a right into the shack to grab the Remote Hacker and some hacking darts. Aim through the broken window and shoot the glowing door control panel to hack it.
Here is your intro to hacking. Like the first Bioshock, if you can get close enough to a hackable object, you can press X and hack it. If you can't do that for some reason (obstacles, it shoots at you, etc.,) then you can use a hack dart.
The hacking mini-game consists of a bar (or series of bars) with colored sections on it and a moving arrow. If you hit (B) it will cancel the hack and (X) will hack it automatically at a monetary cost. To hack it manually, press the (A) button to stop the arrow. You want to stop it on Green or blue. They are the same except blue will provide a bonus of some sort (machine does extra damage, you receive an extra item, etc.,) If you hit multiple blue patches then you will recieve even more bonuses.
If you land in a white section then you will recieve a small shock and will have to start the hack over. If the arrow lands in a red section then you will trigger an alarm and be attacked by security bots. And have to start the hack over. REMEMBER that the game doesn't pause for a hack in Bioshock 2 so either keep on the move once the hacking starts or wait until the area is clear. Lastly, you are timed (per section) and if you take too long, it'll count as landing on a white.
Go back around and through the door you just opened. In the next room, hack the security bot and you'll have a friend to help you. Continue on.
There are two splicers in this room. Deal with them how you like and then check the small work area to your left. Just outside this room is a health station if you need it. $15 for a full heal. Or hack it and it will poison anyone else who tries to use it, $9 for a full heal and if you get a bonus, it'll drop a health kit on the floor. If you destroy it (rendering it useless) it'll drop another health kit on the floor.
The Great Chain Rattles by Andrew Ryan
Just inside the small office area against the wall just at the bottom of the stairs on a shelf you'll find the diary.
Leave this room out through the back right. Go into the next room and use the switch to start an event. Once you flip the switch, sit back and watch. Don't bother wasting ammo, you'll be fine.
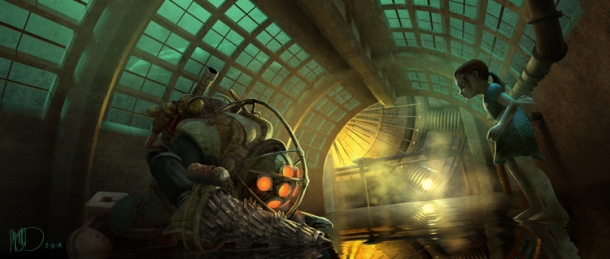
Welcome back to the water. Walk through the water and come out the other end, it's a short trip. You'll enter a room with bookshelves. Approach the exit to this room slowly. If you peak around the corner and look up you should be able to see the light of a security camera. Take out your remote hacker and claim the camera as your own. If you're lucky, the camera will see the two splicers in the room and handle them itself. If not, there's a leadhead and a thuggish splicer in the room to deal with. kill them and continue on, taking what you like.
On your way out of this room you HAVE to walk by a Bot Shutdown panel. It's the wall mounting with the green light and the security bot over it. This panel can be used to shutdown any bots in the area for free. Not only is this useful for saving yourself but you can also use it to gain your own bots. You can trigger an alarm on purpose and run over to the panel and flip the switch giving you two innactive bots to hack and take with you.
Continue out of the room and take a right. Grab the free Plasmid in the middle of the Jet-Postal room.
Mr. Tape Recorder by Eleanor Lamb
To get this, you'll have to back track a bit. Go back until you get to the water section again. As you go down the stairs get back in the water, but before you actually go under water, there will be a big fan on your left and just behind it will be the Diary. Use Telekinesis to grab it. Return to the Jet-Postal room.
Search the room and continue out the other end and to the left. Go up the stairs and take a left onto a catwalk. There are some splicers in the pit off to your right talking. Use Telekinesis to grab one of the propane tanks and hurl it into the center of the group. There are 6 splicers total and you just got rid of three. Clearly, if you're a splicer, you'd want to know what that explosion was and shoot the person who made it, whoever they might be. If you wait, they should come running and you should be able to make short work of them with the remaining tanks. Just be careful not to spend too much time aiming because they may shoot the tank and cause it to explode in your face.
Just a Fad by Prentice Mill
Just continue down the catwalk and it will be on a drawing board desk against the wall on your left.
Ryan vs Lamb: Reality by Sofia Lamb
Hop off the catwalk and under the "Cafeteria" sign immediately across. Go up the stairs and through the kitchen into a side room with this diary in a suitcase in the back left corner. Beware two new splicers as you exit
Head to the giant door at the end of the room which will slam shut. Then turn around and follow the wall on your right. Go through the first door then take a right and go into the bathroom. Look through the hole in the wall and use Telekinesis to remove the pipe that's jamming up the gears.
What Happened to the People? by Mark Meltzer
Come out of the bathroom and back out the door to your left. You should be able to see a group of low hanging colored lights just off to your left and in front of you (but not through the big door yet). If you are looking straight at the giant door they are on your right by some boxes. Under those lights is the diary.
Go through the Giant Door
Know the Beast by Sofia Lamb
Just after you walk through the big door, there's a path off to your left. follow the tunnel around the corner and it will be sitting on a toppled filing cabinet.
After going through the Huge Door, take a right and there'll be a vending machine (feel free to hack/shop) and a hall just to the left of it. Go up the stairs and ignore the Big Sister. Take out your remote hacker and
From the main room, head as if you're heading into the cafeteria but as soon as you walk under the sign, take a right and go all the way to the end to the hole in the wall. Use Telekinesis to remove the pipe in the gears. Now turn around and walk back through the door and take your first left back out to the main room.
What Happened to the People? by Mark Meltzer
From where you stand, in front of you and slightly to the left there should be hanging lights (If you went through the Huge Door then you went too far.) If you are looking at the huge door it should be just to the right of it. Under these lights is the Diary.
Continue through the Huge Door
Know the Beast by Sofia Lamb
Just after you go through the huge door, you can go to the left down a small passage. Go down the passage and just around the corner, the diary should be resting on a fallen filing cabinet.
Now that you're on the otherside of the door there should be a Vending Machine just to your right. Feel free to hack/shop. Once you're done with that go through the doorway just to the left of the vending machine and up the stairs to the Switching Hub.
Don't bother with the big sister, she's just there to scare you. change to your remote hacker. On the outer wall should be a security camera. Hurry and hack it because you're about to get attacked by a large number of splicers. There is a lot of cover to crouch behind while you hack. Once you have that done, wade through the splicers and get on the elevator. They appear to be on a continuous respawn so you'll never manage to kill them all.
Once the elevator gets to the top you get to witness the effectiveness of the trap rivets. Once the door opens grab the extra containers plus the individual left overs. The rivets will never hurt you, only others.
Improving on Suchong's Work by Gil Alexander
Just past where the trap rivets were deployed, make you tight 180 to the left and continue up a few steps. In this little office, to the back in the top drawer of a filing cabinet is the Diary.
Go into and through the next room to get to the train station. Just down the stairs is one splicer. Kill him, grab any trap rivets left and hit the button on the wall by the windows to your right. After the cut scene, you'll need to fend off a decent sized group of splicers. So go into the next room and hack the camera on the wall to the left. There's also a health station (which you should probably hack so they can't heal) immediately to your left through the door. If you need anything else there's also a vending machine here.
The Situation by Brigid Tenenbaum
In the middle of the station is an island with wooden benches on either side. The diary is on the side furthest from the train all the way at the end of the bench.
When you're ready, climb on the train and pull the lever.