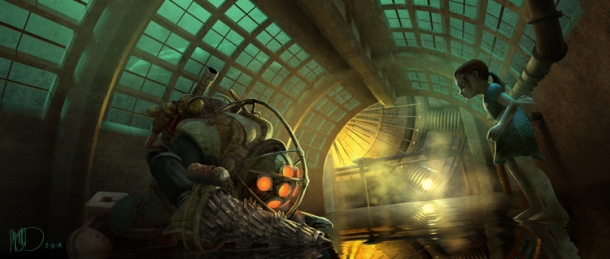
Once you regain control, turn around and start following the path but before you round your first corner, on the yellow/orange stones to your left you'll find a Sea Slug. Collect it for 10 Adam. Then go around the corner and turn around immediately and you'll see a slug resting on the wall of the corner. Continue along the path and you'll see pipes sticking out of the ground on the left. There's a slug in one of the pipes. You should now be 30 Adam richer. Finish up the underwater sequence ahead.
When you first get into Siren Alley, turn left and you'll watch a short event that'll introduce you to the new Big Daddy type, the Rumbler. This is actually a perfect photo op for leadhead slicers. Three of them are about to get killed without your effort so just click a few times for some extra points.
For right now though, leave the Rumbler alone and continue down the alley and around the corner. You'll be introduced to Simon Wales. Don't waste ammo here, you can't hurt him.
Just after Simon Wales departs, go through the door on the right to collect a new Plasmid, Security Command. This will become one of your favorite plasmids and is essential to dealing with Rumblers.
Walk into the next room slowly. If you follow the wall to the left you'll end up under a security camera that you should hack. You can also dispose of the splicer there and hack the vending machine and health station. You can also use the machines in here to acquire some bots which I very much recommend. Once done with those, go up the stairs to the left. Be careful when you go to the top because there is a turret on the far and of the walk way (just at the top of the stairs in the middle of the room) and it's looking straight at you. Make sure you hack this turret. Finish the Splicer if you need to.
Lamb's Salvation by Father Wales
Just follow the walkway and it'll be on your left against a trunk, under some candles just to the left of the door that requires the code to get out.
Head back out into the Little Eden Plaza and take a right and follow it around to the Pink Pearl. You'll see a Brute Splicer knocking on the door. He'll open the door and then kill him.
At this point, you may want to get yourself a little sister. See if you can find that Rumbler again. I would recommend fighting in a wider space because he'll be hurling grenades at you which are much harder to dodge in a tight space. He'll also throw mini-turrets which hurt a lot and are hard to see. Those are easily countered by using Security Command.
So set up traps. When you are ready, get the camera rolling and start the fight by using Security Command. This will make your bots attack him first. Then, once they have his attention, you can start your attack. Make sure that you keep security command on him because it will cause the mini-turrets to attack him instead of you. It'll make the fight a lot easier. Otherwise you can use the Telekinesis plasmid to catch grenades and through them back. Remember that Winter Blast is also a great tool. The only downside is that he'll be blue so it'll be harder to see if Security Command fails so be careful.
Once you're done with the Big Daddy, take his sister. There are two Adam corpses in Eden Plaza, and neither of them are particularly easy. If you are short on ammo then there's vending machines in the plaza to stock up on. If you have the mini-turrets you can use them though I wouldn't really use more than two at a time.
For the corpse at the top of the stairs, use what you've got for trap rivets on the walkways and some in the room on your left. Put some on the stairs in front of you. You can use a turret if you like but if you only have one or two then save them for the next corpse. Sometimes they'll shoot at you from downstairs and it's not easy to see them. For this one I can only wish you good luck.
For the corpse on the ground floor, you can try and use trap rivets but more important than those are the mini-turrets. Hopefully you have atleast one. You should also use any anti-personnel ammo you have. This isn't a corpse to be stingy on. After these two corpses, drop off your sister and (if you've been rescuing them) it's time for your first reward, one of which is the Proud Parent tonic. This tonic will net you more Adam when your Little Sister harvests.
Now that you're done with that (or skipped it), head over to the Pearl. In the entrance, grab the Speargun. This weapon is pretty powerful in general but the rate of fire and the speed at which the spear reaches it's target are somewhat slow. It's best use is for sniping and a certain type of enemy later in the game. And for gruesome deaths. Move into the next room to see two splicers talking. Feel free to try your new toy on them.
Once you've disposed of the few splicers, there's a health station off to your right that you can hack. There's a Bot Shutdown in the small room at the back so you can collect bots off of the Health Station. Now go on upstairs and get back the spears you've used on the splicers. Be careful because down the hall next to where those two splicers were talking, there'll be a turret. Head up the next flight of stairs but be careful for the trap spears that are blocking your path.
You can remove these spears by shooting the spears themselves or by using telekinesis to redirect them. Get rid of them however you like. Just around the corner will be a Spider Splicer. These guys are very agile. They can climb walls and ceilings. They can close a gap quickly for some very wide, difficult to dodge melee attacks and then can throw hooks at you as a ranged attack. The only upside to these things is that they're only about as tough as regular splicers. A shotgun blast can kill them or get them pretty close. Remember to RESEARCH.
Dispose of this splicer and another Spider Splicer will probably climb up from downstairs. Continue to follow the arrow but beware of the security camera in one of the hallways on this floor. Walk into Daniel Wales' room and take a right. You'll see him at the end of the hall. Go slow though because there's a couple of trap Spears in the hallway. Dispose of those and follow after him.
Drop into the hole in the ground and try to get into a corner. You'll see a hallway leading out of the room. BE CAREFUL. There are two turrets at the end of the hallway. Use your remote hacker and you may even find these will cure a Spider Splicer in this room.
Leave the room with the two turrets and you'll be on the second floor again. Now it's time for you to kill Daniel Wales. He's a leadhead splicer with a bot friend and a LOT of health. Try hack his bot (Auto-hack darts are amazing for enemy bots) and then turn your attention to him. He isn't overly difficult, he'll just eat a lot of ammo/fuel. Once you're done with him, loot his body to find out the code for Simon Wales' church.
More than likely you'll hear a Big Daddy and Little Sister now. If you'd like, you can off the Big Daddy and take his little sister. You should know the drill by now (get it!? sorry *cough*).
The first Adam corpse is in this building on the second floor. Lay out your traps. There's the two flights of stairs onto the floor (one up, on down) to cover and then the two paths right next to the corpse. Lay your traps and your turret down the hall should help. Dropping a mini-turret wouldn't hurt either. You MAY end up facing a Brute splicer which you should probably research. When you're down, head out of the Pearl.
Once you're out of the Pearl, you'll probably see another Brute Splicer. Research and kill him. Then head back to the door that you just got the code for. BEFORE YOU PUT IN THE CODE, prepare yourself like you would for an Adam corpse. Lay out some trap rivets and mini-turrets. You're going to get attacked by a lot of spider splicers and maybe even a Brute or two. When you're ready, put the code in.
Once on the other side, grab the spears from the corpse to refill if you need. Head downstairs and you'll find your next Adam corpse. This corpse isn't too easy either. Unfortunately the extra level above you makes it difficult. So set traps as best you can. Again, abuse the mini-turrets if you have any and get ready for a fight.
Once you've gotten your Adam, drop off your little sister. But we're not done yet. Go down the main section of Plaza Hedone and on the right you'll see some stairs. Go up those stairs and another Big Daddy should come smashing through the door. If not then he must be wandering around. Might as well go find him and finish up with the sisters here. After he bursts through the door, don't attack him, let him go collect a sister before you attack him.
Follow him, let him collect his sister. He probably went to the vent with the Security camera above the door on your left. Hack that and quickly set up your traps. Then start recording and hit him with Security Command to start your attack. Kill him and take his sister.
Once you've collected the sister, if you've still got your set up in place, your first harvest is probably right next to you. Touch up your defenses and begin your harvest. This shouldn't be too much of an issue. If you need to, step back and let your security camera pick up the slack. Try to end the fight with two bots (by hacking the friendly bots).
Once you're done, allow the Little Sister to lead you to the last corpse. The corpse is up on the roof/third floor of the plaza. Be careful because there's a turret near the corpse. Go slow and when you find it, hack the turret. There's also a vending machine nearby if you need anything. It also sells canned beans which you can use to instantly refill a small portion of health.
Set up your traps like normal. This should be a breeze compared to the last few harvests because this one is more enclosed with fewer avenues to get to. It will also consist almost solely of Leadheads. So set up camp and get let your turret and bots do the work. Just be careful of the Leadheads grenade attack because those can destroy your turret pretty easily.
Once you're done with that, it's time for the big sister again. Figure out where you want to fight her, set up your traps, drop of your Little Sister and get back to that spot. I would recommend where you first picked up this sister, just under the security camera. Of course, you should do whatever suits you. Good Luck and REMEMBER TO RESEARCH HER!
When you finish with the Big Sister. Follow the arrow to the pumping station. Move through the pumping area and into a room with a few splicers. Kill them and proceed into the next hallway. On the left side of the hallway you'll come across an office with a Power to the People station. Make sure you use it and the move through the hallway to Wales' temple.
This is a rather frantic fight. You'll start off fighting some leadheads and a spider splicer. Just to your right will be a healing station. Hack it but then move away from it so it doesn't accidentally get destroyed in the fighting. You may also want to toss a mini-turret into the middle of the room.
Once you've dealt with part of these splicers, keep your eyes open for a Brute. And once you manage to get rid of the Brute, Father Wales will come out of hiding to fight you. Simon Wales has just as much health as his brother did. He's a Spider Splicer though and this'll make a good chance for a lot of research points. Once you finally manage to kill him (this may take a few tries), loot his body.
Make sure that you've got everything you want out of Siren's Alley and then head into the back room. Flip the switch and then make a mad dash out of Siren Alley.
It should be noted that on the way out, when you reach the room with the four pumps, the room off to the right that was locked no longer is.


