Welcome again to a completely different area of Rapture. Leave the train station and into the building. Walk down the stairs, though a few slicers and into the next room where you'll get the Damage Research Tonic. Continue on through to the air lock and flood the room. Make your way through the underwater section. There are no Adam Slugs in this section (but there will be later on in this level).
Leave the airlock area and walk past some Big Daddy outfits to meet Mr. Gil Alexander face to... screen? Well, watch the events unfold and soon you'll be up to your ears in splicers. It will probably start with a Houdini splicer on the globe in the middle. You are encouraged to research as you kill. Be careful in this room. It feels easy and it seems like it should be easy but I still died multiple times (without vita chambers).
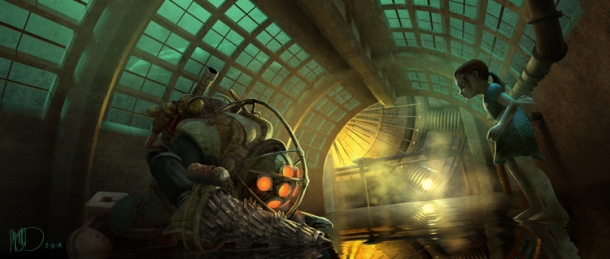
Once you finish up, head up the stairs and use the bio-scan. Take out your spear gun and then your research camera. And maybe some Winter Blast. Get ready to meet an Alpha. First thing this Alpha will do is dash at you and all you have to do is melee with any weapon as he reaches you to stop him. Actually he's pretty tame compared to a regular Big Daddy. I find spears work well. They freeze even better than regular Big Daddies. They do shatter if killed while frozen though. Also, they are a regular enemy so they will spawn randomly and attack you just like splicers.
Like I said, You'll probably find this enemy to be much easier than regular Big Daddies. Watch out for more though because they can still be dangerous. Once you're past the bio-scan, you'll find the Gil left you another message. Listen to it, then grab the...
Agnus Dei by Gil Alexander
It's right there, behind the wall panel that just opened up with the Eve Hypo and Health Kit.
Proceed around the corner to the next door and use the voice recording and it will open the door as promised. Head into the next room and around the corner booth in the middle. At the back of the booth will be another panel to use the voice recording on. Give it a try. It won't work. However, you will be allowed through the door across from the booth.
There will be a few splicers in here. Deal with them. Make your way around (on this floor) to the back of the room, behind the stairs and the wall behind the stairs. Come around the corner and in a recess in the wall you'll see a Bot Shutdown switch with a radio attached to it. Walk up to it and hit A to destroy it. If you have trouble finding it, the Bot Shutdown will show up on the map.
After you destroy this panel, you'll probably find a Big Daddy wandering around with his little sister. It'll be a bigger, badder version of a Rumbler. You can steal the Little Sister with your traps, winter blast, and armor-piercing ammo (it does wonders). The two corpse are actually in this room. One just by the vending machine and one just upstairs. I should also point out that there's quite a few newer plasmids. I'd at least pick up Security Command 3 because it'll spawn elite bots like the ones that Grace gave you (if you let her live).
Once you're done with that, we'll find the last few relays. The first one you can reach by leaving the room to the west (the side with the Vending Machine). Go out a little and around a corner, you'll see a turret you can hack. This is a semi-difficult hack (as they'll be from now on). Take the right out of this hallway and then take a left to go through double doors.
Go forward a little and you'll see a locked door on the left. the code is 5254. Go through this room to get the Careful Hacker 2 tonic. Go back and continue onward. You'll find a room with some standing water. Zap the splicer and then kill her and the one just out of the water. Hack the health station if you like. Leave the room and you'll come to another room with a slicer beating on an Ammo Vendor. Just watch him and you'll get some free ammo and the vending machine itself will take care of him.
Not long after, the steel wall to your right will go up and allow you into a theater. Walk into the theater and up to the microphone. Wait for Gil to finish talking and then deal with the Houdini Splicers he sends in. They'll be a piece of cake. After you finish them, an Alpha will come crashing through the glass. Take care of him as well and proceed through the glass to find the next Bot Shutdown radio.
The next one is very easy. Head up the stairs and turn around (you'll be facing north) and walk around the wall divider there. There's a turret against this wall on the other side, hack it. Go up the small stairs and into Fontaine's office. There will be an Alpha at the far end of the room behind the desk but he's the only enemy you'll have to face. Kill him and walk around the corner to the right to destroy the radio. on the other side of the office is a giant stuffed head on the wall. It's actually a switch. Use it to lift the curtain to your right and reveal a wall of safes.
Go back to the main room. On the second floor, take a left and go around another wall divider into a conference room. The two "bodies" at the table are actually splicers but you can't hurt these splicers until the come alive. Kill the splicers, and go through the door on the right to find the "Unstable Teleportation Plasmid." No you can't teleport, it's just a mini-game of hide and seek. You can complete it if you want for the Vending Expert 2 tonic.
The plasmid will reappear in this room, then it will appear in the previous room on the way out (to your left as you come out of this room). Then it will appear in the main room with the stairs on a broken pillar on the second floor. Then it will appear next to the vending machine on the first floor. The last place it will appear will be on one of the couchs at the foot of the stairs just as you first came into this room.
Go through the door on the left side of the room now. The water in here is electrified. You can fix the problem by shooting the control panel on the far side of the room (through the wall). It might help to crouch. Just on the other side of that wall will be a Security Camera you can hack. Rip the radio out and a few splicers will trickle into the room. Kill them and make your way out and back downstairs.
Make your way back to the Security Desk. You'll be able to get inside now. Make sure you use the Power to the People station, wait for Gil to finish talking and then flip the switch.
Once you've flipped the switch, follow the quest arrow out of this building and towards the airlock quickly because you'll be under constant attack by Alphas and splicers. It'll be unpleasant if you stick around too long. Keep your guard up.
Once you get out into the water, follow the path until you hop into a giant hole. Go through the hole in the ground and you'll land next to an Alpha. Right next to you are some stairs going up. Go up those stairs (all the way) and you'll find a slug at the top. Then just jump back down through the hole again and proceed to the end and use the Airlock.
Once inside, it'll be dark. Follow the Arrow until you find another Gil terminal. He'll tell you that you need to turn the lights back on. Go down the stairs on your left and then just after the health station, take a left and then your first right to find the switch you're looking for. Go back the way you came.
From the beginning, go down the right set of stairs, then take your first right turn and then immediately turn right again to find the next switch. Now head back up to the beginning and flip the last switch. Once Gil is done talking, take the plant.
You'll get attacked by two Alphas and you'll need to kill both of them before you can proceed. I hope you've been doing your research on them. Anyway, continue to the back left of the room, past the first switch you flipped. Kill the splicers in this room then go to the left back of the room again and downstairs into a big room, the flower will be in the back of the room. Once you pick it up, you'll get blinded by mist and fog. You'll be taunted by enemies and then you'll have to face some of them, thankfully not all of them. Kill them and you'll be allowed to leave the room.
Go back to the main room where Gil is and leave out the other side (the right side). You'll be a little bit above a pit. Directly under you is a rocket turret so try and kill the splicers from here and then see about hacking that turret if you can. There's a health station in this room if things get hairy. The toughest part of this room is not getting stuck somewhere. Even just your bots will give you a hard time going places.
Once you've cleared this room, head into the next room. Kill the splicers and (for now) avoide the Big Daddy. In the middle of this room is the Gatherer's Candidate section. You'll find a flower here. Go down the other side of this section, take a right and go to the end. You'll find a Security Camera on the wall. Deal with that and then hack the door control panel through the window. Now return to the previous room (with the rocket turret) and you can enter the door you just hacked and you'll find a Power to the People station.
Go back into the next room (where you just got your last flower). Go back down the otherside and take a right like you did last time except this time take your next right and you should be able to drop down into the basement. If you have trouble finding it, it's the north middle cell. The flower you're looking for is in the last cell on the left when you're trying to leave. After you get the flower, when you open the main door to the cell block you'll find yourself face-to-face with an Alpha.
By the way, since you're probably looking for your last two little sisters, both are likely in this area or by Gil's Tank. Take care of the Big Daddies, harvest some Adam and I recommend that room where you got blinded by the fog for your Big Sister encounter. Remember to research! Good Luck!
When done, go to Gil's tank and use the flowers to bribe Gil. Of course this can't be easy so you'll be attacked by a few splicers. Really there's nothing here you haven't seen before. It'll consist of leadheads, Houdini's and three to four Alpha's Once you've dealt with that you can choose to kill Gil or leave him. If you leave him, it contributes to the Savior achievement. That's the only real difference aside from asthetics.
Go back through the airlock and back into the water. Just outside you should see the air-refilling station. Go to it and use the genetic key-card you just got. This will let you in to Persephone. You'll see the Airlock door just behind the station. Before you finish, make sure you have all you want, particularly research on Alpha's and regular Big Daddies (there are no more Little Sisters after this level).


