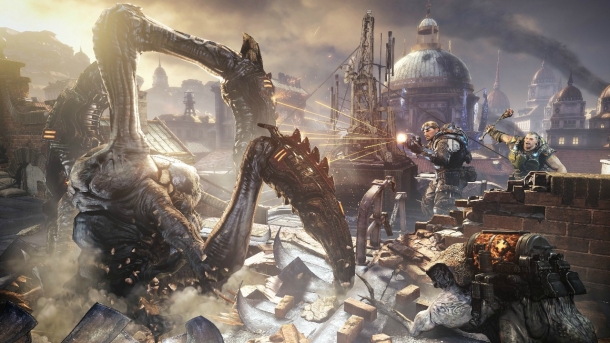
Pick up the ammo in front of you and look on the left for collectible (1/1) and then enter through the gate that opens. Walk forwards and pull the lever to be given two options. For the record, both of these options are pretty much identical, I will list both of them anyway just for the purpose of making the guide as thorough as possible.
| Option 1: Left Hall | Exit from the elevator and continue forward. A mauler and a pair of theron guards will enter from the opposite end of the room. Eliminate them and continue. Kill the drones and the tickers in the next room, then look across the chasm to where Dom and Baird are and help take down some of their problems. Then head around the narrow pathway beside the cliff being mindful of the theron guard and the mauler around the corner. Kill them and continue. vault the wall here, ventilate any remaining locust and leg it for the door at the end. Exterminate the mauler that comes through and head through to the next area to regroup with the others. |
| Option 2: Right Hall | On departure from the elevator, a mauler and two therons will emerge from the door at the opposite side of the room. Defeat them and continue into the next chamber. There is a locked door in front of you so make your way to the narrow ledge on the left, watch out for the theron and the mauler here and on the opposite side of the room. Put them down and continue round the ledge. There will be two or three locust sitting behind the barriers in front of you and one off to your left. Kill them all, then vault the wall and cruise to the door at the far end of the balcony here, kill the mauler and follow the passage to regroup. |
Enter the locust lift at the end and move through the door a hole will appear in the floor and a group of theron guards will come running for you from the other side. Use the yellow lines in the floor to identify cover points and move to them. Eliminate the threat on the other side. Then look to the right side of the room and pull the switch to re-extend the platform so you can cross the gap. Move forward and repeat the process here, kill the guards on the opposing side of the gap and this time, the ground will reappear automatically. Continue onwards.
After running a short way forwards, another gap will appear in the floor and more locust will enter the room and attack you. Quickly step on the glowing pressure pad to give yourself cover and engage the bad guys. As you do, you will see a set of stairs appear on the right side of the room giving the locust access to a higher platform overlooking your position. Try and take anything out that goes up the stairs or you will get flanked. Your best bet at this point is to fall back to the pillars on the left side of the room and use a sniper rifle to take the bad guys out from a relatively safe position.
When you have defeated them all, head forward to the tall, lamp like structure in the centre of the area. As you approach you will see a cut-scene. When you regain control of Fenix, you will be in a lowered section of ground, which has conveniently placed cover on all four sides and you will need to defend yourself from all the locust that come to finish you off. While they are attacking you will need to use the wheel when you have a free moment and use it to lift the section of wall back up to the previous area. As you do so, waves of guards will enter through the doors surrounding the area. The first wave of guards will come from the front, the next from the right, the third from the left and the fourth wave will come from the back. Each wave consists of approximately five theron guards and the fourth wave will enter the room as you are battling with the third wave. By the fourth wave of enemies though, you should have lifted the section of floor sufficiently during the lulls between fighting to have escaped the line of fire of the guards below. Keep turning the wheel until you reach the top.
Enter the huge door at the top of the stairs in front of you to see a cut-scene with the queen giving you a bit of a monologue and a lot of story related stuff. Next up you will do battle with the queen’s new right hand man - Skorge.
Skorge will jump up and come down near you, chainsaw blazing. Tap the ‘B’ button to keep him at bay and saw him a little when he falls back. He will then jump up to one of the raised platforms on the side of the rooms and fire at you with a cover-mounted mulcher whilst tossing ink grenades everywhere and summoning tickers from the little yellow pools to come and upset you. When he gets bored, he will jump to the roof of the room and cut down stalactites to crush you, avoid all of the stuff that he throws at you and try and shoot him when you have an opening. After going through his routine he will cut down one of the large pillars flanking the room. Dodge it so it doesn’t crush you and he will jump down and charge at you, when he gets close he will jump and try to chainsaw you, tap the ‘B’ button again to send him reeling and then run to the pressure pad in the centre of the room to make the cover reappear. You will need to repeat this process seeral times until you see a cinematic.
After you have defeated Skorge he will retreat on some kind of super reaver. Exit the room via the stairs either side of the throne and regroup with the others. After a short conversation the bridge in front of you will extend. To a cannonball run the whole way across the bridge and do not stop until you enter the building on the other end for a cut-scene and the end of Act 4.


