Shantytown
Find a Way into the Solarii Stronghold
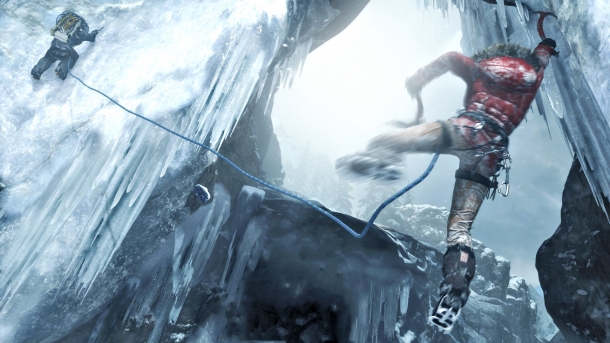
Climb the zipline that leads to the upper platform and then climb the zipline on the other side, saving yourself when you fall. After Roth saves Lara, and you gain 100 XP, climb the wall and unlock the Vista Tower Base Camp. Head across the bridge and jump the gap for a quick convo with Roth and then wall scramble into the tower and up to reach the underside of the next bridge.
Jump and shimmy to the underside walkway and continue. Roth will once again save your, but you will now have to shimmy right to pull yourself up. Jump to the next area and continue, listening to Roth's instructions. When you reach the top you will fall and be stuck in a platforming run section. Keep moving and when you reach the end make sure to grab the craggy wall and climb up for 200 XP. Enter the cavern and follow the path until you going another 100 XP.
Cavern Entrance
Follow the cavern to a cutscene and you will then gain access to the next area.
Geothermal Caverns
Rescue the Captured Endurance Crew
Follow the river of blood until you find some arrows and then light it up and shoot the natural gas to create a path. The gas will quickly return, so shoot another arrow and quickly move by until you reach The Pit Base Camp, where you can gain Lara's Journal: No Escape. Grab the Confessions of a Solarii: In Her Honor document and then squeeze through the passage to a cutscene.
Head down the path to a second opening and go ahead and shoot the gas to explode the monsters below and then continue. As you reach the bottom, look up to the left to spot a Sack and shoot it to start the Challenge: Firestarter. Head into the open area and hug the left wall for some Salvage and then continue into a small tunnel to reach 2 more crates of Salvage. As you return to the main room, kill the enemy that drops down and then cross to the other side of the cave, past where the crowd of enemies was.
Stop when you reach the first captive and look up to find another Sack and then continue to the GPS Cache 1, right next to an upper ledge that leads to 50 Salvage. Drop down and continue right into a tunnel, past the gas, and kill another enemy. Using your Survival Instincts, find the Sack on the ceiling above and then grab the Salvage and GPS Cache 2 from the ledge. Return to the center of the pit and climb the ledge in the middle to find the Funeral Fan.
Now that you have everything, head to the valve by the gate and turn it to release some gas that you can explode to clear an exit. Head through the gate and hug the right wall, hiding behind a stalagmite when some Solarii show up. Wait for the men to separate a bit and then quickly kill of the one that walks toward the pit, followed by the one that stays near you. Grab the Food Cache and GPS Cache 3 and then head up the path. Stop at the corner and wait for the light to go out and the one man to investigate and then kill them both.
Grab the Endurance Officers - Reyes: Dear Alisha document and the Food Cache and head up the steps. Stop at the first cage and jump up to climb to the top where you will find the Geothermal Caverns Treasure Map and then drop down and continue to the Catacombs Base Camp, Salvage and Wedding Fan relic. Turn around and look left to spot some Salvage in netting and then release the valve nearby and shoot the gas to create a path forward.
Using cover, head forward and shoot the Sack on the other side of the room and get the Food Cache near the entrance. Shoot a fire arrow at the natural gas to kill the enemies and take out any more that appear. When clear, hop the gap and aim an arrow at the Sack by the natural gas and then drop down to get a Food Cache. Now climb the craggy wall to the next area.
Start by stealth killing the enemy with his back to you and then back up and shoot the Sack hanging above. Move along the left wall and carefully peak out, switching your firing mode, to shoot the man with the flashlight off to the left. You can now easily take out the rest of the Solarii by shooting the natural gas by peeking through the stalagmite. Head down and loot all the bodies and the Diaries of a Madman: Lost document near the altar before wading into the water to the left to get the Inscribed Silk Fan relic near some Salvage. Return to the altar and cross the room, past a valve, for a Food Cache and the GPS Cache 5 and then rope dart the cage to move it in front of the door. Finally, break the valve and shoot the gas to break through the door and run through the cavern to exit.
Three men guard the Endurance crew, but luckily they have their backs to you. Start by taking out the Solarii on the far right and then take out the other two, with a fourth showing up on the right. After the cutscene, head through the debris and break open the valve and shoot it so Lara can climb the platform to the roof of the helicopter. On the other side of the room is two gas leaks, you need to shoot the left one and then quickly shoot the right one to release the other platform.
Unfortunately, Lara will fall, but with a little help you can climb around the right side of the helicopter and reach the top again. Jump across to the platform and pop both valves and then take cover behind the wall so your arrow goes through both leaks at the same time, saving the Endurance crew and getting you 100 XP.
Escape the Cavern
Run straight ahead to the two cages and jump across to escape and gain 400 XP.
Find a Way into the Temple
Run down the linear path to enter the temple underbelly and gain 100 XP.