• Games
    • Most Popular (+)
    • Top Rated
    • Recent Releases
    • Coming Soon
    • Release Dates
    • Recently Added
    • More
    • Platforms (+)
    • Characters (+)
    • Companies (+)
    • People (+)
    • Franchises (+)
    • Brainwaves
    • Most Popular
    • Articles
    • Discussions
    • Thoughts
    • Reviews
    • Trending
    • Grand Theft Auto V
    • 4 Pics 1 Song
    • Dragon's Dogma
    • The Elder Scrolls V: Skyrim
    • Pokemon X/Pokemon Y
    • Contributions
    • All
    • Collections
    • Most Popular
    • Lists
    • Galleries

Dead Space 3

  1. Home
  2. Games
  3. Dead Space 3
  4. Walkthrough
  5. Campaign Missions
  6. Chapter 10: Now We Know
Tracking
Want to play
Top 500
#59
MENU →
  • Home
  • Details
  • Releases
  • Credits
  • Content
  • Overview
  • Story
  • Gameplay
  • Collectibles
    • Prologue
    • Chapter 1
    • Chapter 2
    • Chapter 3
    • Chapter 4
    • Chapter 5
    • Chapter 6
    • Chapter 7
    • Chapter 8
    • Chapter 9
    • Chapter 10
    • Chapter 11
    • Chapter 12
    • Chapter 13
    • Chapter 14
    • Chapter 15
    • Chapter 16
    • Chapter 17
    • Chapter 18
    • Chapter 19
  • Enemies
    • Feeders
    • Fodders
    • Nexus
    • Unitologist Soldiers
    • The Swarm
    • Stalkers
    • Dividers
    • Slashers
    • Lurkers
    • Leapers
    • The Hunter
    • Pukers
    • Twitchers
    • Guardians
    • Pods
    • Infector
    • Snow Beast
    • Unknown Regenerator
  • Editions
    • Dev-Team Edition
    • Limited Edition
  • DLC
    • Awakened
  • Media
    • Videos
      • Download Content
  • Guides
  • Walkthrough
    • Campaign Missions
      • Prologue: Beginnings
      • Chapter 1: Rude Awakening
      • Chapter 2: On Your Own
      • Chapter 3: The Lost Flotilla
      • Chapter 4: History's Ember
      • Chapter 5: Expect Delays
      • Chapter 6: Repair to Ride
      • Chapter 7: Mayhem
      • Chapter 8: Off the Grid
      • Chapter 9: Onward
      • Chapter 10: Now We Know
      • Chapter 11: Signal Hunting
      • Chapter 12: Autopsy
      • Chapter 13: Reach for the Sky
      • Chapter 14: Everything Has Its Place
      • Chapter 15: A Change of Fortune
      • Chapter 16: What Lies Below
      • Chapter 17: A Strange City
      • Chapter 18: Kill or be Killed
      • Chapter 19: Endings
    • Side Missions
      • C.M.S Greely
      • Conning Tower
      • Supply Depot
      • Armory
      • Reaper Barracks
      • Disposal Services
      • Artifact Storage
    • Co-op Missions
      • C.M.S. Brusilov
      • Archaeology
      • Marker Containment
    • DLC 1: Awakened
      • Awakened 1: Requiem
      • Awakened 2: Infidels
      • Awakened 3: Perdition
  • Achievements
    • Xbox Achievements
    • PlayStation Trophies
  • Cheats
    • Hacks
  • Home
  • Brainwaves
  • Contributions

Dead Space 3 - Chapter 10: Now We Know

Excavation Headquarters

After the conversation to begin the chapter, look on the drawers to the left of the dig site map to find an audio log [Log 1/1]. Further along the wall behind this is a door we can open using a torque bar (if you need to craft one there is a bench near the door we entered from). Inside you will find crates, lockers and a weapon part – Pneumatic Torch [Weapon Part 1/4]. Return to the map room and head over to the door near the bench and go on through.

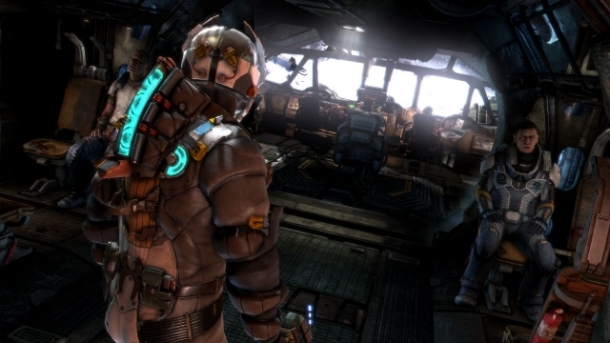
Smash the crates if you feel like it and then proceed to the end of the hallway to exit the building. Approach your colleagues nearby for a short scene.

Excavation Base Camp

When you are back in control take cover behind one of the nearby concrete blocks and kill the 4-5 Unitologist commandos that appear in the icy area in front. Remember that these guys are not necromorphs, so a head shots will kill them!

Once they are dead, loot the area and head on over to the tent with the unlocked door on the far right of the area. Proceed through the room here (note there is an upgrade circuit on the crates to the right on new game +) and ride the elevator at the end down exit the building. Cruise a short distance over to the outdoor lift nearby and ride that down to the next area.

As you reach the base of the lift, take cover behind the crates to the left and kill the Unitologist commandos that come running across the bridge. Once the immediate threats are dealt with, eliminate any other Unitologist forces on the opposite side of the bridge, note that sometimes a spitter will attack them, giving you an opportunity to attack them whilst they are preoccupied. When it is clear, proceed across the bridge and work your way through any remaining enemies to the open door.

Once inside you will be in a room with a bench and a suit kiosk that you can use to upgrade your weapons/suit. Additionally in the centre of this room is a weapon part – Directed Suspension Field [Weapon Part 2/4] (note that this appears as MK-II Directed suspension Field on new game +). When you are ready to continue, use kinesis to remove the crates from the doorway and proceed through door.

As you exit the building, there will be a few Unitology commandos fighting off some slashers nearby in total there are around 10 enemies. Help either side out and then finish off the remaining bad guys. We need to go on through the open door at the end of the area, however before you do that, there is a cave off to the left with a resource cache for your scavenger bot if you are interested.

Enter the marked tunnel and follow the mining cart tracks to the door at the far end of the area, there is one Unitlogy commando that you will have to kill along the way. When you reach the door, look to the right and you’ll find an alien Artefact [Artefact 1/2] sitting on the ground next to a scaffolding.  Continue through the open door. Kill the slasher that appears.

Upon exiting the other side, follow the catwalk to the left, climb down the ladder and look behind it for a weapon part – Hammond’s Heavy Frame [Weapon Part 3/4]. Kinesis this over to Isaac so you can grab it. Continue through the next door.

As you exit you will be attacked by 6 Unitology commandos. Take cover behind the nearby crates to finish them off. Once it’s clear, note the door here marked co-op. This is the starting point for the optional co-operative mission 2. It is best to do this during mission 11.

You can find a walkthrough here:

  •  Co-operative Mission 2: Archaeology Walkthrough

When you are ready to continue, proceed through the unlocked door at the far end of the area.

Excavation Drill Site

As you enter a scene will play showing some swarmers reviving some dead Unitologist commandos.  We haven’t seen this type of swarmer before and I described it above, but in case you can’t remember here’s a quick refresher on how to handle them:

New Enemy: swarmer

In addition to the spider-like swarmers that we have seen so far, there is a  second type of swarmer that consists of a head with a series of tentacles appearing from below to act as legs. They can reanimate dead bodies by merging with the head area. Whilst they have control of a body they can use its weapons to attack you or morph it into a slasher. To kill them quickly, shoot the swarmer itself and whilst they have control of a body, shoot the head – this is where the swarmer is located and a headshot should either  kill it instantly or knock it to the floor where you can shoot it freely.

Irrespective of the type of swarmer  that you encounter, you should definitely try to kill them before they take over bodies as it will make Isaac’s encounters with them a heck of a lot easier!  


Fortunately, as mentioned in the enemy description earlier, all you really need to do is shoot the swarmers themselves or the heads of the bodies that they take over to kill them. Once you are done, (note that on a crate just inside the door there is a weapon part on new game + MK-II Overclocked Heavy Frame – note that this often clips through walls and can glitch out making it difficult to pick up) continue through the next door.

As you round the corner, you will see a group of Unitology commandos being attacked by wasters. Kill them all and keep your distance. A large group of swarmers will come in and bring most of them back to life again. Deal with them at a distance before moving in to finish off any stragglers when things quieten down. Continue around to the right and interact with the panels here for a mini game to unlock the door. Go inside when able.

Coring Platform

As you exit the lift, look on the wall to the right for an upgrade circuit [Circuit 1/1]. Continue down the slope. At the bottom, activate the generator and use the bench opposite once it comes online if you require it. There is a weapon part – Telemetry Spike [Weapon Part 4/4] on the table next to the bench. Continue through the now open gate.

Note: At this point you can earn the achievement/trophy ‘Drill Sergeant’. To do this, you need to complete the next section of the mission without taking any damage.

You will see a giant drill stuck behind a gate that is blocking your exit. We need to shut it down to progress. To do this, follow the steps below:

  1. First you will need to use kinesis on the cranks on either side of the gate to release the drill. It will now fly around the room and you will need to avoid touching it. Note that doing so will result in a quick fire jump to the previous checkpoint.
  2. 6-8 Wasters will show up, popping out of the various vents around the room so use stasis on the drill and kill the enemies.
  3. Once no more enemies are about, use stasis on the drill again and shoot between the blades to hit a yellow fuse sitting on the top centre of the inside of the drill bit. Once it takes enough damage, it will lift off the ground for a few moments. Use this time to go fill up your stasis and loot enemies for ammo.
  4. The drill will lower once more and 3-4 wasters and 3-4 slashers will emerge from vents around the room. Use the same tactic as before – put stasis on the drill and then focus on killing the enemies.
  5. Again stasis the drill once the enemies are dead and destroy the fuse, loot whilst you wait for the drill to come back down.
  6. When it hits the ground for the final time, immediately put the drill into stasis and shoot the fuse. If you can destroy it quick enough the large group of feeders that appear will not be able to reach you in time and will de-spawn during the ensuing cinematic that plays out.

Once the scene plays, continue through the next door and ride the elevator in the next room up to the next area. After getting off the lift, look behind the boxes directly in front of you for an S.C.A.F Artefact [Artefact 2/2]. Loot the area and then enter the next building.

This will signal the beginning of a new chapter.

Jump to a section:

Share Chapter 10: Now We Know with others

< Prev: Chapter 9: Onward Next: Chapter 11: Signal Hunting >

Last updated by Sokkus, 15th February

Do you want to earn money creating pages just like this? Gamewise is currently looking for writers, find out more here.

Around the Network

Dead Space 3 Brainwaves

View all →

  • 13th December, 0 replies

    dead space 3 chap 18 stuck help

  • 19th June, 1 replies

    A New Dead Space "Absolutely" Will be Made

    According to EA Studios executive vice president Patrick Söderlund, the Dead Space series will return....

  • 11th September, 1 replies

    Dead Space 3 (general and co-op)

    I'll start by warning you that this is less a review, more a list of complaints. If you want some kind...

Dead Space 3 Walkthrough

Campaign Missions

Prologue: Beginnings Chapter 1: Rude Awakening Chapter 2: On Your Own Chapter 3: The Lost Flotilla Chapter 4: History's Ember Chapter 5: Expect Delays Chapter 6: Repair to Ride Chapter 7: Mayhem Chapter 8: Off the Grid Chapter 9: Onward Chapter 10: Now We Know Chapter 11: Signal Hunting Chapter 12: Autopsy Chapter 13: Reach for the Sky Chapter 14: Everything Has Its Place Chapter 15: A Change of Fortune Chapter 16: What Lies Below Chapter 17: A Strange City Chapter 18: Kill or be Killed Chapter 19: Endings

Side Missions

C.M.S Greely Conning Tower Supply Depot Armory Reaper Barracks Disposal Services Artifact Storage

Co-op Missions

C.M.S. Brusilov Archaeology Marker Containment

DLC 1: Awakened

Awakened 1: Requiem Awakened 2: Infidels Awakened 3: Perdition

4.15/5
1,229 ratings

Your rating:

Quick Details

Franchise(s)
Dead Space
Developer(s)
Visceral Games
Publisher(s)
Electronic Arts
Release Dates
PlayStation 3

Feb 5, 2013

Feb 8, 2013

Xbox 360

Feb 5, 2013

Feb 8, 2013

Microsoft Windows

Feb 5, 2013

Feb 8, 2013

Page Contributors

View all →

84 points Sokkus

Build the ultimate game collection now!

Log In with Facebook

Popular Brainwaves

View all →

  • 18th January

    There are some big games launching over the next few months

  • 6th February

    What should I get - Dead Space 3 or Bioshock Infinite?

  • 5th February

    Dead Space 3 Awakened DLC Announced

    Dead Space 3 released today in North America, so what better time for Visceral to announce the first...

Gamewise
The world of video games at your fingertips.
About · Contact · Advertise · Blog · Press · Facebook · Twitter · Google+ · YouTube
© 2012-2025 All rights reserved · Terms of Use · Privacy Policy · Contribution Guidelines
Trending: Emoji | Candy | Mods | GTA | Pics | Flappy | Clans | Food recipes | Sticky Toffee Cupcakes Recipe | Tetris | Evil Apples

Please log in to continue

Log In to Gamewise

Log In or Sign Up via Facebook

Existing Members without Facebook

Forgotten password?

close
  • Main Menu
  • Home
  • Games
    • Games
    • Most Popular
    • Discover
    • Rate
    • Top Rated
    • Recent Releases
    • Coming Soon
    • Release Dates
    • Recently Added
    • More
    • Platforms
    • Characters
    • Companies
    • People
    • Franchises
  • Brainwaves
    • Brainwaves
    • Most Popular
    • Articles
    • Discussions
    • Thoughts
    • Reviews
    • Trending
    • Grand Theft Auto V
    • 4 Pics 1 Song
    • Dragon's Dogma
    • The Elder Scrolls V: Skyrim
    • Pokemon X/Pokemon Y
  • Contributions
    • Contributions
    • All
    • Most Popular
    • Collections
    • Most Popular
    • Lists
    • Galleries
  • Dead Space 3
  • Details
  • Releases
  • Credits
  • Content
  • Overview
  • Story
  • Gameplay
  • Collectibles
    • Prologue
    • Chapter 1
    • Chapter 2
    • Chapter 3
    • Chapter 4
    • Chapter 5
    • Chapter 6
    • Chapter 7
    • Chapter 8
    • Chapter 9
    • Chapter 10
    • Chapter 11
    • Chapter 12
    • Chapter 13
    • Chapter 14
    • Chapter 15
    • Chapter 16
    • Chapter 17
    • Chapter 18
    • Chapter 19
  • Enemies
    • Feeders
    • Fodders
    • Nexus
    • Unitologist Soldiers
    • The Swarm
    • Stalkers
    • Dividers
    • Slashers
    • Lurkers
    • Leapers
    • The Hunter
    • Pukers
    • Twitchers
    • Guardians
    • Pods
    • Infector
    • Snow Beast
    • Unknown Regenerator
  • Editions
    • Dev-Team Edition
    • Limited Edition
  • DLC
    • Awakened
  • Media
    • Videos
      • Download Content
  • Guides
  • Walkthrough
    • Campaign Missions
      • Prologue: Beginnings
      • Chapter 1: Rude Awakening
      • Chapter 2: On Your Own
      • Chapter 3: The Lost Flotilla
      • Chapter 4: History's Ember
      • Chapter 5: Expect Delays
      • Chapter 6: Repair to Ride
      • Chapter 7: Mayhem
      • Chapter 8: Off the Grid
      • Chapter 9: Onward
      • Chapter 10: Now We Know
      • Chapter 11: Signal Hunting
      • Chapter 12: Autopsy
      • Chapter 13: Reach for the Sky
      • Chapter 14: Everything Has Its Place
      • Chapter 15: A Change of Fortune
      • Chapter 16: What Lies Below
      • Chapter 17: A Strange City
      • Chapter 18: Kill or be Killed
      • Chapter 19: Endings
    • Side Missions
      • C.M.S Greely
      • Conning Tower
      • Supply Depot
      • Armory
      • Reaper Barracks
      • Disposal Services
      • Artifact Storage
    • Co-op Missions
      • C.M.S. Brusilov
      • Archaeology
      • Marker Containment
    • DLC 1: Awakened
      • Awakened 1: Requiem
      • Awakened 2: Infidels
      • Awakened 3: Perdition
  • Achievements
    • Xbox Achievements
    • PlayStation Trophies
  • Cheats
    • Hacks