• Games
    • Most Popular (+)
    • Top Rated
    • Recent Releases
    • Coming Soon
    • Release Dates
    • Recently Added
    • More
    • Platforms (+)
    • Characters (+)
    • Companies (+)
    • People (+)
    • Franchises (+)
    • Brainwaves
    • Most Popular
    • Articles
    • Discussions
    • Thoughts
    • Reviews
    • Trending
    • Dragon's Dogma
    • Grand Theft Auto V
    • The Elder Scrolls V: Skyrim
    • 4 Pics 1 Song
    • The Binding of Isaac
    • Contributions
    • All
    • Collections
    • Most Popular
    • Lists
    • Galleries

Dead Space 3

  1. Home
  2. Games
  3. Dead Space 3
  4. Walkthrough
  5. Side Missions
  6. C.M.S Greely
Tracking
Want to play
Top 500
#37
MENU →
  • Home
  • Details
  • Releases
  • Credits
  • Content
  • Overview
  • Story
  • Gameplay
  • Collectibles
    • Prologue
    • Chapter 1
    • Chapter 2
    • Chapter 3
    • Chapter 4
    • Chapter 5
    • Chapter 6
    • Chapter 7
    • Chapter 8
    • Chapter 9
    • Chapter 10
    • Chapter 11
    • Chapter 12
    • Chapter 13
    • Chapter 14
    • Chapter 15
    • Chapter 16
    • Chapter 17
    • Chapter 18
    • Chapter 19
  • Enemies
    • Feeders
    • Fodders
    • Nexus
    • Unitologist Soldiers
    • The Swarm
    • Stalkers
    • Dividers
    • Slashers
    • Lurkers
    • Leapers
    • The Hunter
    • Pukers
    • Twitchers
    • Guardians
    • Pods
    • Infector
    • Snow Beast
    • Unknown Regenerator
  • Editions
    • Dev-Team Edition
    • Limited Edition
  • DLC
    • Awakened
  • Media
    • Videos
      • Download Content
  • Guides
  • Walkthrough
    • Campaign Missions
      • Prologue: Beginnings
      • Chapter 1: Rude Awakening
      • Chapter 2: On Your Own
      • Chapter 3: The Lost Flotilla
      • Chapter 4: History's Ember
      • Chapter 5: Expect Delays
      • Chapter 6: Repair to Ride
      • Chapter 7: Mayhem
      • Chapter 8: Off the Grid
      • Chapter 9: Onward
      • Chapter 10: Now We Know
      • Chapter 11: Signal Hunting
      • Chapter 12: Autopsy
      • Chapter 13: Reach for the Sky
      • Chapter 14: Everything Has Its Place
      • Chapter 15: A Change of Fortune
      • Chapter 16: What Lies Below
      • Chapter 17: A Strange City
      • Chapter 18: Kill or be Killed
      • Chapter 19: Endings
    • Side Missions
      • C.M.S Greely
      • Conning Tower
      • Supply Depot
      • Armory
      • Reaper Barracks
      • Disposal Services
      • Artifact Storage
    • Co-op Missions
      • C.M.S. Brusilov
      • Archaeology
      • Marker Containment
    • DLC 1: Awakened
      • Awakened 1: Requiem
      • Awakened 2: Infidels
      • Awakened 3: Perdition
  • Achievements
    • Xbox Achievements
    • PlayStation Trophies
  • Cheats
    • Hacks
  • Home
  • Brainwaves
  • Contributions

Dead Space 3 - C.M.S Greely

You will have access to this optional mission during chapter 4 and then again during chapter 7. To reach the mission area you will need to get in the SKIP and fly to the C.M.S Greely destination choice. When you arrive, exit the vehicle to enter zero gravity mode.

C.M.S Greely Debris Field

Walk to the end of the platform and look down for a piece of debris with a bird logo on it. Fly down here.  You will likely encounter a few lurkers here so kill them if you like, or ignore them for now. Work your way over to the frayed end of the debris and you will find a door. Use kinesis to open this and head inside.  Open the chest here for a weapon part – Compact standard Frame [Weapon part 1/4], a med pack and some resources. To the right of the chest in the corner is an S.C.A.F Artefact [Artefact 1/2].

 Return outside and use your suit locator. Fly over to the objective marker and head inside the door here.
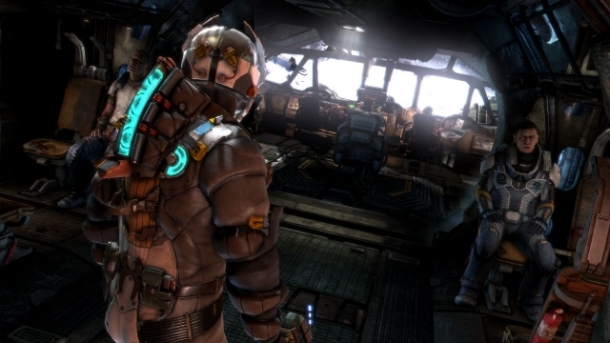
C.M.S Greely

Enter the door in front and continue through the next hallway.  In the room here there is a ladder on the left side as you enter are some lockers containing some med kits and to the right of the ladder there is a shelf containing a weapon part – Compact Standard Frame [Weapon Part 2/4]. When you are ready to continue, climb down the ladder.

Turn around and kill the lurker that jumps out of the vent. Use a torque bar on the wall socket here to open the door (if you don't have one, there is a nearby bech that we will activate soon so you'll be able to get one then!). Inside you will find a weapon part – Telemetry Spike [Weapon Part 3/4], a upgrade circuit [Circuit 1/2] in the locker on the wall and a bunch of resources and ammo. Return outside and climb down the stairs indicated by your suit locator. Enter the door at the bottom and mosey on through the hallway to the other side.

Climb down the ladder here and activate the generator with kinesis (note there is an upgrade circuit on the table to the right on new game +).  Climb back up the ladder and you will be attacked by a pair of slashers and a spitter. Go and use the now activated lift. At the top, loot the lockers in the hall here before proceeding through the door.

In the next room there are a couple of lockers to loot in the control room to the right. What we want to do though is check out the glowing blue box. Approach this and interact with it for a puzzle. We need to balance the power so that both needles are sitting in the green area.

  • Move 45 to the right
  • Move 60 to the right
  • Move 90 to the left
  • Move 60 to the right
  • Move 45 to the right

When you have successfully completed the puzzle an audio log [Log 1/2] will play and the nearby door will unlock. If you want to double check, the audio log is at the bottom of the stairs and you can replay the message if you wish (note there is a upgrade circuit on the floor next to the chair to the left of the unlocked door on new game +). When you are ready proceed through the now unlocked door. Continue through the next hallway and exit back into the main room.

Two slashers and an exploder will be waiting for you. Kill them and then head over to the now active bench. Make a torque bar if you don’t have one and then enter the door to the right, just above the stairs we ventured down earlier. Grab the upgrade circuit [Circuit 2/2]. Exit the shower room and follow the suit locator down the ramp and through the door indicated.

When you reach the large room with what looks like a biology lab in the centre you’ll be attacked by a lurker and spitter. When the room is clear examine the right hand wall of the room. There is a pair of purple alcoves, and the one furthest from the door has an Alien Artefact [Artefact 2/2] in it. There are tonnes of destructible crates strewn around the room as well so feel free to smash them for some ammo and when you are ready go down the lift at the back of the room.

Work your way around the set path here, around the low wall and kill the slasher hiding here.  As you approach the exit another slasher will appear, so smash him down as well before proceeding through.  As you interact with the next door, deal with the slasher that appears before continuing.

Follow the walkway around to the left and kill the swarmers that emerge from the wall in front.  Go past the bench here and use kinesis on the blue circle on the wall to open the next door. Go on through and continue until you reach a room that has plenty of electricity blocking your progress.

To get rid of this, use kinesis on the central structure to remove the panel sitting on top. Remove the semiconductor and after a few moments the electricity will stop running.  Incidentally this will also cause a number of floor panels to turn into gravity panels. Stepping on these glowing orange/pink panels is instant death, so avoid!

At the back of this room you will find a weapon part – Electric Charge [Weapon part 4/4] (note this is still there on new game + but appears as the upgraded MK-II Electric Charge). There is also a blue circle on the control panel to the right. Use kinesis on this to activate an audio log [Log 2/2].  Grab the security key from off the table to the right.

Now it’s time to backtrack. As you approach the entrance to the room a group of swarmers will rush in. Try to kill them before they can reanimate the corpses on the ground. Once you are clear continue back through the tunnel to the lift, avoiding the gravity panels as you go. Once on board, head back up to the lab.

This part can be quite tricky. There are quite a few enemies now populating the lab and more will show up as you progressively kill them. To make things a little more interesting, there are active gravity panels all over the place, so try not to back up into any of them! We can however use the gravity panels to your advantage. When a necromorph comes at you, try and put a gravity plate between them and you and 80% of the time they will run over it and be killed.

After first stepping off the elevator, four slashers and a spitter will find their way over to you in the midst of the gravity panels. Once they have been dealt with, head for the door and as you approach a further three slashers will also come out to play. Dispatch them before cruising through the door.

Return to the main area and kill the five exploders that emerge from the various vents around the room. When they are all cleared out, use the security card on the panel next to the bench to unlock the door here. Loot the various bits and bobs in here and interact with the blue monitor on the back wall to complete the mission.

Back track outside to resume the main story. 

Jump to a section:

Share C.M.S Greely with others

< Prev: Side Missions Next: Conning Tower >

Last updated by Sokkus, 12th February

Do you want to earn money creating pages just like this? Gamewise is currently looking for writers, find out more here.

Around the Network

Dead Space 3 Brainwaves

View all →

  • 13th December, 0 replies

    dead space 3 chap 18 stuck help

  • 19th June, 1 replies

    A New Dead Space "Absolutely" Will be Made

    According to EA Studios executive vice president Patrick Söderlund, the Dead Space series will return....

  • 11th September, 1 replies

    Dead Space 3 (general and co-op)

    I'll start by warning you that this is less a review, more a list of complaints. If you want some kind...

Dead Space 3 Walkthrough

Campaign Missions

Prologue: Beginnings Chapter 1: Rude Awakening Chapter 2: On Your Own Chapter 3: The Lost Flotilla Chapter 4: History's Ember Chapter 5: Expect Delays Chapter 6: Repair to Ride Chapter 7: Mayhem Chapter 8: Off the Grid Chapter 9: Onward Chapter 10: Now We Know Chapter 11: Signal Hunting Chapter 12: Autopsy Chapter 13: Reach for the Sky Chapter 14: Everything Has Its Place Chapter 15: A Change of Fortune Chapter 16: What Lies Below Chapter 17: A Strange City Chapter 18: Kill or be Killed Chapter 19: Endings

Side Missions

C.M.S Greely Conning Tower Supply Depot Armory Reaper Barracks Disposal Services Artifact Storage

Co-op Missions

C.M.S. Brusilov Archaeology Marker Containment

DLC 1: Awakened

Awakened 1: Requiem Awakened 2: Infidels Awakened 3: Perdition

4.15/5
1,229 ratings

Your rating:

Quick Details

Franchise(s)
Dead Space
Developer(s)
Visceral Games
Publisher(s)
Electronic Arts
Release Dates
PlayStation 3

Feb 5, 2013

Feb 8, 2013

Xbox 360

Feb 5, 2013

Feb 8, 2013

Microsoft Windows

Feb 5, 2013

Feb 8, 2013

Page Contributors

View all →

69 points Sokkus

Build the ultimate game collection now!

Log In with Facebook

Popular Brainwaves

View all →

  • 18th January

    There are some big games launching over the next few months

  • 6th February

    What should I get - Dead Space 3 or Bioshock Infinite?

  • 5th February

    Dead Space 3 Awakened DLC Announced

    Dead Space 3 released today in North America, so what better time for Visceral to announce the first...

Gamewise
The world of video games at your fingertips.
About · Contact · Advertise · Blog · Press · Facebook · Twitter · Google+ · YouTube
© 2012-2025 All rights reserved · Terms of Use · Privacy Policy · Contribution Guidelines
Trending: Emoji | Candy | Mods | GTA | Pics | Flappy | Clans | Food recipes | Sticky Toffee Cupcakes Recipe | Tetris | Evil Apples

Please log in to continue

Log In to Gamewise

Log In or Sign Up via Facebook

Existing Members without Facebook

Forgotten password?

close
  • Main Menu
  • Home
  • Games
    • Games
    • Most Popular
    • Discover
    • Rate
    • Top Rated
    • Recent Releases
    • Coming Soon
    • Release Dates
    • Recently Added
    • More
    • Platforms
    • Characters
    • Companies
    • People
    • Franchises
  • Brainwaves
    • Brainwaves
    • Most Popular
    • Articles
    • Discussions
    • Thoughts
    • Reviews
    • Trending
    • Dragon's Dogma
    • Grand Theft Auto V
    • The Elder Scrolls V: Skyrim
    • 4 Pics 1 Song
    • The Binding of Isaac
  • Contributions
    • Contributions
    • All
    • Most Popular
    • Collections
    • Most Popular
    • Lists
    • Galleries
  • Dead Space 3
  • Details
  • Releases
  • Credits
  • Content
  • Overview
  • Story
  • Gameplay
  • Collectibles
    • Prologue
    • Chapter 1
    • Chapter 2
    • Chapter 3
    • Chapter 4
    • Chapter 5
    • Chapter 6
    • Chapter 7
    • Chapter 8
    • Chapter 9
    • Chapter 10
    • Chapter 11
    • Chapter 12
    • Chapter 13
    • Chapter 14
    • Chapter 15
    • Chapter 16
    • Chapter 17
    • Chapter 18
    • Chapter 19
  • Enemies
    • Feeders
    • Fodders
    • Nexus
    • Unitologist Soldiers
    • The Swarm
    • Stalkers
    • Dividers
    • Slashers
    • Lurkers
    • Leapers
    • The Hunter
    • Pukers
    • Twitchers
    • Guardians
    • Pods
    • Infector
    • Snow Beast
    • Unknown Regenerator
  • Editions
    • Dev-Team Edition
    • Limited Edition
  • DLC
    • Awakened
  • Media
    • Videos
      • Download Content
  • Guides
  • Walkthrough
    • Campaign Missions
      • Prologue: Beginnings
      • Chapter 1: Rude Awakening
      • Chapter 2: On Your Own
      • Chapter 3: The Lost Flotilla
      • Chapter 4: History's Ember
      • Chapter 5: Expect Delays
      • Chapter 6: Repair to Ride
      • Chapter 7: Mayhem
      • Chapter 8: Off the Grid
      • Chapter 9: Onward
      • Chapter 10: Now We Know
      • Chapter 11: Signal Hunting
      • Chapter 12: Autopsy
      • Chapter 13: Reach for the Sky
      • Chapter 14: Everything Has Its Place
      • Chapter 15: A Change of Fortune
      • Chapter 16: What Lies Below
      • Chapter 17: A Strange City
      • Chapter 18: Kill or be Killed
      • Chapter 19: Endings
    • Side Missions
      • C.M.S Greely
      • Conning Tower
      • Supply Depot
      • Armory
      • Reaper Barracks
      • Disposal Services
      • Artifact Storage
    • Co-op Missions
      • C.M.S. Brusilov
      • Archaeology
      • Marker Containment
    • DLC 1: Awakened
      • Awakened 1: Requiem
      • Awakened 2: Infidels
      • Awakened 3: Perdition
  • Achievements
    • Xbox Achievements
    • PlayStation Trophies
  • Cheats
    • Hacks