Nexus-03 Site
After entering the Nexus research site, follow the catwalk all the way around to the left and enter the door at the end.
Furnace Room
As you enter, look on the table to the left for an audio log [Log 1/4]. Enter the next door and look on the wall to the left for a locker containing an upgrade circuit [Circuit 1/4]. Loot the lockers before proceeding up the lift to the roof.
Exit the lift and move forward a short distance. This will cause 4 leapers and 3 wasters to spawn at the far side of the area and run over to greet you. Fortunately, they will only come one or two at a time though, so they should not cause you too much grief. Once no more enemies are forthcoming, look to the left of the elevator we just rode to find a panel we can interact with. Remove this and grab the battery from the socket. Carry this to the far side of the roof and pop it through the half open door into the room there.
Return to the lift and climb the ladder nearby. Follow the catwalk here to the far end and kill the 3 wasters you encounter along the way. Climb down the ladder and look around to the right at the far end of the room. Loot the locker on the wall for an upgrade circuit [Circuit 2/4]. Grab the battery and stick it into the slot. Activate the panel that lights up and then kill the waster that appears.
Return outside and work your way back to the elevator. As you approach, a legless waster and a pair of leapers will emerge from the fog. Kill them and then continue down the lift and backtrack through the furnace room to the Nexus area.
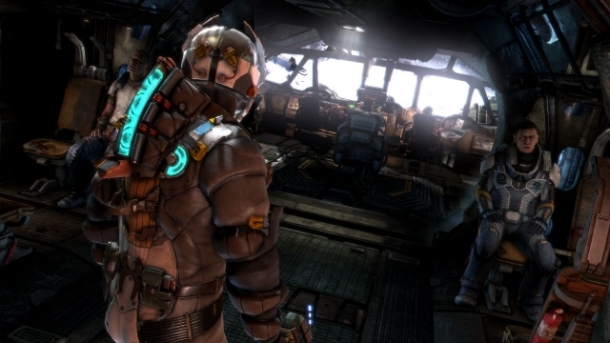
Nexus-03 Site
Continue back along the walkway here until you reach the control panel between the four cranks on the left. Activate the screen here. Afterwards you will need to use kinesis on the cranks nearby to increase the pressure in the furnace. Each of the four cranks is numbered and the game will let you know which crank needs to be turned by lighting up the number on the machine above the necessary crank. Simply move from crank to crank using kinesis to charge them up until the machine’s bar shows as full red. At this point mosey on back to the computer panel and activate it.
Follow the walkway around to the right and use the bench if you feel the need to do so. When you are ready, get in the lift and ride it up to the observation deck. Turn left and after a short conversation with Santos, she will give you a Blueprint – Probe Gun [Note this blueprint does not count towards your collectible count].
Return back down the lift and enter the door to the left to exit the building, continue back to the previous lift and enter the door at the bottom to re-enter the coring platform.
Coring Platform
Continue through the coring platform, using the bench if you require it (I’d recommend creating a torque bar if you do not have one) and doing any additional looting that you may have neglected to do before and exit through the door on the far side. Head over to the building on the right and you can now use the access codes Santos gave you on the panel here to unlock the door. Continue inside.
Plateau Access
Take the first left to find an active elevator, but don’t miss grabbing the text log [Log 2/4] from the crate opposite. When you are ready to press on, ride the lift up to the next area.
Upon exiting the building and moving forwards slightly, you will see a short scene. Here we will also be introduced to a new necromorph – the Stalker.
| New Enemy: Stalkers |
| Stalkers are probably the most nimble of the necromorphs you are likely to encounter in Dead Space 3. They are elusive and will hide behind objects and stick their heads out from time to time. When they get a clear line on you they will charge out of cover at high speed to attack you. A couple of shots to the legs will get rid of them, but most areas where you encounter them are quite open, which leaves them with plenty of obstructions and cover that they can use to sneak up on you. As such, when stalkers are about, you need to keep track of your surroundings! Your best bet is to retreat back to an open area so that the stalkers will have to charge at you across open ground for a good distance so that you can de-limb them before they reach you. Stasis works to slow their advances as well! |
Follow the snowy path here, killing the five stalkers that will come to attack you as you progress. Continue past the construction equipment and up the hill to an open door labelled Barracks. Before entering, look to the left, head around the side of the building here to find a couple of crates to smash and a Unitologist Artefact [Artefact 1/1].
Enter the building and you will see a projector playing a video against the wall to the right. You will find a text log [Log 3/4] on a table to the right of the projector. On the left-hand side of the room are some lockers to loot. There is also another text log [Log 4/4] near here (note that on the table in front of the lockers there is an upgrade circuit on new game +).
Once you have looted those, go over and use a torque bar to open the locked door here. Inside you will find a weapon part – compact repeater [Weapon Part 1/1] (this appears as a MK-II Compact Repeater on New Game +) on the shelf to the left and an upgrade circuit [Circuit 3/4] on the back wall. Loot the rest of the room and then duck into the hallway next to the projector to find a lift we can take to proceed.
Staging Yard
Upon exiting into the staging yard, move forward slightly and a pack of stalkers will let their presence be known. There are 6-7 stalkers in the area and as such you really need to keep an eye out as they can sneak up on you quite easily. Your best bet is to stay in a corner with a decent view of the area (this will limit the number of places that they can approach from) and use stasis on them as you see them charge and put them down before they arrive.
Once the area is clear, make your way over to the locked door with the panels we can access in front of it. Play the mini-game to unlock the door and then proceed inside.
Nexus-02 Site
Enter the door down the hallway to the left. As you enter the observation area, turn right and grab the upgrade circuit [4/4] from the locker on the wall next to the door. After a short conversation, we’ll need to find three pieces to make our weapon. Continue to follow the walkway here past the ladder to the very end. Here, turn to the left and use kinesis on the crank suspended above the centre of the room. Return to the ladder and climb down.
On the lower level, you will find the first piece, the Probe Tip on the edge of the metal platform overlooking the cliff below. The second piece, the Probe Frame will be sitting in the cage nearby that we lowered earlier using kinesis from the upper level. The final piece, the Probe Engine will be sitting on a table surrounded by med packs on the walkway to the right of the ladder.
Once all three pieces of the blueprint have been acquired, climb back up the ladder and backtrack through the door and back outside to the Staging Yard.
Staging Yard
Upon returning to the staging yard a short scene will play and you will find yourself once again squaring off against the snow beast. As with the previous encounter, we need to avoid his lunge and charge attacks whilst waiting for the tentacles to emerge from his back to shoot them. Once all three tentacles are severed, his chest will open to reveal three more. When it opens, stick him in stasis and shoot all three bulbs to damage him. Repeat this whole process three times and afterwards the snow beast will once again run off.
After the fight a short radio conversation will ensue and a new optional mission will be added. To access this, we can go through the now open door on the far side of the Staging Yard – it’s the one will all of the flares on the ground in front of it. It is also a good time to backtrack back to the start of the base to do the second optional co-operative mission as well.
You can find walkthroughs for the optional missions here:
If you decided to complete the optional mission, you will end up on the cliff outside the Coring Platform, if you did not feel like smashing out the optional mission, you simply need to backtrack all the way to the top of the cliff before the Coring Platform.
Coring platform
Work your way back to where we had the intense standoff with the drill bit before. As you arrive a group of swarmers will come and reanimate the bodies in the centre of the floor and 3 slashers will also pop out of vents to attack you. Kill them all and continue up the icy slope and through the door. Use the lift to get back up top and fight off the pair of spitters and the swarmers that bring 3 commandos back to life. Once that is all done, enter the door here.
Nexus-03 Site
Once you arrive back at the Nexus facility, use a bench to craft the special weapon. Use the lift to reach the observation area and head back to where we left Santos and the rest of the crew.