 The Basics
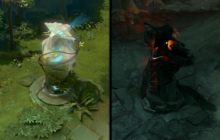
Towers play a key role in all stages of a match and are the main defensive structures in the game, protecting the lanes and the base from attack. In total there are 4 separate 'tiers' of towers for each side. The first two tiers are in the lanes of the map, whilst the last two tiers are located within the team's base (and are therefore much harder to destroy).
Attributes
All towers have an attack range of 700, a true sight range of 900 (i.e. they detect invisibility) and deal 75% siege damage to heroes and 150% to creeps.
Each 'tier' is invulnerable to attack until the lesser tier tower has been destroyed. So, for example, if all of the towers are in tact on the battlefield you will not be able to attack your enemy's tier 2, 3 or 4 towers.
Tier 1 towers have 1,300 health and have 18 armour. They deal 100-120 damage at a slightly slower rate of fire than the other towers. All of the other towers have 1,600 health and deal progressiely more damage.
Additionally, towers have what is called backdoor protection. This means that if the creep wave has not progressed towards the tower and you attack it, it will regenerate at a rate of 90 hit points per second and will take 25% less damage from illusions.
Gold Bounty
Towers are also a significant source of bounty, providing the enemy team with large amounts of gold upon destruction (and a tiny amount of experience). The amount distributed varies depending on a number of different factors, including whether a hero gets the last hit or a creep, whether the enemy team manages to 'deny' a tower on low life (130 hp or lower for tier 1 towers, 160 for the rest), and which tier the tower belongs to.
The following table presents a clear summary of the different possible outcomes:
| Tier | Bounty (Hero Last Hit) | Bounty (Faction Last Hit) | Bounty (Denied) |
|---|---|---|---|
| 1 | 452 - 470 unreliable Gold | 160 reliable Gold | 80 reliable Gold |
| 2 | 502 - 520 unreliable Gold | 200 reliable Gold | 100 reliable Gold |
| 3 | 552 - 570 unreliable Gold | 240 reliable Gold | 120 reliable Gold |
| 4 | 602 - 620 unreliable Gold | 280 reliable Gold | 140 reliable Gold |
Targetting
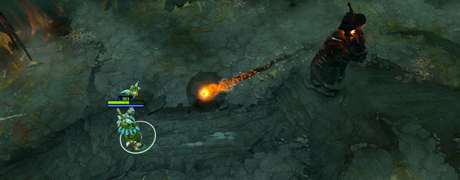
Towers can have a huge impact on a team fight if one takes place around a tower and having tower 'aggro' can be the difference between winning and losing an engagement, especially during the early stage of a match.
 Towers actually have a very specific target priority system that determines which unit it will attack. This system can be effectively (and intentionally) worked around by adopting a few changes to your playing style.
The following is the order in which the tower will attack:
- The closest enemy unit or hero attacking a friendly hero.
- The closest enemy unit or hero attacking the tower itself.
- The closest enemy unit or hero attacking any friendly unit.
- The closest enemy unit.
- The closest enemy catapult.
- The closest enemy hero.
The tower will switch targets if any of the following happen:
- If the targeted enemy unit or hero dies.
- If the targeted enemy unit or hero moves out of range of the tower.
- If an enemy unit or hero begins to target a friendly hero.
- If an enemy hero being attacked by the tower manually attacks a friendly unit or hero.
Thus, by entering the range of the tower to close the gap with your opponent you will not actually attract the tower's aggro. You will, however, attract it if you begin to attack the enemy hero. Once you break off from your engagement the tower will still attack you, however you can manually attack (A + mouse click) one of your own creeps to remove the tower aggro.
It's also worth noting that casting spells on enemy heroes does not in itself count as attacking them, so again, the tower will not attack you if all you do is cast a spell on the enemy.