The following is list of some of the basics of gameplay, mostly non-combat gameplay. If you want to know more about combat, please see the Combat page.
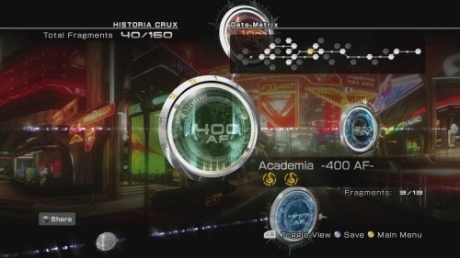
Historia Crux
Instead of a world map, FFXIII-2 has the Historia Crux, a hub for all times and locations that your players have unlocked through the story of by finding Artefacts and opening gates. Players can freely go back and forth between all the areas that are unlocked, unless you are in the middle of a section where you can not leave to the Historia Crux, and can even replay the story sections over again by closing the gate an entering, resetting the area and allowing them to do it all over again.
Treasures
Treasure Spheres
These spheres are all over the maps and usually contain normal items such as gil and Phoenix Downs. Once opened, a marker will appear on the map so that you can keep track of opened spheres. Treasure Spheres are always located in the same place on the map, in each of the time periods, and will always contain the same item, no matter when you open them.
Treasure Boxes
These boxes will usually contain items that are story related, side quests items, or rewards for decisions that you made in the Live Triggers. These do not appear marked on the map when you open them, so keep track of this. Also note, these will only appear in one timeline, so open them immediately.
Moogle Hunt & Moogle Throw
Somtimes, invisible treasures or treasures out of reach can be found by having Mog search the nearby locations. Using the command key for Moogle Hunt, Mog can fix temporal displacements and bring the item into the world.
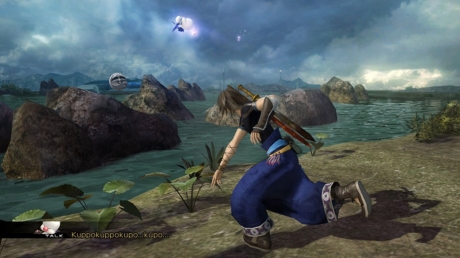
In other occasions, treasures will be out of reach on high ledges or floating in mid-air. To get these you will need to unlock Moogle Throw, which allows you to grab Mog and throw him to the desired location. If there is no treasure in that location, Mog may come back with something else completely.
Live Triggers
Live Trigger's are event related questions you are asked in a conversation, usually with NPCs. Depending on your answer, you can earn Adornments for your Tamed Monsters.
The first time you play through an area you have access to every question in the zone, but on subsequent playthroughs (via Closing Gates) you may not have access to them all. That being said, there is always enough questions with funny answers to get either of the two Adornments rewarded.
For more details, see the Live Triggers section.
Temporal Rift Puzzles
In some maps, you may come across temporal rifts that you will need to enter and solve a puzzle to proceed with the story. For the most part, the Temporal Rift Puzzles are easy. The only exception to this is the Hands of Time puzzles.
Tile Trails
These puzzles are the first you will run into and are fairly easy. The object is to grab all the crystals and then walk to the gate. If you run out of tiles, you will have to try again.
- Red Tiles - These can only be walked over once and will disappear
- White Tiles - These can be walked over twice before they disappear
Crystal Bonds
These puzzles are not hard, but are time sensitive. Your objective is to connect the crystals in the required pattern. The only thing that can really trip you up is the fact that the crystals will change color every 3 seconds. You can stop this by grabbing a crystal strand though.
The Hands of Time
Easily the hardest puzzles in the game, these will start out easy and get harder each level you play. Your object is to clear the clock of all the numbers without having both hands end on empty spots. This means you need to make sure that whatever number you pick, at least one hand will end on a number. Once you have 1 number left and have a hand move to it, you can advance to the gate.
Because these puzzles are randomly generated, tips are the only info available.
- Hands that are half the clocks value will always only have one possible move, since both hands will land on the same number. Use this to plan the moves before and after its value.
- In the larger clocks, taking out the small numbers will make you have a smaller clock with less values. This will help you see the puzzle more clearly. The only negative is that you may need those small numbers to traverse the large ones.
- Don't try to plan out the whole puzzle ahead of time. There is no ONE solution. Try taking out a few numbers before slowing down and seeing what you have left.
- NEVER give up. Even when it seems like something isn't working, keep trying different variations. Sometimes a number will be giving you a problem, save it for last... maybe you want to end on it.
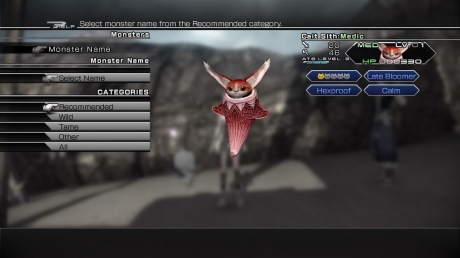
Taming Monsters
Every time you take part in a battle with a recruitable monster you have a chance to obtain their monster crystal, except if you already have their crystal. Once done, you can add them to your party through the Paradigm Pack and then insert them into your Paradigm Shifts.
Like Serah and Noel, these monsters can be developed through Crystarium to make them stronger. Some can only be developed to a low level, while others can be developed further.
If you find you don't like how a tamed monster is being developed and want to start fresh, there is an option to release them. The only problem with this is unique monsters that you only get once such as Gigantuar, Twilight Odin, Golden Chocobo, and all seven crystals obtained from Moogle Throw. Be smart if you choose to develop these characters.
For more details, see the Tamed Monsters section.
Collectibles
Fragments
Fragments serve no purpose in the game, except to get the trophy/achievement related to having all 160. These can be found by completing certain events, beating bosses, or finding them hidden in levels.
Adornments
Adornments are hats that you can put on your tamed monsters to make them cuter. Once again, they serve no actual purpose other than cosmetic look and are one of the hardest things to complete in the game.