Augusta Tower -200AF-
You’ll come to a room with orange panels. Examine them all and one of them will respond differently. Instead of an intruder alert, it will actually give you information. This will also open the door to the W. Turning right will show you two Treasure Orbs, one of which will require a Moogle Throw. Turning left instead will lead you to the next room. Before entering that room, open the nearby Treasure Orb for 1500 gil. Enter the room and examine the orange terminals again. When you find the right one, it will require a password. The correct password is said by the scientists outside as you pass them. The solution is 9261.
You’ll get the map for Augusta Tower at this point. Go back to the previous room and out through the other door. This will put you on an inner ring of the tower. If you go left, you should find a Wild Artefact on this ring just before the edge. Head back to the right this time and you’ll come to a panel that you can’t activate because of a Paradox.
Go back to the Historia Crux and travel back to Yaschas Massif 1XAF and unlock the gate on the W side of the map with a Wild Artefact.
Augusta Tower -300AF-
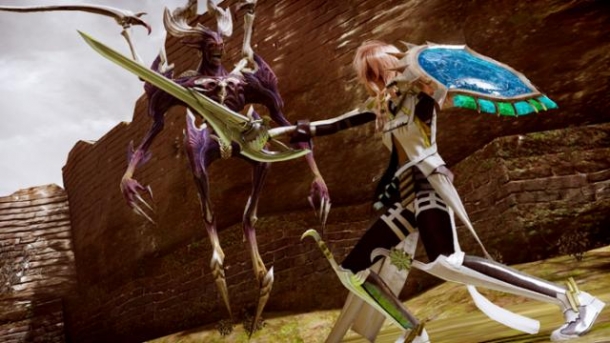
Note:You’ll find both the Flanitor and (later) the Dragoon. They are both fantastic creatures and you should catch both.
Floor 12
When you get into the first room, you’ll see a golden terminal nearby. Activate it to spin the room. Spin it once and you will be able to exit the room. When you exit the room, a computer will say “1”. The numbers you hear now will be a passcode later so write them down… or just wait and I’ll tell you the answer later.
Take a left and head to room number two (SE). Rotate this room and exit onto the outer walkway. There’s a Treasure Orb to the N, then head W and use this terminal to spin the room twice. Use this room to get back onto the middle ring. Hop onto the elevator that has come down for you.
Floor 14
An elevator will come down on the outer ring. That’s your goal. Check to the W to find Chocolina and then S of her is a terminal. Use that to spin the W room twice. Make your way to that room and loot the Treasure Orb. You’ll find yourself on the outer ring. Head S to get to the other room. Use the terminal to spin the room you are in. The first time will allow you access to a couple of Treasure Orbs and the second time will give you access to the lift. Get on and go upstairs.
Floor 15
Run straight ahead to room 7 and walk inside. Walk out of the room to the right. Just outside of the room is the terminal to spin it. Spin room 7 three times and then use room 7 to get to room 2. Just outside of room two is the terminal to spin it. Spin the room twice to gain access. Use the Computer in this room and you’ll be asked for a passcode. The code is 1237172. You will gain the Circuit Board Fragment. You will also get the Access Key 50.
Head back to the Historia Crux and travel to the same tower in 200AF.
Return to 200AF
Head back to the console that you couldn’t activate earlier and use it. This will raise an elevator from bellow which will allow you access further on. Cross the bridge and talk to Alyssa. She will teleport to the middle. Activate the nearby terminal to raise another platform. Make your way to the center platform. Before going up the elevator, make sure you spend your CP. Use the elevator and you will end up in a few battles. During these battles, I recommend you try and tame the Dragoon.
These battles shouldn’t pose a significant threat. Deal with the enemies and when you get to the top of the elevator, you will be in a large room similar to the one you just left. Around the inner ring are a bunch of terminals that rotate the rooms in front of them. You’ll need to turn each one to make one flowing path.
Floor 51
Spin the SE room once, the SW room once and W room three times. You’ll have to follow the path now until you get to the last room. Use the terminal in the room to spin the room. Make it face the middle and exit onto the inner ring. Make sure you use the computer in this room. This will give you the Access key for floor 52.
Once you’ve collected the treasure orb from the inner ring, go back into the N room and spin it back so you can head back the way you came. Make sure you collect all the treasure orbs scattered around and keep your eyes peeled on the walls. There are lots of items scattered around on the walls where you can’t reach. You can throw Mog to these however. When you get back to the inner rings, use the elevator to go up to floor 52.
Floor 52
Go to the NW, through the room to the Treasure Orb beyond. On the middle ring, head E and around to the SW room. Along the way, you’ll find another Treasure Orb. Walk through the SW room and travel along the outer ring. On the outer ring, look for another Treasure to throw Mog to for a Platinum Ticket. Go back to the SW room.
Use the terminal inside and then head SE to open the Treasure Orb. Go back through the room and out the other side. When you make it to the next room, use the terminal inside twice and make your way to the middle ring. Operate the next terminal twice and open the Treasure Orb here, then go back to the previous room and spin it twice to return it to its original position.
Move back to the outer ring and head N to the next room. Use this room to get to the next segment of the outer ring. Follow the outer ring around the N side and enter the NE room. In this room, use the orange computer to get the Access Key to the top floor. Exit back to the outer ring and head as far east as possible. You’ll find a Treasure Orb on the wall ready for a Mog Throw. Head back to the main elevator and take it up to the top floor.
On the way to the top, you’ll have to fight a Behemoth. It’s important that you raise the Behemoth’s chain gauge as high as possible and then, when he hits about half health, switch to an all commando role to kill it. When a Behemoth reaches half health, it will stand up and completely recharge its health. It’s still beatable when he stands up but it’s always nice if you can kill him before then.
Top Floor
There is a Chocolina shop to the north. On the way, open the Treasure Orb. Go up the stairs near here and at the top you’ll bump into Yuel. Talk to her and she will get you into the nearby Time Gate.
Proto Fal'Cie Adam
- Paradigms:
- Rav, Rav, Com
- Rav, Com, Med
- Sen, Sen, Sen
- Com, Com, Com (cross)
| 74250 HP | |||
|---|---|---|---|
| Element | Vulnerability | Status Immunity | Misc |
| Fire | Normal | Slow/Stop | Chain Resist: 40 |
| Ice | Normal | Poison/Dispel | Stagger: 200% |
| Electric | Normal | Imperil | Phoenix Down |
| Wind | Normal | Curse | None |
| Physical | Normal | Pain | Untamable |
| Magic | Normal | Fog | No Role |
The Proto fal’Cie is actually a pretty easy boss. Make sure that you take out the manipulators on either side first because these are capable of some pretty devastating damage. Otherwise, just stagger the fal’Cie and lay on the hurt. He should fall pretty quickly.
After you beat him the first time, you’ll have to fight him again. This time he will pack more than twice the health, will use beneficial status effects on him and negative effects on you. Otherwise, he the fight will play out almost exactly the same except being drawn out more. Make sure you abuse 1). Both of the manipulators and the fal’Cie body take massive damage when staggered.
Once you’ve defeated him again, you will go into a Cinematic Action.
- LS right
- LS up
- LS right --> B/O
- Tap A/X
- LS right --> Tap A/X
After the battle ends, you’ll succeed in killing the fal’Cie. When you are given the Live Trigger choice, you'll have two choices. You choose to scream at Hope to finish the battle or you can select every option but to fight the Fal'Cie further. Each time you kill him and the manipulators (don't forget to kill them too), it will add a new entry into your bestiary which will help with you get a fragment later. It is easy to return so it acceptable to do this at a later time. Once you regain control of Serah again, use the computer and then activate the Time Gate and head to Academia 4XXAF.
Beating this boss again later with the Paradox Scope activated will cause a Paradox Ending.