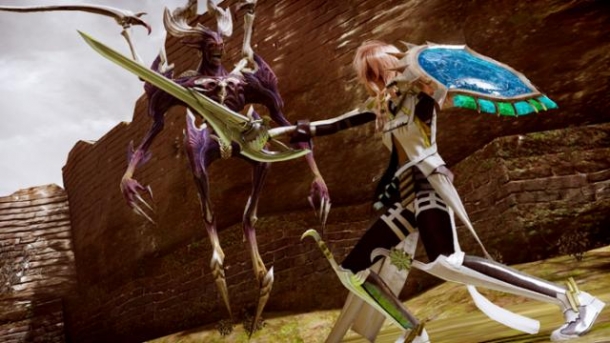
Chaos Bahamut
| 79930 HP | |||
|---|---|---|---|
| Element | Vulnerability | Status Immunity | Misc |
| Fire | Halved | Pain | Chain Resist: 60 |
| Ice | Halved | Fog | Stagger: 999% |
| Electric | Halved | Stop | Phoenix Down |
| Wind | Halved | Poison | Phoenix Blood |
| Physical | Halved | Provoke | Untamable |
| Magic | Halved | Curse/Dispel | No Role |
- Paradigms:
- Sen, Sen, Sen
- Med, Med, Med
- Com, Com, Com
- Rav, Rav, Com
- Med, Med, Com
When I started this battle, I had Serah’s health at 2592 and Noel’s health at 2774 with most of my points in Com, Rav, and Medic. I highly recommend that you go into this battle significantly stronger if possible. Or you can stock up on a lot of Wound Potions.
Thankfully, Chaos Bahamut doesn’t really regenerate health. He does have some pretty hard hitting attacks though. When he’s close, he’ll use physical attacks and most of these won’t be too devastating except for the wounding. Watch out when he’s at a distance though, he has a Breath attack that does massive damage so you should change to 1) for that. Worse still is Megaflare which can kill you at lower levels if you don’t change to 1).
If you are strong enough to manage the lesser amount of healing, you are going to want to swap between 4) and 5) for the most part except when you are in 1) for an imminent attack. The Com in 5 will keep the Chain Gauge up where 2) will likely let it fall. Once you get his Chain Gauge up there, change to 3). Chaos Bahamut can’t be staggered so you’ll have to just settle for the additional damage. Remember to abuse your Feral Links on this one.
This is a rather simple fight otherwise. He doesn’t do a whole lot of crazy things and there’s no unusual strategy to success here.
Caius 1
| 38830 HP | |||
|---|---|---|---|
| Element | Vulnerability | Status Immunity | Misc |
| Fire | Normal | Pain | Chain Resist: 50 |
| Ice | Normal | Fog | Stagger: 300% |
| Electric | Normal | Stop | None |
| Wind | Normal | Provoke | None |
| Physical | Normal | None | Untamable |
| Magic | Normal | None | No Role |
This battle can be pretty tough. Watch out for his debuffs and self buffs. At first he will only attack one person but when he hits half health, he gets really aggressive. He’ll start casting his beneficial spells frequently making him stronger and stronger while dealing wound damage. Also watch out for his Chain Break ability which will completely reset his Chain bar. There are really two strategies to this.
Fast paced:
Start with Rav, Rav, Com and lay it on thick until he is staggered. Immediately change to Com, Com, Com and start beating on him until he hits half health. At this point, he will likely break the stagger gauge. If you need to, top off your health at this point and then switch back to the Rav, Rav, Com. Stagger him again and then change to Com, Com, Com. At half health he almost always does a Chain Break but after that, it will be a little bit before he does another so you may be able to bring him down before that. This strategy will likely nearly kill you though because of his strong attacks after you lower his health past half.
Optionally, you could start the battle with a Syn, Syn, Med paradigm and boost yourself up. He will usually debuff you eventually but it might help you stay alive longer while you are being aggressive.
Medium paced:
This is similar to the previous strategy. You want to keep on the offensive but don’t be shy about healing. Unfortunately, I haven’t had a whole lot of success with this strategy against Caius.
Slow paced:
There really is no slow pace. Caius will continually use beneficial spells on himself that will stack and make him harder to kill. Eventually, what seemed like a decent battle will turn terrible. If you are strong enough to survive this then he should already be down.
Caius 2
| 52950 HP | |||
|---|---|---|---|
| Element | Vulnerability | Status Immunity | Misc |
| Fire | Normal | Pain | Chain Resist: 50 |
| Ice | Normal | Fog | Stagger: 200% |
| Electric | Normal | Stop | None |
| Wind | Normal | None | None |
| Physical | Halved | None | Untamable |
| Magic | Halved | None | No Role |
This battle is actually rather similar to the previous battle with three main differences. The first is that he can cast Ultima, which he will likely do early on. Usually I can get a Rav, Rav, Com round out before he does. Then switch to Sen, Sen, Sen to survive the Ultima, then continue towards staggering him.
The slower pace is actually a viable possibility in this fight because Caius is susceptible to Provoke now. If you want to try and keep him provoked by a Sen, you can do this but when he hits half health, he’s going to go back to his Area Effect attacks again which will somewhat negate the Sen.
The last thing of note is that when you’ve downed him, he’ll revive like he did at the end of the last fight… except that the battle won’t end and you’ll have to defeat him again. As soon as he goes down, I would swap to a Med, Med, Med and heal up quickly. Try to get to top health and back to Rav, Rav, Com with a full ATB before he’s back on his feet. Then just repeat what you did previously. He should have no buffs and he may not instant Chain Break at half health this time so this may actually be slightly easier than downing him the first.
Chaos Bahamut
| 1059000 HP | |||
|---|---|---|---|
| Element | Vulnerability | Status Immunity | Misc |
| Fire | Normal | Pain | Chain Resist: 50 |
| Ice | Normal | Fog | Stagger: 300% |
| Electric | Normal | Slow/Stop | None |
| Wind | Normal | Curse | None |
| Physical | Normal | Dispel | Untamable |
| Magic | Normal | None | No Role |
I found this fight to be significantly easier than the previous fight if you keep your eyes peeled. There are three different Bahamuts. You have to kill the Garnet and Amber ones before the Jet Bahamut will step forward to fight. Both of these Bahamuts will revive themselves after a certain period of time. Thankfully, it seems that they revive relative to when they die so that it’s staggered a little bit.
There are four attacks you have to watch out for. The first is that you need to watch out for. The first (and far more minor) is his Seeds of Destruction. It lays a bunch of seeds on the ground which will explode after a period of time. They aren’t really devastating and they may not even harm you at all but if they hit at the wrong time, it can be depressing.
The next two attacks aren’t particularly damaging if you switch to Sen, Sen, Sen. The first is Judgment Blade. He’ll raise his giant sword over his head and plunge it down. The second is his Dark Flames attack which rains fire on your head. Neither are particularly damaging and they give you enough notice to protect yourself.
By far, the most damaging is the Gigaflare. You will see the Jet Bahamut counting down to it. It’s an attack that he will execute alone if he’s alone but if the other Dragons have revived, they will do the attack together dealing far more damage. The real tricky part is that you have to watch that countdown because when it hits 1 (or just before), you want to change to your Tortoise paradigm. It’s probably the most painful thing about this attack that you can’t change paradigms once the animation for it starts.
Later on, he will start using the Dying Sun attack. It’s another attack you should Tortoise for but it’s not particularly damaging or interesting compared to the other attacks.
Otherwise, the combat is actually pretty standard. All of the Bahamuts are pretty prone to staggering and that’s the route you want to go. Light them up with Rav, Rav, Com. If you have the Cerberus-X paradigm (Com, Com, Com with a Cross tuning), it’ll definitely benefit you here. You can take your time because they won’t cause Wounding damage so feel free to play conservatively. Just make sure that as soon as Garnet or Amber appears, you take them out so you don’t get wiped out by Gigaflare.
Once you have finished this battle, sit back and watch the credits roll…
Wait... WTF!?
In classic JRPG tradition, you’ll be able to continue playing as if you were just before the final boss but you’ll have picked up some goodies. The most important is that if you go to Serendipity, you can learn a new Fragment Skill called Paradox Scope which makes certain battles more difficult and if you succeed will cause a Paradox Ending. Make sure you grab that. It’s time to tackle some Paradox Endings! And by that I mean, level up first. Trust me.