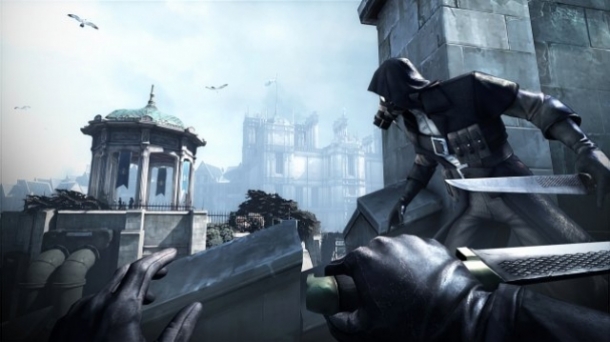
| NOTE - There are two things worth noting before you start going through this mission, one of which is that the Bottle Street Gang in this mission are neutral, so you don't have to be sneaky around them. The other is that you will encounter new enemies, called Assassins, in this mission, who have gas masks on their faces and have similar powers to your own. |
When the mission begins, you'll be dropped off at the same spot as the last mission, High Overseer Campbell. However, things are a lot different than the last mission, as enemy placements are different, and there are new Runes and Bone Charms to grab. To do this whole mission in a nonlethal manner, you will need to do the side missions for Slackjaw, who is the leader of the Bottle Street Gang.
When you walk up the second set of stairs, you'll find a guard walking around; you can take him out if you want, or continue making your way up to the first main area. You'll notice that there is a big metal door blocking access to the second area, and not a Wall of Light. There is a big spotlight here, as well as one guard walking around, but you don't need to go this way, so ignore them and head down the alley to the right.
You'll see some Bottle Street Gang members just standing around, but don't worry about them, as THEY ARE FRIENDLY and will not bother you at all. As you approach the one at the end, he will mention that Slackjaw wants to meet you. Go down to where the two other gang members are, and go inside the Dunwall Whiskey Distillery.
This place, unlike the last mission, is now a neutral zone, meaning that you don't have to worry about being stealthy here and can run around if you want. Head to where Slackjaw is and talk to him, and he will mention that he can help you infiltrate the Golden Cat, as long as you help him with something first. One of his best men, Crowley, seems to have gone missing while out gathering information, and Slackjaw wants you to find out what happened to him.
FINDING CROWLEY
Crowley is inside of Galvani's place, so you'll need to get to the second section of the city. When you exit the Distillery, you should go straight ahead and back the way you initially came, as the path to the right has some Assassins, which are tricky and might see you; two are in buildings with the balconies, and the third is on the roof just up the stairs to the right of the Distillery entrance.
Go back to the entrance area, being careful of the two guards there, and climb onto the roof heading to the second area. Since you need to go to Galvani's Offices, head to the left side and take out the guard on the second floor balcony. You can't use the third floor balcony, as you need a key to enter the door there, so head inside the second floor doors.
As soon as you are inside, head to the right and go inside the door, as there are two guards in the main room talking, who turn around not too long after you enter and start patrolling. While in this room, head to the other door and wait for the guard to come over there and turn his back, then quickly open the door and take him down, stashing his body in the room. Take down the other guard and stash his body in the same place, then head upstairs.
You'll find two men standing over a dead body, which just so happens to be Crowley. Blink over and hide in the long room adjacent to the larger one and wait until the guards stop talking. You don't have to take these ones out, but one of them has the key for the third floor balcony, so it might be helpful. Similar to the last floor, wait near the door near the stairs for the guard, then take him down when his back is turned. Do the same with the other guard, then grab the note on the desk next to Crowley's body.
Start heading your way back to Slackjaw, heading back the way you took to avoid the Assassins. When you reach Slackjaw and listen to the Audiograph, he gives you a key for the Captain's Chair Hotel, which is next to The Golden Cat. Slackjaw then mentions he has another job for you, which is to retrieve the combination for the artist, and he will take care of the Pendletons for you, taking them out nonlethally.
THE GOLDEN CAT
The next goal is to enter The Golden Cat, which will be done via the Captain's Chair Hotel, although a little detour is in order before you do that (COMPLETELY OPTIONAL). Head to the area of the map with the entrances to Galvani's Offices and the Artist's Apartment. You need to make your way to the steps on the left side, that lead down to an alley where you'll find some Weepers. Instead of going in the direction of the Weepers, head in the other direction until you overhear two guards harassing some woman about an elixir.
You can either shoot them with Sleep Darts, or just let them kill the woman. If you save her, talk to her to get the Artist's Apartment Key. If you let her get killed, you can loot the key from her dead body; letting her die has no effect on your Kills statistic at the end of the mission.
Now you have the key, you can continue on with the main mission. You need to get into the third area of the starting map, which you can do by either going across the roof connected to the second area, or by going through the alley where you got the Artist's Apartment Key. There are some guards patrolling this third area, but all you need to do is get through the door of the hotel, which leads to the door that accesses the roof area of The Golden Cat. Be careful of the swarm of rats that come down the stairs as you're climbing them.
THE ARTIST'S COMBINATION
You have two objectives at The Golden Cat, which are to retrieve the combination and to rescue Emily, the late Empress' daughter; it doesn't matter which you choose first, but it is suggested that you go after the combination first, as it makes things easier when going to rescue Emily.
Make your way across the roofs until you come upon the courtyard, where you can find a guard walking around. Take him down and if you do, stash his body on one of the wood planks above the courtyard. Blink to the ledges on the building until you get to a window, then go inside. Wait on the ledge until Madam Prudence and the guard stop talking.
The Madam will go into her office, while the guard will start walking around the room, so wait until you get a chance to take him down. Now, you will want to go through the door on the right, then the next door straight ahead. Sneak up behind Madam Prudence and steal her key (close the door), then head back to the main room.
Get close enough to the glass doors, so the guards will talk, which will make them separate, so make sure you Blink up to the window again to stay out of sight until you can take down the one guard. In the next room, there are two ladies passed out on the couch to the right, so don't worry about them, but take down the guard on the balcony near them.
Get close to the next pair of doors to have the guard and woman go their different ways, then go through the doors when the coast is clear and go through the next set right past the woman trying to wake up a guard. You will see the Art Dealer on a chair, blindfolded, with him thinking you're one of the girls. You will need to pull the lever to shock him until you get the option to make him tell his combination.
FINDING EMILY
After getting the combination from the Art Dealer, head back to the room just before Madam Prudence's office, with the stairs (not the spiraling ones). Take these stairs to the top floor, where you'll find a room with a Courtesan, an empty room and the room where Emily is located.
Go inside the room to finally rescue Emily. Emily says she knows how to escape, so follow her all the way down the stairs to the VIP Door. It is locked and Madam Prudence has the key, so if you have it, continue on. If you don't have the key, head back upstairs to steal it. Once you open the door, Emily will automatically head to where Samuel is with the boat.
ROBBING THE SAFE
Go through the VIP Door to find yourself back in the beginning area, in a little room with Granny Rags, which is connected to the alley with the Weepers. Before you go and bring the combination to Slackjaw, you might want to go to the Art Dealer's apartment to rob the safe yourself. Go back to the area with Galvani's Offices, but you want the other balconies on the other side.
As soon as you go through the door to inside the apartment, go straight to your left and inside the room with the open door, closing it behind you. Once the enemies in the room start walking around, wait until the one goes slightly left of the door until you go out, choke him, and quickly bring him back into the room.
With the first guy subdued, wait until you get a chance at the second guy, then place him into the room, too. Go up to the safe and input the combination to open it and grab all of the goodies inside. Once you're done, exit outside to get back to the first main area.
CLEANING UP
When you get back to the first main area, start heading back to Slackjaw. As soon as you speak to him and give the combination, the Pendleton twins will automatically be taken care of, nonlethally. With that over, the last thing you need to do is head back to the boat and tell Samuel you're done here.


