| C | Item |
| Rosenkov Chestplate | |
| Medical Treatment Plan |
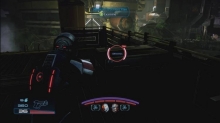
From Nyrek, turn left and go down to find the Rosenkov Materials Chestplate. Again, from Nyrek, pass by him to the left and walk straight towards the ladder to find the Medical Treatment Plan. Now make your way over to Captain Riley. Past her, take a right and you'll enter a room with the Crane Display. Activate that, then hit the center button and the right button. In this little room will be some Spare Parts to salvage on the floor. Go back to where Riley was and activate the computer terminal there. Go back to the Crane Display and hit the same buttons again. Activate the Crane Display again, Press the center button, then the left button and then the center button again to lift the next box. Activate the Display again and press the right button and then the center button to drop the box. From here, move towards the ladder but don't go down it.

Turn right and follow the right wall to the terminal to Vent Sector A1. Head over to the Fuel Rod Control terminal. When you do, you'll be attacked by a bunch of Husks and a Marauder. Take out the Marauder quickly with an overload and let loose with Biotics. Unfortunately, you aren't in a good spot so you'll just have to be aggressive to get out.
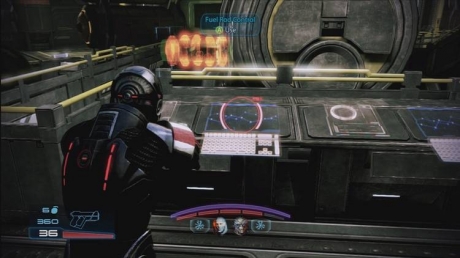
After you've gotten rid of the Reaper minions, seal the two tanks. After they are both sealed, you'll have to reactivate the reactor. Just to the left of the terminal to do so (and down) will be a PDA. Collect that and then prepare for a fight. This time you have a better position but tougher enemies. Move to the left and look for the two Barrier Engines. You need to hit the one on the left with regular weapon fire because it's hard to hit it with an Overload. Then as you retreat to a better position, hit the other Barrier Engine with an Overload. After that, this is just a regular fight with Marauder's and Husks. Use Singularity and Pull to slow the Husks down and Overload to strip the shields of the Marauders. After a few waves, they'll stay dead.
After this point, you'll have a choice to make. You can send one of your people to help the other group or you can choose not to. After you make your choice, you will have to fight a Brute and two Marauders. Where the Brute starts is a Barrier Engine so the Brute will start with some shields. Wait until the Brute is out of range of the Engine and strip its shields. Then set about killing it as quickly as possible so you can focus on the Marauders rather than have to dodge the Brute and the Marauders at the same time. When you've killed them all, Initiate Startup. Head across the building to the Extract Point to finish the mission.
| If you choose not to help Riley, she will die defending her squad member. If this happens, you can authorize a medal for her at the Spectre HQ. If you choose to send help, she will survive. |