| C | Item | C | Item |
| Deathmask | Pistol Melee Stunner | ||
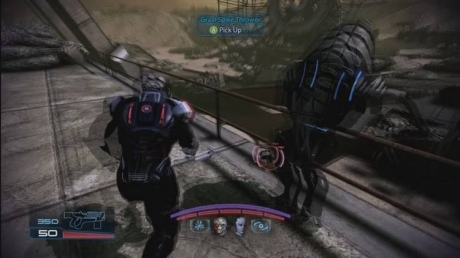
| Graal Spike Thrower | SMG Scope | ||
| Shotgun Smart Choke | Assault Rifle Barrel | ||
| Pistol Magazine | M-5 Phalanx |
| Important Note: |
| It is a good idea to do Attican Traverse: The Rachni, Tuchanka: Turian Platoon, and Tuchanka: Bomb before this mission. It is possible these missions won't be available after this mission. It also wouldn't hurt to do N7: Cerberus Attack. |
A good biotic squad will work well here. In the first room you come to, you'll have to fight a bunch of Husks. Kill them all (Use lots of singularity) and then a scene will play out.
After you get out of your vehicle, you will be at a rest stop. There will be quite a few things scattered around the area. Next to the Krogan working on the tires will be a Shotgun Smart Choke, Death Mask (armor), and a Pistol Melee Stunner. To the left of those by another vehicle will be a Pistol Magazine upgrade. Across from the vehicles, leaning on the rail by a Krogan will be the Graal Spike Thrower. There will also be a Med Kit near the Spike Thrower and another not far from it just barely covered by shadows. Talk to theScout by the rubble at the far left.
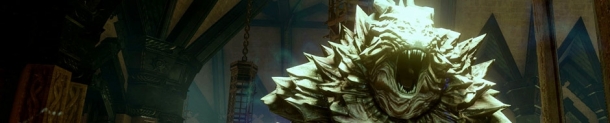
Make your way into the Ruins. You'll fall down a small ledge and then turn on your light as you make your way down some stairs. Go up and take the door at the back right. You'll come to a room with a large fallen slab in the middle. Make your way through some rooms until you see a Mural of a group of three Krogan sitting before another Krogan. Go down a large flight of stairs. In a further room, you'll find a large Mural of Kalros. Walk past a Rachni body (if you've helped the Krogan Squad). Go up the large stairs and you'll come into a green ruin.
Outside, make your way along this platform. The platform will narrow and you'll be attacked by some Ravagers and Cannibals. Have your squad focus on the Ravagers because there's plenty of cover to keep yourself safe from the Cannibals in the meantime. Once they are dead, clean up the Cannibals but watch for their grenades. Head towards the back left and you'll come to some stairs and a bridge. Go over the bridge and jump the gap.
On the other side of the bridge, you'll come to an area with an indentation in the ground and a bunch of Cannibals. Kill the Cannibals and then head through the room. As you come to the back corner to leave, a group of Cannibals and a Brute will appear. Drop a Singularity/Warp combo on the Cannibals which should kill most of them quickly. As soon as you can, focus on the Brute and take him down. Thankfully the area isn't as easy for him to navigate as it first appears. If he gets close, you have plenty of room to back track. You can even go back over the bridge if you need.
Go past where the Brute came from and you'll come to an area that leads to what looks like a large city gate. You'll be attacked by Husks and Ravagers which can be very dangerous. Try and use powers to kill the Husks so you can stay mostly in cover while the Ravagers pound on your cover. Once you are fairly certain that you are safe, kill the Ravagers.
Go through the City Gate and between the large Krogan Statues on the bridge. Jump the new hole in the bridge and continue along this overpass. You'll come to a large, diamond shaped area with many Krogan Statues. You'll be attacked by a group of Cannibals from the left and right. Stay at a distance and take the Cannibals out. Once they are dead, Husks will appear and likely a Marauder from the left. Try and take the Marauder out if you have a chance so that he can't help the Husks. This may not be possible though so back track the Husks out of his range and kill them. Once they are dead, kill the Marauder. On this platform, you will find an SMG Scope near some ammo and a crumbled tower.
Go past the point where the Marauder came from. Go up the large stairs and when you see the big picture of Kalros, turn around and on the right side of the stairs (left as you came up them) should be the Assault Rifle Extended Barrel. Now go in past the picture of Kalros. On the other side, drop down to the sand to rejoin the Urdnot leader.
When you find out what the plan is, watch out for the Cannibals dropping. Just watch for the grenades because there could be a lot of them and the cover is at strange angles here. When you've cleared the area, go up the large staircase to the left. At the top you will find the M-5 Phalanx. From there, turn around and follow the hallway until it leads across a large bridge. Cross the bridge.
You'll end up on the lower level. At this point, run straight up the middle towards the Reaper. Take cover near the stairs. At this point, you'll have to take cover every chance you get so that you don't get fried. Work your way up slowly. When you go down some stairs and come to a large arena like area, be ready for a fight. You'll be attacked by a large group of Brutes (like 6+). You can continually back pedal around the area and kill them all or you can just run for each of the Hammers and activate them to end this fight. Just be careful that you keep all of the Brutes in the same direction so that they can only ever attack you from one angle.
After you've returned to the Normandy, you'll take another funky nap but it operates just the same as the last one.