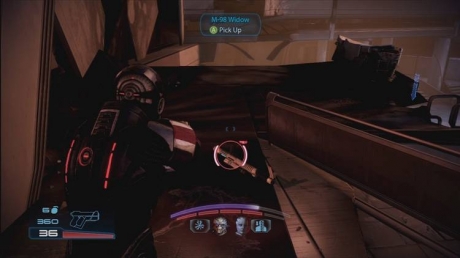
| Umbra Visor | |
| M-98 Widow | |
| Sniper Concentration | |
| Assault Rifle Barrel | |
| SMG Heat Sink |
I would take a heavily biotic group with one person who has Overload. When you land, make your way down the rubble to the Asari fighting below. You'll have to jump up on a nearby turret and keep the Reapers off of the Asari barrier. In the distance, on the left side of the road, will be a Barrier Engine. Destroy that first and then start working on the Brutes and Husks. Always make sure nothing is attacking the barrier and kill anything that is first. Once they are all dead, you'll talk to the Asari again and then set off to find the relic.
As you approach the end of the bridge, you'll be attacked by some Cannibals and Marauders. They will be way down the bridge and shouldn't pose a problem. They were so far away in fact that they never got close enough to shoot me. Use your biotics to keep them away while you get rid of them. Go into the building at the end. When you come outside, you'll be in a large courtyard.
Down below will be a couple of Marauders but they are alone and shouldn't be a problem. Kill them and go down but move through cover because a couple of Cannibals will appear shooting in the distance on your right. Clear them out and some drop pods will appear. These will leave behind a bunch of Marauders and Cannibals. They'll be even further away but there will be a lot more of them. Just keep your distance and move up slowly only when it's safe (check your radar). Inside the building on your right will be a Med Kit on the ground. You'll find another Med Kit on the ground just to the left of the stairs leading up the back of the courtyard. Go up these steps and make sure to destroy the Spore Pods on the way.
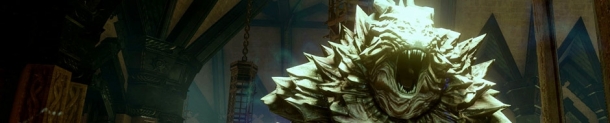
When you get close to the top, you'll be attacked by a couple of Marauders and a Banshee. It's very important that you use your powers to eliminate the Marauders quickly so you have the ability to move around freely while fighting the Banshee. Focus your squad on the Banshee and use their abilities to strip and lift the Marauders while you clean them up. When they are done, focus all your attention on the Banshee and make sure you swap weapons when her Barrier is gone. Once she is dead, go up through the giant fountain to ramp at the back (where the Banshee came from). Inside the building, you'll drop down to a lower floor with a piece of Salvage at your feet. Bypass the door at the end of the hall.
Once outside, kill the couple of Cannibals below. They won't pay any attention so they should be quite easy. Go up the back to where the Sniper team is. Behind the snipers will be a Sniper Rifle Concentration Module and a Med Kit. To the Sniper's left will be the M-98 Widow. There will be a lot of fire from below. There will be lots of Cannibals and Marauders. There's also a Barrier Engine on the back wall so make sure you take that out quickly. Then start killing the enemies below. As long as you stay in cover, you should be fine but if you pop out, there's enough of them below that they'll make short work of you if you aren't careful. Once they are dead and you have all of the equipment, drop down to the lower level and exit through the broken segment of wall.
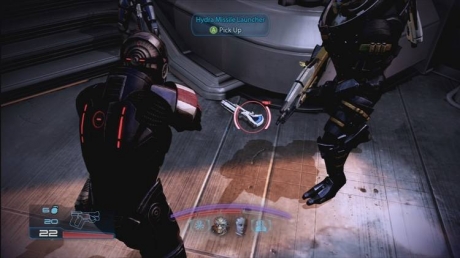
Climb the ledges and meet up with the Commando at the top. Talk to her and you can persuade her to give you Air Support. After this chat, you'll be attacked. There will be a Hydra Missile Launcher right at your feet. Grab it and retreat to behind the glass barriers. From here, start working off the Banshee's shields and then when they are gone, use the Hydra on it. There's a Barrier Engine on the left wall but way back. Try to take that out and then clean up the Marauders and Ravagers in the area. Make your way up the pile of Rubble and take a right. You'll be in the water and just before a group of Pods will be an Assault Rifle Extended Barrel.
After you pick that up, there will be a bunch of Husks. Just mow them down and move ahead. You'll be without Air Support and a couple of Harvesters will appear. Between where they land is a Barrier Engine. Make sure you take that out fast because you don't want two Harvesters with Barriers as thick as their armor. Once that is down, do whatever will keep you alive. If you can manage to kill the Harvesters while not being in any danger do so. If you can't then don't worry about it because they will eventually leave anyway. Go to the end of this platform and turn left (or right for a nice view). Just in front of a blue force field will be an ammo crate and an SMG Heat Sink.
Inside, study the different artifacts around the room and then study the statue in the middle. After that, the points you want to activate are the mural just to the right of the statue, the manuscript on the back wall to the left of the statue, the Shield, and the bust on the right side. Once you've done that, activate the beacon.
You'll have a fight on your hands. You actually only need to strip him of his shields so start shooting at him and hitting him with Overload. When he retreats, put yourself behind one of the supports that come down to where the benches are and use that to block out the light from the Gunship. Wait there (and if you think you can, hit Kai Leng). When it goes away, starting hitting Kai Leng again. If you need to use Medi-Gel, do so. After three or four rounds, you should have his shields gone.