| C | Item | C | Item |
| Shotgun Blade | Sniper Concentration | ||
| Rosenkov Gauntlets | Pistol Melee Stunner | ||
| SMG Heat Sink | Turian Technology | ||
| Pistol Scope | Turret Control Schematics |
While the last mission was Reaper, this one is all Cerberus. When you land, fight your way to the back of the area but move slowly. There are a lot of Troopers, Centurions and Engineers in the area. There's a Generator about half way through the area that will provide cover for the Cerberus Troops. I found moving up the left side to be the safest way up. Work your way along until you get to a point where there's a little trough that you can drop into to protect yourself. From here, watch out for grenades and make your way up to the back of the area.
Once you get inside, go up the ramp to the left and at the top go straight into the dead end. You should find a Shotgun Blade Attachment here. Turn right and continue on. Doing this will lead you to some resistance. When you come upon the Cerberus Troopers, try to prioritize on the generators and engineers. There is a nice little alley to the right that you can move up to take flank the Cerberus Troops. From this angle, you can also hit the Shield Generators in the back. Clear the room and go through to the left back of the room. You'll find more enemies here with more Generators but they shouldn't pose a problem.
At the end of one of the dark hallways in this area should be the Rosenkov Materials Gauntlets. Just past that last group on some rubble to the right will be a Computer to salvage. Climb up on the next ledge and then climb up the ledge to your left. At the end will be an SMG Heat sink. From here, when you turn left, you'll come across a small group of Cerberus and fight them over the previous room. Do watch for the few Centurions in this group. Go over this bridge and to the next area. You'll come to a large room with a drop on the right. To the left will be a Pistol Scope and a Med Kit.
When you go down the ramp into the lower area on the right, you should see a couple of Cerberus Centurions in the distance. Try and stop them quickly before they board the shuttle (it's ok if you don't). In their camp will be a Datapad. From their camp, turn left and start pushing towards the Cerberus Assault Troopers. You'll come to a Cerberus Shuttle in the air. When you approach it, it will fly off. That's when you'll see the bomb.
Turn right from the bomb and climb the ladder. At the top of the ladder on top of some boxes will be a Sniper Rifle Concentration Module. Move to the left of those boxes, down the hall and then go right into the building. In the rubble on the right will be a Pistol Melee Stunner. From there, turn left and go down the broken section of floor.
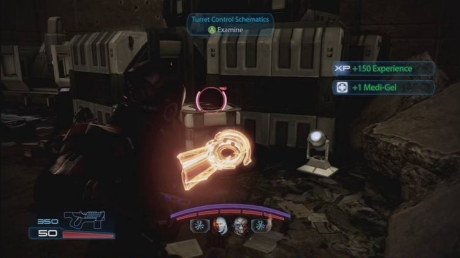
Turn left into the next room with the broken ceiling. Move up the left wall. Make sure you hug it and get to the lab machine. On that will be Turian Technology you can salvage. Use the lab equipment for cover and take out the auto-turret at the end. Where the turret was will be a Med Kit and the Turret Control Schematics. Go through the hole in the wall to the left. Follow the walkway and drop down the ladder.
At this point, you'll have to protect Lt. Victus. Drop down off the ledge you are on to the wall that splits the path. Use the Radar to tell which side the Cerberus Troops are coming from. The first wave will just be Assault Troopers. Eventually, you'll get some Centurions as well. Just watch for where the shuttles go and you can likely take out a couple before they even have time to react. For those most part, the individual troops should be easy and you have plenty of room. At the end, however, an Atlas Mech will drop down. On the far right side of the area under the overhang will be a Hydra Missile Launcher that you can use on the Mech. Use it to take it out quickly. If it still lives, finish it up and clean up any stragglers.