Rally Point Alpha
When you regain consciousness, walk forward into the first lab you see. You'll find a doorway off to the left side and beyond that will be a hallway. Follow the hallway until it opens into a hanger and pick up the sticky launcher along the way. You will see a Jackal attacking scientists in front of you. Kill the Jackal and turn to the right to find some Grunts and Jackals swarming around a staircase. Take the Carbine that the Jackal dropped and stay by the doorway while you thin their numbers. Take the stairs up when you have a clear opportunity.
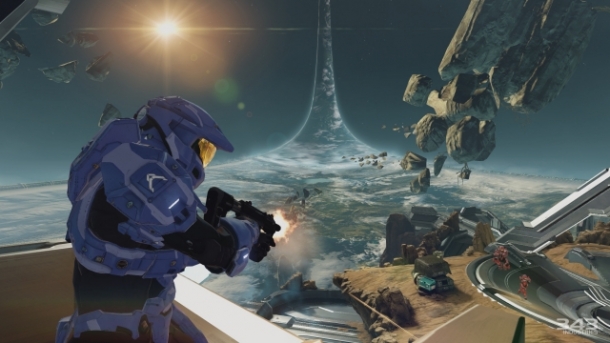
At the top, you'll see an open area with a few different levels ahead of you. There is an Elite walking around and he may be hovering near the base of your platform. Try to find him and keep an eye on him because he's going to be one of the tougher Elites. Until he appears, clear out the minor resistance in the room. When the area is safe, cross the bottom floor of the room. You'll find a room with stairs leading up, a couple of scientists and a marine. There will be a door to the left that leads into another hanger bay. You can also enter this room by climbing the stairs.
Go up the stairs and enter the bay. You'll see a Phantom come in to drop off infantry. There will be a couple of walkways that lead outwards. Place a sticky bomb at the plate where the left walkway connects to the platform and wait for the troops to land. When they land, trigger the bomb to kill them. The same thing will happen at the spot where the right walkway connects.
There will likely be a couple of enemies left, likely Elites. Start fighting them but watch for the next Phantom to appear. It will approach the end of the left platform. Place a Sticky there. Clean up the Grunts and Jackals from that drop. Use the last stickies to take out any remaining enemies. Grab a Plasma Pistol and watch for the fourth Phantom which will make to drop troops at the end of the right platform. Fight any remaining troops and when the Phantom starts to dislodge enemies, throw grenades at the point where they are landing. This should thin their numbers significantly. Remove any remaining enemies and then make for the end of the platform. Flip the switch at the end and leave the hanger by the door off to the right side (as you're looking out to space).
You should almost immediately bump into a couple of Jackals and maybe an Elite so be ready. If you have any grenades left, use them to start this fight so you can clear them up. Turn left and you'll see some Marines fighting off enemies in the distance. If you go up the left side, you can get up to the higher level and fight from there. Kill any enemies on this level and then go to the larger area of the walkway. You'll find a hole in the walkway that you can shoot through. Get rid of any enemies on the lower level but there are a couple of high ranking Elites here so be careful.
Drop through and continue through the room. It will lead into a square glass building with stairs at the back. Kill the Grunts in the room and climb up to the next floor. Before taking the stairs on this next floor, you'll see a UNSC weapons cache on the left side of the room. Restock and then climb up the stairs. You'll come out to a large warehouse like room. There will be a middle platform ahead of you with an Elite and a few Jackals/Grunts. Kill them and give the Elite Plasma/headshot punch. With this small group dead, turn left and go through the marked doorway.
Follow the hallway around and you'll eventually find a Shotgun leaning against a crate. Make sure to grab this before heading into the next room. The next room is going to have a pair of Hunters in it but they shouldn't be a problem with a Shotgun in hand. While you can jump right into the fight, there's a Sticky Detonator in the small office area of the lab. You'll find it sitting on some crates at the back of the room. Feel free to use this up before tackling the Hunters head on with the Shotgun. Like all Hunters, remember to go for their soft fleshy section at the back. When you are using a Shotgun, try to lure them towards you to swing with their shield arm and then circle or jump around to their backside by way of their gun arm. This should keep you safe while allowing you an easy attack.
Keep dancing with the Hunters until you've brought both of them down and then you can check again inside the small room. There a few things to interact with, not least of which are a couple of Armor Mods. Cortana will open the nearby door for you and you can meet the good doctor.
Rally Point Bravo
After your chat, you'll find yourself in a hallway with a couple of malfunctioning doors. The one on the right side will eventually open. Go through that door and it will open up to the research area with the Composer in it. Before leaving this room through the marked door, look at that door and turn right. Drop off of the platform and you should see a small cave nearby that is just big enough for you to walk into. Inside of this cave will be a Terminal.
Head for the waypoint and leave this room. You'll find a Marine on the floor who will get up and unlock the nearby door for you. Go through the door and up the ramp. There will be some precision weapons on the ramp for you to stock up on. Grab what you can and kill the Grunts in the next room. Turn right into the hall and then turn right again into the small access corridor. This will lead to another room with a couple of Jackals in it. Go through the large door on the left to enter a warren of hallways.
Kill the two Grunts approaching from the right but then turn left and you'll see a Turret at the end of a long hallway. If you can kill anybody from here, do so but after that, go past that hallway to the left to the next hallway on the left. You should find some weapons including a Sticky Detonator. Follow this hallway and it will bring you up to the left flank of the Turret. Watch for an Elite here and use the tunnel you are currently in for cover if you need to. Eliminate the Elite and the Grunt on the Turret (if you haven't already) and then cross the hallway.
You'll see a new doorway opening as you cross the hallway, go into this hallway and it should turn right as it leads you up a ramp. The ramp will bring you to an upper platform in the next room. Kill any enemies up here and then turn to focus on the enemies down below. They are going to keep pouring into the room through the escape pods below. Watch for the couple of Elites down there and take your time since you have a height advantage.
Soon, Cortana will mention that you've killed the last of them and a large door will open at the end of the room on the lower level. You'll enter a hallway with red flashing light outside of a lab. Follow this hallway and watch to the left side. You'll soon find a small doorway that leads up to a ramp. There should be a couple of Grunts on this ramp. Go up the ramp and turn right to find a large room but don't go in. To your left will be a small door that turns right and goes up another ramp. It should look rather similar to before. Go up this ramp and into the next room.
Once again, you'll be on an upper platform above escape pod hatches. This fight will be much longer and more aggressive. There's a DMR on this level at the end by the door against a crate if you need ammo. Enemies can come up at you one of two ways. They can come up the ramp that you came up which is rare but does happen or they can come up the other ramp that exits in the middle of the long wall on this platform. This is going to be far more common. This hallway and ramp area is probably the best place to station yourself. From here, kill any enemies as they come up and you will likely not have anyone come up the other ramp. When you run out of enemies, you can head back out onto the platform to kill the enemies in the room proper.
You'll encounter a lot of enemies in this area to begin with including a lot of Grunt and Jackal Rangers. They'll be accompanied by quite a few Elites so make sure to keep your Plasma Pistol stocked up. Be very careful because at least one Elite will have a cloak and Sword. He can close the distance on this ramp pretty quickly so it's important that you kill him quickly or know when you need to leave the ramp and make some distance. As you fight them off, you'll hear a voice saying "stage 1: airlock opening complete" or something similar. The voice is rather faint but if you listen closely, the number is the important thing. Each number is an airlock opening and more troops entering. The last one should be number three. After that, kill the last few (marked) enemies and the door on this platform will open up for you to exit.
Exit this area through the door on the top level and it will lead to the room where you can control the defense grid. There will be an Elite operating the controls at the front of the room but he'll be cloaked. If you sprint up to him and hit him with a melee attack, you'll likely be able to kill him with an assassination before he can respond. Be careful though because there will be another Elite in the room with him and he'll attack you as soon as he sees you. Once you've killed the first Elite, immediately back up into cover or, if you're feeling bold, rush him and you will likely be able to melee him to death.
Plug Cortana into the console and when she's done, pull her out and continue out the door on the far side of the room from where you entered. You'll come up behind a Covenant patrol. Kill them with a quick couple of melee attacks and kill the Jackal at the end of the tube. Enter the next room at the end of the hallway. There will be a group of Grunts going up some stairs and at the top will be a platform attached to a long hallway. Shoot your way through the Grunts and stop at the top of the stairs.
Peek out into the hallway to get an idea of what you're facing. There are at least two Elites and one of them will be carrying a Sword that he can take out when threatened. Around them will be Jackals and in front of that large group will be an almost equally large field of Grunts. Throw a couple of grenades towards the Elites and Jackals and start shooting at the Grunts. Try to take out as many Grunts as you can before you need to take cover. This should hopefully eliminate most of the smaller enemies. If you notice that one of the Elites is weak, try and get them first.
Take cover and then ready for another go at them. This time should be much simpler so just clean up the remaining enemies slowly. Just remember to watch out for that Sword because he might make a dash at you soon. When you've cleared the hallway, make your way to the end and you'll find yourself in an observation room overlooking the Composer. Pass through the room and it will lead you back out to the Composer's room. Right in front of you will be a Mantis Mech. Hop inside.
You'll need to protect the Composer for as long as you can. Remember that the Mantis has shields so if you play it safe, you can get some serious distance out of the Mantis. There's also another Mantis further ahead down the ramp if this one gets too beat up.
Kill the Grunts at the bottom of the ramp but watch out for Overcharge shots that will immobilize your mech. Also watch out for the enemy on the ridge with the Fuel Rod Cannon. Make your way down the ramp and follow the path as it leads left and then back right around the Composer. You will come up along the right side of the Composer and you'll have to fight off waves of enemies brought in by Phantom.
The first couple of waves will just be infantry but not long after that will be Wraiths and Ghosts. Try to use the Composer as cover from the drop ships while you kill the various vehicles that appear. At least one Phantom will fly over your head and try to drop a Wraith behind you. Destroying the Phantoms is rather unlikely so either go straight for the vehicles or try to take out the Turrets mounted to the Phantom (if necessary).
After that Wraith is dropped behind you and you destroy the rest of the vehicles in the area, you'll be attacked by a wing of Banshees. There will be roughly five of them and they'll come at you with their Fuel Rod Cannons ready. Try to dodge the Fuel Rods and hit them from long range to minimize the damage. When you need to, get behind the Composer. Because it goes all the way to the ceiling, it will provide good cover from the Banshees.
As you are fighting them, more drop ships will appear with infantry and Ghosts so be on the lookout. After you've taken out most of the Banshees and the first new wave of foot soldiers, another Phantom will try to drop troops behind you. A whole bunch more Phantoms will appear and you'll have to take them out. Try to keep your distance from these drop ships since most of the enemies will be infantry and will have trouble hitting you at long range.
When you clear this last group of enemies, Cortana will tell you it's time to get to the elevator inside to find the doctor. Dismount the mech and get inside the elevator. Ride the elevator until Cortana finds exactly where the doctor is and when the elevator stops at the top, use the green switch to open the door.