Rally Point Alpha
Hope you're a good pilot. When you gain control of your fighter, you'll be in a long narrow passage and you'll have to navigate your way to the end. If you go too high, you'll fly out of the shielding of the Didact's ship and be destroyed. Otherwise, try to avoid the various moving walls as you progress.
Along the way, you'll come across a few different destroyable objects, not the least of which are the Promethean Turrets. You'll also come across tight sections that are blocked by large orange balls of energy. These balls will need to be destroyed for you to safely fly through. Most of the trip will be uneventful but there are a few important areas where you should be careful.
There will be a section where you make a long arc towards the left. After that you'll have to fly through a series of tight turns. Make sure to change to your rockets because a couple of these tight spots are going to have Turrets in them that you have to destroy to get by. Shortly after will be a section with pylons running up the center and alternating sides. You might think it best to make small turns but give a little bit of extra room on each side so you don't accidentally bump the ends of your wings.
Not long after that, you will fly into a tunnel where the walls will sort of form a Haz-Mat symbol and you'll have to fly through the spaces will avoiding Comm antennas. Fly through the bottom hole, then try for the top of the next. You can try for the bottom of the third but the ship doesn't seem to dive as well as it climbs so it is probably best if you go to the right instead. After that, go straight up the middle.
After that, you'll fly through a series of holes blocked by those orange energy balls. Destroy them so that you can fly through but be careful because the walls tend to close in these areas leaving you a space barely bigger than your ship to fly through in the middle. You'll fly down a long canyon with a bunch of Turrets but if you keep moving, you shouldn't have a problem surviving. Make sure to watch for the large columns that will move across your path.
You'll fly back inside of another tunnel that curves to the right and when you come out, you'll have to slip between glowing yellow energy beams. The beams won't kill you immediately but they'll deal a lot of damage. If you have to skirt one so you can make it safely through the next one, that's ok as long as you don't hit a couple dead on. This will open to another canyon which will eventually come to a fork as it enters a tunnel. The paths are identical but I found it easier to maneuver afterwards by taking the left path. Inside these paths will be a bunch of small walls that you can easily move around but they will come out you pretty fast so you need to stay on your toes.
Another tunnel will curve right and you'll have to shoot your way through quite a few orange barriers. Don't be shy about changing weapons if you can't reload fast enough. You'll have a few tight areas but nothing too crazy until you enter a tunnel that keeps narrowing further and further until you barely have room to get out. This will exit onto the top of the ship.
You'll see large Turrets stationed in a ring formation around the outside of the area. There is a beam of light that comes down from these Turrets and enters a cube like structure below. Inside of these structures are the power sources for the Turrets. You'll need to destroy these to take out the Turrets. The best way to handle this is to follow the ring around the outside. You can fly in one side of the cube as you shoot at the power source and then fly safely out the far side. Then you follow the ring around to the next power source until you've destroyed them all.
Rally Point Bravo
After Lasky makes a hole for you, you'll be on foot with a rather large bomb strapped to you. Walk forward a little ways and you'll enter a room with quite a few Watchers in it. There is a "dead" Turret in this room towards the back and if the Watchers can get to the point where it was, they can rebuild it and cause additional trouble for you. It is likely that with so many Watchers, you won't be able to prevent this so be sure to hang back if you fail to stop them. In the back middle of this room should be more ammo. When you are ready, head into the next room on your left.
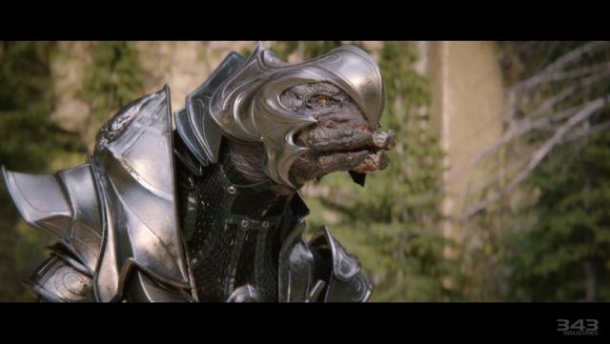
This room is going to have a Knight Lancer. If you have your SAW, short controlled bursts will make very short work of him. The door behind him (on the right side) is your next destination and there will be another Knight on the far side. Handle that Knight the same way and go into the room. One of the Knights likely dropped a Scattershot. If you are low on ammo, feel free to grab it. Take out the remaining Watchers in this room and any Crawlers that appear after that. Before leaving this room, go around the back of the central structure hanging from the ceiling to find the final Terminal.
The next door you are looking for is on the right side. Hopefully you still have your SAW because there are three Knights in this next room and they can spawn Watchers. If you have the hologram ability, stick by the door and send out a hologram. With the Knights distracted, pop out and burst fire at one of them until he goes down. Rinse and repeat until they are all dead. If this is proving difficult or you no longer have the same, you can also use the Hologram to get closer in with a Scattershot.
When you've killed the three Knights in this room, check under the central structure for ammo before taking the elevator behind the door to the left.
At the bottom, follow the hallway and watch for the weapons cache on the right side. The next door will lead you to a walkway with a platform for Cortana on the right. Plug her in and go through the portal that she opens. You'll enter a dark hallway with dark red highlights all around. There will be a handful of Crawlers in here but they shouldn't be too much too worry about. At the end of this short hallway will be another portal.
Landing after this portal, you'll realize this section is going to be a little bit tougher than the last. A few Knights materialize across the room in front of you. There are some weapons on the right side for more ammo if you need it. Go up the ramp and take cover behind one of the Pylons. Try and locate the closest Knight and take him out. Slowly work your way through the crowd of Knights on this level before going up to the next. Find where your exit portal is before going up. In front of it will be a Knight Battlewagon so be ready to bring him down. There should have been Suppressors in that weapon cache from earlier and if you get up close and let rip with that, he should go down quickly. When he does, grab his Incinerator Cannon and go through the portal.
You'll enter a room loaded with weapons. On the right side will be a variety of Promethean weapons to use as you like. In the middle will be some pretty useful human weapons. I would recommend a Hammer and Lightrifle before leaving.
Cortana will open another portal and on the other side of this portal will be a Knight. You can try sneaking up on him for the assassination but it will be a tough feat so feel free to just smash him with the hammer. Switch to the Lightrifle and start making your way to the marked portal on the right. You'll almost immediately encounter some Crawlers which is why you switched weapons.
The room will start to slant down but at the top of this ramp will be a weapons cache along a large wall if you need it. Take peeks over the edge to shoot any Crawlers you may find and then back up. Wait for the Knights to approach and then charge over the edge with your Hammer to take them out.
If all this fighting isn't your thing, you can also go up the left side to get to the portal without fighting. It will take a little luck though. Kill the first Knight and head to the far left side of the platform as you look towards your waypoint. Make sure your shields are full and then make a make dash for the portal. Make a sprinting jump to start with so that you clear the gap and then just keep going until you make it or die.
As you walk into the next room, a Knight will materialize directly in front of you. Rush him and smash him with the hammer. There will be a Watcher here as well so make sure to take him out quickly before he can start shielding the Crawlers.
With this first wave dead, Cortana will get to work and you'll have to hold this position. If you look back at where you came from, turn right and you'll see a long hallway. Crawlers will start hopping up from below. They will all make a pretty standard leap up to roughly the same spot on your platform. Kill the first few but when they start coming faster, take out your hammer and smash three of them at once for an Achievement.
When this wave is dead, more Crawlers will start appearing in the hallway from which you entered this room. Start killing them and remember that there is ammo on the upper level. Soon they will start swarming from all over and it is best to stay on the upper level at this point. There is a barrier that should provide pretty good cover when you need it. You can still be aggressive but being close to good cover when you need it will make all the difference.
Cortana will finish what she is doing and then you'll have to grab her. Turn towards the long lower hallway and start moving. Do NOT blindly rush across this bridge because you'll likely die. Use a precision weapon if you can or a Suppressor if not and walk your way across. You should be able to make it pretty comfortably as long as you keep walking and shooting. If you stop shooting, however, you'll likely get overwhelmed. Go through the portal at the end.
Rally Point Charlie
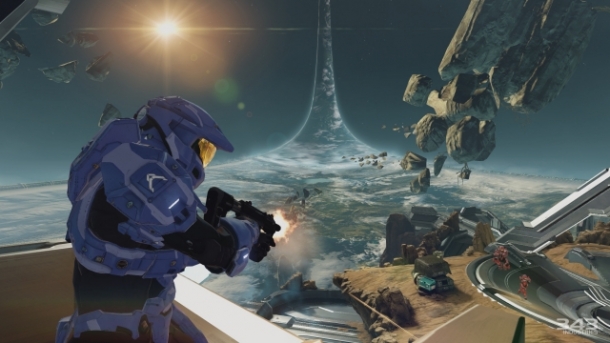
Go up the lift and at the top, hit the conveyor to be launched towards the Didact. When you land at the end, you'll find a whole slew of weapons. Take a Lightrifle and Binary Rifle with you. Go through the door and activate the control panel in front of you. Cortana will do something pretty drastic and then you're off to take a couple of buildings. Go to the left and hit the man cannon to be launched to the next building.
When you first land, you'll see a Knight directly ahead of you. The Binary Rifle should kill in two body shots or sometimes instant kill with a head shot. Kill this first Knight in that method and then watch for a Knight on the platform above him. If he appears, kill him as well. Turn right and there will be a little dip in the path. There will be a Knight and Watcher down this way. Kill the Watcher with your Lightrifle and then kill the Knight with the Binary Rifle.
At the dip, turn left and you'll see a ramp that leads up. There will likely be another Knight and Watcher at the top of the ramp. Try and take them out the same as you did with the last though you may be running low on Binary Rifle ammo so it may be best to use grenades. When the Binary Rifle is empty, be sure to switch it out with a Suppressor. Climb up the ramps to the top level and you'll see a panel that activates a light bridge leading across to the central section of the building. At this central section will be several more Knights. From here, burn through your Lightrifle ammo to kill as many Knights and Watchers as possible. When you are low, sprint across the light bridge to the central area. Hopefully, you should only have a couple more Knights to go. There is a barrier near the end of the bridge and the pillars all make for good cover. Pop out from cover and move to the next. Get close to a Knight and let rip on him before getting back into cover and starting the dance again.
When you've eliminated all of the threats here, run to the end of the central structure and plug Cortana in again. She'll do her splitting trick and then you'll head off to the next area. Turn to the left and you'll see a launch pad below you that will fling you to the next structure. There may still be Prometheans on this structure so be quick. Jump off the top level to that bottom level and sprint to the man cannon.
This structure will have a few enemies, particularly Crawlers on it. Kill the first two when you land and then you should see a Knight at the top of a ramp ahead of you. Wait for a moment before going for him as there are a couple more Crawlers in the area. Wait for them to appear, kill them and then rush the Knight. A Watcher will take notice from the platform above and attack. If he heads back up to the central part of the structure, be careful though as there is a Turret in the middle. Kill him and any remaining Crawlers. When you are ready, poke your head out and kill the Turret. At the end by where the Turret was will be another good selection of weapons. Stock up with a good variety before heading for the man cannon to the left.
This will take you to the final structure and this one can be a real tough fight. There are far more enemies here including droves of Crawlers and Watchers. When you land, kill the first two Crawlers and then watch for Crawlers to your right. Start working through the Crawlers and Watchers to your right at the point where the walkway dips down. Climb up the ramp but watch for more enemies at the top. At the top, turn left again and you'll see a large group of Crawlers.
Take cover behind the barrier on the right side and start working on the Crawlers. When you get a chance, look up the wall on the right and you'll probably see a Sniper Crawler. Kill him and then take cover behind where the wall sticks out. This will provide you with cover from most of the spots where there will be Crawlers. They will come around the corner after you but they likely won't all come at once, allowing you to pick them off a little at a time. If you killed the Sniper Crawler, you'll probably find a Binary Rifle around here. Empty one of your guns and then pick up the Binary Rifle.
Slowly pick away at the Crawlers as they come around the corner. When they stop, peek your head out and killing those still attached to the walls or upper levels. Start making your way up the ramp that leads to the upper level. As you climb the ramp, watch to the right side for Watchers.
You'll find a switch in a similar looking corner that activates a similar looking bridge. Tuck yourself into the nook that the switch is in for safety because there will be quite a few Watchers and Crawlers across the way. Don't activate the bridge just yet. Use ranged weapons (Binary Rifle if you have it) to take out any Watchers you can find. When you can't find any more, kill any Crawlers. Try to safe a couple of shots in the Binary Rifle for later though.
With the area cleared a little, flip the switch. Wait and see if you can get any Crawlers to come to you. This will thin their numbers further. Cross the bridge when you feel confident and immediately take cover. There will be a few Crawlers wandering around here and there will be many more on the columns that line the central section. Be extra careful with your shields here because if you step out at the wrong moment, their combined fire can really wipe you out. Try to take out as many as possible.
When you feel certain that you've got a moment and there are no Crawlers approaching, change to your Binary Rifle and look down the long central area. You are looking for a Battlewagon somewhere near the end. If you can find him, try and take him out with a couple of quick shots from the Binary Rifle. If you can get him, that should make life a lot easier. Then you just need to clean up the Crawlers on the walls and get to the end. If not, be careful to stay along the outsides of the columns as you clear your way up. If you get towards the middle, you might find yourself surprised by an Incinerator shot.
Either way, make your way up to the end of this platform and plug Cortana in. She'll split up a little and lower the Didacts shields for you. Take the man cannon off to the left and this will take you back to where you started. There will be a couple of Knights scattered around here. Use the barriers for cover and try to work on one at a time but be careful as they are all higher end Knights.
Kill all three of them and a blue elevator will appear on the section closest to the Didact. Take a ride up. Watch the cutscene and when you regain control, push up on the LS to climb up. Press the LT to plant the grenade as prompted and then make your way back over to your bomb. Follow the on screen prompt to detonate the bomb and enjoy the ending!