Rally Point Alpha
After you escape the wreckage of the Dawn, you'll need to work your way through a graveyard. There shouldn't be any danger here so feel free to sprint through but you can find some weapons scattered about to augment what you have if you search around a little.
Soon, you'll enter a cave and come out to a huge open area with a large Forerunner structure in the middle. From here, go left and you'll find a section of the Dawn with a Warthog nearby. Hop in the Hog and ride that further to the left. Up ahead, you'll see what looks like a tube leading into the cliff side. Drive into that and you'll enter a tunnel.
Ride the tunnel until it leads you back outdoors again. When you get there, you'll see Covenant emplacements and Phantoms dropping off troops. You have two ways through this area - drive through to the other side and make a mad dash for the next cave or fight your way over. To fight your way over, it's best if you get on foot and start working there now. Clear out to the left so you're safe from that angle but then head back and go right. This will bring you up along a higher cliff that will provide you with a little bit of elevation and better cover.
From here, you can kill the enemies below. The exit is along this right wall and around a corner. When you get there, watch out for a hidden Elite guard. It can be pretty safe to rush through but when you get to this last guard, you HAVE to go through him and you have no place to retreat to, making this last part dangerous. However, if you hop out and hit him with enough to drop his shields, you can beat him down on the run and keep going to safety.
In the next cave, you'll come across a few Grunts but one of them will likely be carrying a Fuel Rod Cannon so be careful and kill quickly. The cave will open to another area similar to the last one. You are going to want to attack this area similarly to the last area by heading up the right side. You'll encounter some stronger resistance from Elites on the left side as you move up but after a little way, there will be a pretty solid stone pillar that you can use for cover.
Just at the base of this pillar (below you) will be some more Jackals and an Elite. Far off to the right side by a large structure will be Grunts and Jackals. Just to your right will be some Storm Rifles, Plasma Pistols and Carbines if you need ammo. Take your time and clear out everything you can see from this position. When you've done so, take the right side towards the structure.
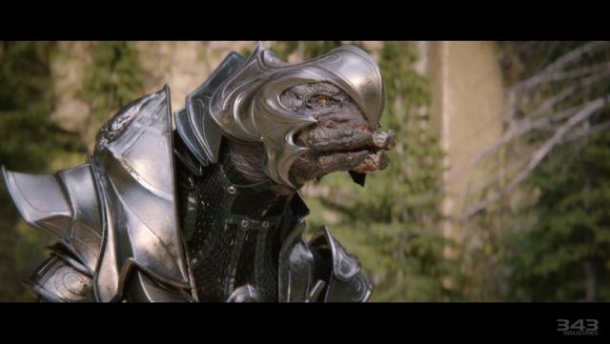
Make your way up the ramp on the right side of the structure and at the top will be some Jackals and Grunts. If you go left and around this level, you'll find another Jackal patrolling that you can kill. Near him will be a weapons cache with Storm Rifles and Plasma Pistols. There's another ramp here leading up the middle of the structure. At the top you will encounter quite a few Grunts and these will be particularly grenade happy so keep an eye out for flying plasma grenades. There will be four Grunts and a Jackal. Be careful when you start making your way closer to the front door because an Elite with an Energy Sword will come out. He should be no problem if you are prepared but he can kill you in a single hit if you're not ready.
Rally Point Bravo
When you've killed them all, grab the camo module from the Elite and go inside. When you go through the second door, you'll find some Needler ammo to your right. Make for the back of the room and activate the console to find out more about where you are.
The map will turn off but Cortana will find a couple of power streams that you can access. Go to the one on the left first, turn on the bridge and activate the data stream. Exit and when you return to the central room, it will be covered in Covenant again. The enemy will consist almost entirely of Grunts and Jackals but there's quite a few of them so take it slow and work your way through them. Make your way to the next power stream a little at a time. When you get there, activate this one the same as the last. Return to the central room.
You'll have to get through this room and up to the cartographer again but it's going to be a little tougher this time. Stick to the left side of the room and move from cover to cover. At this point, your weapons may be a little less than favorable for the enemies you're dealing with and you'll probably have to scrounge for weapons. You'll more than likely have Needlers and Plasma Pistols in abundance. Use the Plasma Pistols like a regular weapon against the minor enemies here and replace them as you need to for ammo.
Go up the sand and rock on the left side which will lead you into a tunnel. From here you should have a good view of the platform that the Cartographer is on. At this point, use the Needler ammo that you've managed to collect on the Elites. They will dodge some but if you can get a decent number of shots to stick in them at the same time (about 8) then they will explode and die, regardless of their shields. Remember that you have the camo mod and using this can be a good way of getting a drop on the Elites so that your first few shots stick for certain.
Make your way down to the platform slowly and activate the cartographer again.
The Bridge
When you regain control, you will see a nexus of light in front of you. If you investigate the table, you can find the Hardlight Shield armor ability. Neither is particularly necessary ahead so take whichever suits your play style. Walk outside and you'll step onto a lift. The lift will slowly lower you to the lower level which is teeming with Grunts and Jackals. Use the little bit of time you have right now to peek over the edge of the elevator and shoot a couple of times. Take out a couple of the enemies below and when you hit the button, take cover directly ahead behind the barrier.
You're going to have to work your way up along this bridge to get to the other side. It's littered with Grunts, Jackals, and Elites. When you get further ahead, you'll even have to deal with Banshees.
After you've cleared out the immediate area, check to the left for weapons lockers filled with Battle Rifles and Assault Rifles. Stock up on ammo and start making your way long the bridge. As you go, keep your eyes peeled for Jackals or Elites with Carbines in case you run out of ammo. Keep your eyes peeled to the right side for a Covenant Weapons Locker with Carbines in it. You should see this just before you come to a large break in the bridge.
When you get to the break in the bridge, you should be able to clear the upper and lower levels on the far side from here. Get rid of as many enemies as you possibly can and then jump down. Cross the bridge to the other side and use the ramp to get back to the upper level.
At the top of the ramp, you'll likely notice the Banshees flying around. Up ahead and a little to the left will be a rocket launcher lying on the ground next to a column. You can use the rockets to shoot the Banshees down and they have some measure of lock-on but their maneuverability is rather weak so it's best if you shoot only as they are heading directly towards or away from you. If all else fails, you can also use conventional weapons or plasma grenades. If you have a Plasma Pistol, you could use that to disable the Banshee so you can hit it with a sticky.
Deal with the two Banshees and continue across the bridge. There are likely a couple more Elites ahead with a mixture of minions. Clear them out and go through the door at the end.
You'll enter something resembling a courtyard leading up to a large structure. Directly in front of you will be a little cover and some Grunts. Kill the Grunts and use the cover. There are a couple of Ghosts in this area as well as large Turrets on the ramp areas on either side. Hold on to a Plasma Pistol and use it to stop a Ghost. Steal the Ghost and use it to kill the other Ghost.
With the vehicles under your control, use the Ghost to take over the Turret position on the left side. Behind the Turret will be a Covenant Weapons locker with Carbines and Plasma Pistols. Zip across to the other Turret and take that out as well before returning to the center archways. In the middle will be a couple of Elites and plenty of Grunts with plasma grenades. Keep your distance and pepper them with shots from the Ghost to wipe them out.
Go up the middle towards the structure and enter the bottom. You'll have to get out and go up the ramp at the back. There are a few more grenade happy Grunts here and there is an Elite at the back with an Energy Sword so be careful. This shouldn't be anything that you're not used to. After you've killed them, head out behind where the Elite was and take a right.
You'll be on a catwalk with Grunts and Jackals. Be careful as the catwalk wraps around to the right because there will be an Elite with a couple of Grunts waiting for you though they shouldn't pose much of a challenge if you are prepared. As you come completely around the corner, you'll see a long hallway with a ramp leading up. There will be three Jackals here and the one at the top of the ramp has a Beam Rifle so be sure to take him out first. Kill them and head up the ramp.
At the top, turn left and you'll be able to see outside. There will be a Phantom dropping off some troops. Let them do that and they will fly off, leaving you in a much better position to deal with the ground forces. Take cover behind the barriers here and check to the left for a weapons locker. Directly ahead of you but at a pretty good distance will be a couple of Elites. Your Plasma Pistol may not be able to get a good lock on them from here but try any way. If not, move a little closer or just keep hitting shooting them between the cracks in the barrier with your Carbine.
They will likely be drawn up the ramps by some sentinels so come up behind them to finish them off. At the top of the ramps will be the sentinels fighting off a couple of Hunters. You should be able to find a Fuel Rod Cannon on the ground nearby, possibly dropped by one of the Elites. Take this and it should make fighting the Hunters a lot easier. They will take a few hits (possibly as many as four each) but hit them and then take cover. If you are careful, they'll never bother with you and remain largely focused on the sentinels.
Inside the building, you'll see a long hallway with a ramp leading upwards. Don't go up the ramp just yet but go under it instead. Under the ramp will be your first Terminal. Check that out and then go up the ramp. Go around the ring and wait on the far side for the lift to lower. When you are ready, board the lift and just wait.