Rally Point Alpha
When you get your boots on the ground, run through the cave ahead and you'll find the Mammoth dead ahead. There are a few ways to board the vehicle but the main two are the ramp into the vehicle bay on the bottom and a side entry door. It's no bigger than any other door and may be hard to see but most of the fighting will happen off to the side of the Mammoth so this will be your most likely entry point. The bottom level should have two Warthogs and towards the top, you should find weapons caches that line the walls by the lookout points.
Check just below the top deck for weapons if you need and then watch on the left side as you pass by a Covenant checkpoint. You may be able to use the rocket Turret on the top deck to attack this group but you should pass by it pretty easily. Not far past this will be a large area off to the right. This is the location of the downed pelican and you can see it in the distance. You need to get to the Pelican and pick up the Target Designator (it won't take up a weapon slot).
There is a Sniper Rifle onboard the ship that you can use and a Warthog will be rolled out of the Vehicle bay. You can support the 'hog or ride in it though I've found staying out of the hog is likely your best bet. There are a lot of enemies scattered around and unless you are driving, you're going to get torn up. In fact, it is quite possible to get to the target designator without actually fighting if you're smart about the path you take. There will be a few Elites and possibly Ghosts so be careful. There's a lot of cover so if you have trouble, just work your way up slowly (or take over a sniper nest). When you have it in hand, use it to destroy the Phantom in the air. Rush back to the Mammoth and when you are onboard, use it to take out the giant Turret floating in the air. Once it has been destroyed, the Mammoth will start moving again.
As soon as you can, get to the top deck and get to the rocket pod. A few Banshees will fly by on the left side and it's best if you take them out as soon as you can. After they've been destroyed, you'll come upon a Covenant camp with a few shields scattered throughout. Under these shields are generators that need to be destroyed. Unfortunately, to destroy them, you need to cross the shield barrier.
Start working on the enemies in this area. The easiest way is if you grab hold of one of the Sniper Rifles on the Mammoth. When you've cleared the foot soldiers, see if you can get your hands on a Ghost. They'll be floating around this area and if you can get your hands on one without destroying it, you should be able to get into the shielded areas, destroy the generators and get out much more easily. When you approach the shields, don't go for the generator immediately. Use the Ghost's boost function to shoot through to one side of the generator before going back on the other side. Hopefully you should splatter most of the enemies in the shield (including the Elites).
With the enemies defeated, get inside the shield and use the Ghost's cannons to destroy the generator. These first two should be easy but the one on the ridge above can be a little tough. Watch out for the Wraith's shots and zip up to the cliff wall. From here, start jumping up the cliff a little at a time and at the top try to sprint over to the Wraith. Climb up and destroy it by either hitting it with melee attacks or throwing a grenade into it. The Wraith will be destroyed and there should only be a few enemies left. Kill them and when you are ready, destroy this last generator.
When you are ready, you'll find the Mammoth moving along the larger ridge off to the side. Climb on and it will round the corner to the right. As it does so, you should see another of the large hovering Turrets. Use the target designator again to destroy this next Turret.
As you destroy it, a large structure that looks like a flying Scarab will appear around the corner. Ignore it and immediately head for the rocket pod on the right side. You'll see Phantoms dropping Wraiths and Ghosts onto the ground ahead of you. Start hitting the Wraiths as soon as they land and only turn to the Ghosts once they have been destroyed. If you are quick about it, you should be able to destroy a few waves of enemies but the rocket pod is almost certainly going to be destroyed at some point.
There should be a Hog on the ground in front of the Mammoth. Make sure the area is clear and make a run for the hog. Hop in the driver's seat and start driving around. You should already have a gunner so you can start taking out the last few remaining vehicles. If you are taking a beating, you can do a lap around the Mammoth for cover. Eventually, the Mammoth will start to move and Cortana will tell you to get to the gravity lift. You won't be able to take a hog but if there's a Banshee in the area, you might be able to jump the gap over where the Mammoth was to take it with you. It's really not necessary though.
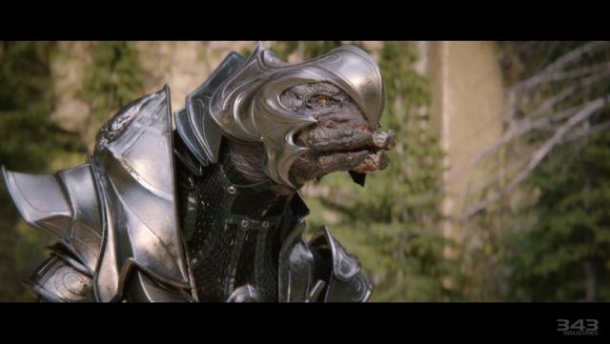
Get out of the hog and approach the gravity lift on foot. You'll pass some barriers before coming upon a group of foot soldiers. These soldiers should be almost completely made up of Grunts. Wipe them out and make your way to the gravity lift. Inside the ship, you'll have a lot of enemies to deal with. If you have a precision weapon, start going for head shots and beat down whenever you have the chance. Get behind one of the two large structures in here for cover if you can but be sure to watch your radar. There's an Elite on the upper level that will come running down the ramp at the back for you and it can be an unpleasant surprise at the wrong time.
When you have a second, it may be worth your while to grab one of the Turrets to bring up the ramp with you. It will help you kill the enemies up there (possibly including the Elite driver) and will give you extra ammo to destroy the core. The core will be tucked into one of the columns. Keep shooting it until the light goes out. When it does, make a quick exit. Jump out of the bay door and if you have a jet pack, use it to soften your long fall.
Rally Point Bravo
You'll ride the Mammoth around for a little bit until you point out to that you're faster alone. Stock up on ammo and drop off of the Mammoth. You'll see your destination off the left side of the Mammoth. Find the valley you're supposed to follow and then use the Jet Pack to glide over to the rocks along the left side. You can actually walk along this section to give yourself a fantastic height advantage. Look down to the right and start clearing enemies. Stick to the left as long as you can and once you've killed everything below, start scanning the cliffs around the area. There are Sniper Jackals here that can kill you in a single shot if you're not careful. Try and find them and take them out as soon as you can to give yourself more maneuvering room.
If you start running low on ammo, you'll find Covenant Weapon caches on the ground below. Grab them and then start working up the middle. Most of the cliffs in the area can be climbed up by jumping up one ledge at a time. Slowly peek your head out and kill the enemies (mostly Jackals and Grunts) one at a time.
There will be a rather large encampment further ahead with many energy shields. In the immediate area are more Covenant. Climb up on the Forerunner structure and make your way to the bridge that leads to the structure proper. Kill the Grunts and Jackals protecting the front. As you cross the bridge and start climbing the structure, you're going to find more Prometheans. There will be a couple Knights and a lot of Crawlers. In this area in particular, you need to be careful to watch the cliff walls because these guys will clamber all over them.
Work your way up to the objective marker but do so slowly because there can be a lot of enemies, particularly Crawlers, Knights, and Sniper Jackals, on the upper levels. There are a lot of small wall sections on these platforms that are filled with glass. Use these for cover if you need to. When you've secured the upper level, enter the building.
Inside the building, you'll start coming across a lot of doors. You'll have to test out each one to find the one that will open. For the most part, the Sentinels should lead you to the door that will open. The final door will open into a large room with spinning columns and a bright yellow terminal in front of you. Activate the terminal and when you're done with it, turn around. Follow the bridge back part way but watch to the right for a light bridge to form.
Cross the light bridge and go through the cramped tunnels. The tunnels will lead you back into a larger hallway. If you go through the door to your right, you'll meet a new friend.
As soon as you regain control, you'll be attacked by a pack of Crawlers. Kill them and then grab Cortana from the nearby pedestal. Take stock before leaving because below you will be a couple of Knights. If you're low on ammo, grab a Suppressor from one of the dead Crawlers and then make your way down the ramp. You can use the large rails attached to bridge for cover until you get to the central structure. Clear out the Knights and Crawlers here and continue through the door ahead. When you go through the door, you'll come to an intersection. If you turn right, you'll see a Terminal. Make sure to use it before taking the Elevator down and leaving.
You'll find yourself back outside and Infinity will be coming down. A Scorpion will be crossing in front of you from right to left. Kick your ally out of the Scorpion and take it over. Start hitting any Wraiths that you see first and then go for the Ghosts running around. Be doubly sure that you've gotten all of the Wraiths because there can be quite a few of them hiding around this area. When you've secured this area, go around to the left side and up the small ramp. You're going to start working your way up this cliff.
You'll turn right, go a little ways and then turn left into a valley. As you round the corner, Phantoms are going to start putting down more Wraiths. Remember to turn the tank sideways so that you can get better speed while strafing. The first one will be coming down just as you round the corner and a second one will touch down not long after that so try to take the first one out quickly so you can move on to the second. By the shield wall will be a small ramp leading up to the left and another Wraith will come down from there.
With the three Wraiths out of the way, go up that ramp to find two shielded generators and a lot of infantry. The Infantry will be a little tough with plenty of Grunts and Elites carrying Fuel Rod Cannons. Kill them all as soon as you can and take the tank in slowly so you don't have more than one or two enemies attacking you at a time. If you want to use the Scorpion to destroy the generators then it is best if you back the tank in. The Scorpion will take damage from the shot but if you back the tank in, there will be less in there to take damage.
When both have been destroyed, the shield wall will fall and you can walk through. Walk through the canyon and pick up the Designator. Use it to paint the structure in front of you for bombardment.