You'll start this mission from the end of "Rising Action." Angel will assist with opening the door to get you into The Fridge (she melts the ice blocking the door). You'll have to make your way across a frozen destroyed facility, through a Hyperion Base, and suffer a seige attack before finding your way back to Sanctuary. This can be a difficult mission, especially if you haven't leveled up as much as you would like; you are encouraged to finish any side missions or return to previously cleared areas and buff up as much as possible before continuing.
- XP: 3917
- Cash: $55
- Gear: Storage Deck Upgrade
The Fridge
So enter the antechamber of The Fridge. Immediately inside, there are four points of interest. A Fast Travel Point, Vendors, Fink's and finally, the door to Frigid Cleft (the central and largest part of The Fridge complex*). This is the direction you must take to continue the story's main quest. Make use of the Vending Machines and fully stock up ammo (if you're short on cash, use the Fast Travel Point to Southern Shelf for those machines instead, as the Vending machines in the Fridge are about ten times as expensive). Directly opposite the vendors is a Fast Travel point into Fink's Slaughter House (a Gladiatorial Arena that will allow you to do combat any time you want, basically a persistent leveling up challenge opportunity within the game world). You do not need to enter Fink's at all; however you may go in just to tour the area without accepting any of the challenges if you want to sightsee (there is also an enclosed second floor observation deck, I suppose it's for multi-player when one or another member doesn't want to participate). When you're ready to continue, move forward to the large Yellow and Black hazard striped metal door. The small wheel to the lower right of it, with a tiny active green lighted indicator, when pressed, will open the door into Frigid Cleft.
*Note: Other areas of The Fridge include Stalker Hollow, The Rat Maze, Rakk Cave, Ice Maw Grotto and Crystal Claw Pit (where you will find Smash Head if you picked up the challenge).
As you enter Frigid Cleft, you'll notice that there are frozen human formed shapes, agonizingly impaled onto giant spikes, liberally distributed throughout the entire level. They're either staked to the ground or hanging from the ceilings; this is Frigid Cleft's version of the green ice slag piles that contains ammo or loot when opened. Like you normally do with the other loot piles, smash or shoot them to reveal and scavenge their contents.
Frigid Cleft introduces you to a new type of enemy, the Rat Bandit. At first, this foe appears no different than those previous, but tactically they are far superior in the way they conduct themselves during combat. Rat Bandits are fast, agile with quixotic movements, and most significantly, will scavenge and grab available battlefield loot just like you. Thus, you may find that after a long battle when you have kill the last rat bandit; if you took too long to do it, the field would be mostly stripped bare of loot drops because bandits themselves had already picked it clean. The game advises you to shoot the Rat, to get him to drop whatever loot he had just picked up; I found that this was not always reliable. On more than one instance, I've seen Rats pick something up (like an Eridium Bar) only to drop either something different or nothing at all when I finally do kill them. So the moral here is, if you see something good, grab it before a Rat does.
Random Rats also seem to have the ability to generate shields too. Their quick movements are tough to anticipate and make for extremely difficult precision aimed responses (eg. with a Sniper Rifle). The most effective against them are rapid fire guns with large magazines and preferably augmented with explosive and or other splash damage capable stats (where a near miss can be just as good as a hit). SMGs, Assault Rifles and multi-warhead homing or singularity grenades, do this job well. In this venue, the Commando character has a distinct advantage in that his turret can keep up with the Rat's quirky maneuvers and rarely misses a shot with these foes. Another reliable method is to pre-aim directly over some nearby dropped loot, and wait for a Rat to stop and pick it up; as he does, you can then nail him if you're quick. The Rat family has a miniature cousin too, called the Rat Midget; he isn't as fast, but as he's much smaller a target, he's even harder to hit.
The best method to eliminate the Rat Bandits and Midgets is when they appear, hold your ground in a protected position, kill them, and ensure the area is cleared before moving forward. Staying more or less to the left side, use whatever you can for cover, as it will provide the shortest route though Frigid Cleft. However, if you want more XP, possible loot and feel up to the challenge, then explore the nooks and crannies. A variety of Rats and other assorted enemies will accost you as you move up. If you see a Goliath, be aware that he will drop an Echo Recording (which offers a challenge and later access to a big red loot box guarded by a mini boss, Smash Head and his gang of Midget Boners). Most of the enemies in Frigid Cleft will be Field, Tunnel and the hardy Lab Rat (who throws axes, melees and even has an eye energy attack beam too). But arguably the most incredibly annoying is the Rat Thief, who closes tightly and literally rips money right out of you (sort of like the blatant street pickpocket gangs of Rome). If you're not careful and let them come within close quarters contact, you will get robbed to the tune of thousands each time; a red numbered (marked as a minus for loss) money display flashes across the screen each time you get hit. So kill this particularly troublesome rat before he even gets within arm's length.
From your initial point of entry you'll see that you're put on a broken and abandoned roadway, littered with debris and defunct vehicles. At a distance you will immediately notice a destroyed multilevel overpass structure. Your travel objective is to follow the roadway, pass beneath that destroyed overpass, and then turn leftwards down a hill to the door that allows you passage out of this level. You do not need to engage everything or explore the whole level to move on with the story quest.
There will be a variety of rats appearing on and around the area of the broken overpass, climbing up from beneath the roadway, and dropping from the overpass remnants. Ensure guarding your right flank as well. Rats will spawn there too when you move forward. You may also be attacked by flying Rakks. These will mostly be relatively low level enemy (but one will be a badass class), so just a few accurate rounds should eliminate them. If you have high enough value Offensive Shielding (where an enemy takes melee damage when they strike you) then you could probably just ignore them and let them nip at you until each die of self inflicted wounds. The Rakk are also enemies to the Rats. Allowing them to fly about overhead may offer a bit of defensive air cover in your favor; the Rakks will often spot the Bandits before you and alert you of their presence (the rats will open fire on the Rakks, thus revealing their own position). Altogether, the aggregate numbers of all these enemy can become quickly overwhelming if you're not careful and attempt to advance too quickly. If needed, do not hesitate to retreat back to the Frigid Cleft entrance and shut the door for a bit of respite or to re-arm if ammo is low. Once you've confidently secured the area, rummage through the various crates and icicle statues for ammunition and loot.
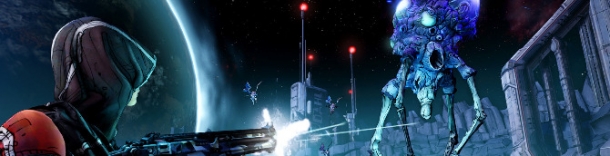
At the point beyond the broken overpass, you'll notice that the roadway continues forward, turning into a bridge structure that has been destroyed. Beneath this destroyed bridge is another section of The Fridge, a frozen lake called IceMaw Grotto, where you'll be introduced to a new creature called the Crystalisk. The Crystalisk is a tripod animal with a large central three faced torso, supported by his three stout legs. It will suddenly burst into player view from below the ice; heavily armored, it is impervious to elemental damge but has a critical weak point in that the crystals in its legs are extremely fragile and thus vulnerable. Shoot these off to get critical damage with each shot. Crystalisks have tremendous health so it's better to attack them with a high damage weapon from a distance. They will launch rock missiles and exploding crystal grenades; or if in close proximity with an enemy, stomp their feet to create damaging shock waves. When they finally die they will glow briefly before furiously exploding, showering a cache of yellow crystals on the ground where they once stood. The crystals are valuable and can be collected as money; in other words, you do not need to trade or barter them (like with Eridium), the game treats these crystals as if it is the same as cash, automatically picking it up. You'll see your money account adjusted upwards as soon as you walk over them. Crystaliks seem to spawn whenever you walk on IceMaw Grotto. So if you're hard up for quick cash, this is the place to farm for money. Be forewarned, there is also a narrow tunnel section of IceMaw Grotto that is exceedingly dangerous to travel through as it is very confined and difficult to maneuver should you engage a Crystalisk. If you're battling one and another suddenly decides to appear from behind, you can be trapped between two very heavily armored, tough foes where second wind last minute saves are unlikely. Be aware that you will have to use a lot of ammunition with each Crystalisks.
Alternatively, you don't have to fight Crystalisks at all; you can just stick to the left side of the road, and as soon as you go beneath the broken overpass, turn left off the roadway, down the hill and battle your way to the door out of Frigid Cleft to The Fridge exit. Be cautious as the final approach down the hill to that door is well guarded by a variety of Rats and sometimes a Goliath; keep shooting and toss grenades, backing up as needed. You may have to retreat uphill quite a ways but eventually you should prevail. Afterwards, go down the remainder of the incline and open the large metal door at the end by clicking the green lit wheel switch on the wall to its left. Walk to the elevator platform; throw the lever on the floor and it will descend from the Frigid Cleft to an exit chamber fitted with vending machines and a Fast Travel Point to the Highlands - Outwash area. Use it to leave The Fridge.
Note: There are other quests you can attempt in a return to this area once you get back to and talk to the NPC's of Sanctuary.
Hyperion Extraction Plant
When you're finally done with the Fridge and outside again, you'll notice that the scene before you suddenly seemed to undergo a phase shift. Looking into the sky to your right, you realize why; you'll see that Sanctuary had just phased back into reality, but it's now hovering aloft in the air. Looking back on the ground, there is a small two story outpost directly in front of you. It has vending machines and a Fast Travel Point. Attempting to take the Fast Travel Point to Sanctuary will reveal that it is no longer seen on the fast travel net. To remedy this, you're tasked to steal a Fast Travel beacon from Hyperion's own supplies.
Make your way down hill from here and you're going to encounter some new enemies called Stalkers. These are interesting creatures that are very fast and agile which allows them to get close and attack quickly or similarly retreat. Their normal speed is roughly equivalent to your top speed when sprinting. On top of this speed, most are capable of ranged attacks and all of them have natural shields. When their shields are up... they can cloak. The only real upsides to these guys is that they don't do a whole lot of damage and when you strip their shields, they are particularly likely to run. You definitely want a fast firing weapon, preferably with the electric shock element.
As you make your way down the hill, you're going to encounter these Stalkers in nests and it's best to either run through them or clear them out as you come to them because the last thing you want is for them to cloak and sneak up behind you while you're dealing with something else. Get down the hill and eventually you'll come to a couple of buildings at the bottom of a small cliff. These two buildings spawn Loaders. Deal with them or run past these as well and you'll quickly come upon the Hyperion Extraction Plant.
Just before entering the Plant, you'll see a giant sign of Handsome Jack with a New-U station next to. Make sure that this checkpoint is recorded because the next section can be pretty tough. When you approach the stairs, enemies may start coming up at you. This area is going to be littered with Loaders, Engineers, and Surveyors. If you have a Corrosive weapon, make sure you have quick access to it. After that, an electric weapon will be helpful for later. At first, you'll likely encounter an Engineer and a Loader. Kill them and head down the stairs to the lower level.
Once on this lower level, watch to the front and left for more enemies. You'll likely see an Engineer or Loader come at you from directly ahead. If they appear, kill them and immediately turn left. There will be a slightly raised long platform with two doors on this side. This is where enemies will spawn. This will spawn all three of the previously mentioned enemies. Make sure you clear out these spawn points before continuing because the next fight is going to be tough and you don't want to have to deal with these guys again if you have to respawn.
Now that this area is safe, head up the stairs to the tram near the water. At the top of the stairs, flip the switch and then board the tram when it reaches you. Look across the water and you'll see the distant section of the facility split into two halves - left and right.
When you land on the other side, enemies may appear from both the left and right sides. Deal with the enemies on the right side because this side is much safer. Once you've dealt with them, you'll have a safe point to work from. If the area is safe, go down to the left side and approach the large door. This will cause several enemies to spawn. Through the large door will come a Constructor and to the left will come several Engineers and Loaders.
Constructor
Back up to your safe spot and hug the wall to your right. The Constructor is going to attempt to hit you with homing missiles but if you stay against this wall, they won't be able to wrap around the mid section and will either hit the wall or the crates. Wait for the Loaders and Engineers to try and come to you. Fight them from here and you should only have to deal with one at a time. When you've run out of Engineers and Loaders, creep up to the corner and take cover behind the pile of boxes.
You want to use a Corrosive weapon if possible and peak out from the corner, shoot in the eye, and retreat. If you're using Zero, create your double so that he goes well past the boxes, wait until your timer is almost gone and then hit it. This is a test of patience. Take your time until it starts to create Repair Surveyors. Make sure you drop these as quickly as possible so that it can't be repaired. If you can keep the Repair Surveyors at bay then you can keep chipping until the Constructor is dead.
Make your way past the gate that the Constructor came through to enter the Orbital Receiving and Processing area.
Orbital Receiving and Processing
Optimally at this point, you want to have access to a fire weapon and a shock weapon. Make your way through this field looting crates to replace ammo that you are short on. When you get close to the Orbital Beacon, it will get eaten by a Gluttonous Thresher.
This is a rather tough battle so you may die a bit before you get this. First, this Thresher can regenerate shields. They don't seem to regenerate like normal shields so they may appear to spontaneously recharge sometimes. Aside from that, the Thresher also has a lot of health, can tunnel under the ground to close in on you, swipe you with it's tentacles if you get close or burrow the tentacles under the ground to hit you behind cover. On top of that, different types of Loaders will enter the area to attack you as well.
While the Loaders might seem like a little bit much considering the strength of the Thresher, you should consider them fodder for your second wind. Try to shoot the legs off of a couple of them so they are damaged and crawling around, then engage the Thresher.
When fighting the Thresher, you want to either be sprinting or shooting. If the Thresher burrows under the ground or is hitting you in any way (behind cover, too close) then sprint away from the Thresher. As soon as he comes out of the ground, turn and start shooting at his eyes. Keep shooting until you need to reload or until you start getting attacked again. Continue this patern and use the Loaders for a Second Wind. Just watch out for all the EXP Loaders that can really interupt your flow.
After you've killed the Thresher, you may have some Loaders to clean up. Get rid of them, inspect the area for ammo and loot and then collect the beacon. Take the beacon to the Southwest part of this area to get to the Highlands proper.
To Overlook
When you first get to the Highlands, there will be a Catch-A-Ride station nearby. Hop in and start following the road. You will be able to drive right up to the front of the town of Overlook if you go left from the start. You'll encounter some Surveyors and Stalkers on the way but nothing you can't handle in a ride.
When you get there, get out and make your way up through the town eventually arriving to a giant grinder to the left at the rear of the town. Set up the beacon atop of that; this action triggers the game to release the attackers. You're going to be set upon by increasingly intense waves of Loaders, Surveyors and a Constructor. It will start off with a few GUN Loaders coming up from the town entrance. After that, EXP Loaders and HOT Loaders will arrive to join the GUN Loaders. Eventually, a Constructor will drop into the fight in one of the following waves.
This can be a brutally difficult fight, especially if you're playing solo. Thankfully, you can't fail this mission. If the beacon gets "destroyed," you'll have to repair it. The downside is that you'll likely die trying to repair it if there is an ongoing attack. The safest (if not the noblest way) to do this is to hide and snipe from a vantage point that prevents any of the loaders from closing effectively with you. Directly in front of the Grinder Platform where the Beacon sits, is a large clock tower. If you walk to the left of that structure, you'll notice a ladder going midway up; climb up as far as you can go and turn around; notice the stairs of the adjoining building. Jump onto those stairs and walk up to the lower roof. Look for another ladder to go up one floor further to the upper roof. When you get to the top, turn left and examine the open ended shipping container; walk into it. You're now in your official Overlook Beacon Attack Defense Bunker (there is also a battery sitting on a chair that is a part of a later, not yet active quest). Despite the dire warnings which Angel continually and shrillingly invokes, the Beacon can never be destroyed so don't be enticed by her to foolishly rush out in its defense; to do so during a loader attack is sheer suicide. Truthfully, once the beacon has been "broken" all one needs to repair is to first kill all the loaders, and when the coast is clear, simply click on the beacon again. It doesn't matter how many times the loaders, or you even you, shoot at it; there is no possible way for the game to eliminate the beacon. Ergo, don't treat it as if the loaders will take away your only chance of returning to Sanctuary; they can't.
When you activate the beacon, the loaders will appear at the town gate and take about a minute to walk the distance from through the town to arrive at the Grinder Platform. Use this window of tactical opportunity to quickly climb up into your protected vantage point and await their arrival. As they attack, pick off and eliminate each at your leisure. During the first loader wave, the beacon will now be rendered inactive as it was "broken" during in the attack; Angel implores you to quickly repair it. Ignore her sense of faux urgency as there is absolutely no need to rush. Instead only wait until every single loader has been destroyed first, then jump down, scavenge loot drops, and go directly forward to the ammo vendor to refit (grenades and sniper rounds being especially useful). Sell collected booty that you don't need. Then, only after you're fully reloaded and are ready for more, return to the Grinder Platform and "repair" (click on) the beacon. Immediately run back atop to the roof bunker in preparation for the next wave; in a nutshell, this is the essence of the entire defense strategy. There will be several waves with progressively tougher foes but each with a pause if you do not touch the beacon. Thus, instead of "repair" the beacon, in our minds, we should amend it to "release the next wave of loaders" and the tactical situation immediately crystalizes. The loaders won't come until we tell them to. Use this strategy and you'll not only defeat the loaders in your first or second attempt, but also maximize your loot. You can collect and sell your hoard after each wave before releasing the next. In this way you optimize your loot management so that items won't disappear from being on the battlefield too long.
Given the composition of the attackers, the most versatile and ideal arms used here will be Corrosives and to a lesser degree, Electric Shock Weapons. Angel will inform you when the Fast Travel Station has finally arrived, signalling an end to the seige. When it does, use it and pick Sanctuary to escape. You'll be in Sanctuary again (afloat in the sky and without walls so be careful not to fall out!). Go talk to Roland to complete the mission.