This mission starts immediately after the end of "The Man Who Would Be Jack". You'll have to return to Thousand Cuts, make your way across the barren wastes and into the facility that's holding Angel. It's an impossible mission but thankfully you've got some help.
- XP: 10638
- Money: $136
- Gear: N/A
Attack!
Talk to Claptrap and he'll jump at the chance to attack Jack. Go to Thousand Cuts and go in the opposite direction from Slab Town. You'll have to cross a field filled with craters and then you'll come to a red force field. Don't touch it or you'll die instantly. Wait for Claptrap to go through and deactivate before following.
This road is brutal (as is the mission). Stay at the gate and turn left to find a bunch of towers in the distance. Each of these towers has an Auto Turret on it that will sap your shields if you get hit. The upside is that they are pretty innaccurate at this range but the downside is that there are enough of them that it doesn't entirely matter. Immediately turn left and start taking these out with a sniper rifle. Take them all up and move up to the next set of barricades.
All along this road are going to be Engineers, Loaders, and Surveyors. You're also going to have to contend with a new type of Loader called a JET Loader. These Loaders can transform into a jet and fly around, making them very dangerous. Stay behind cover and before targeting your next victim on the ground, make sure you check the skies and the ground for these JET Loaders. You want to take them out as quickly as possible. Try not to shoot down the Buzzards though as they are on your side.
You'll have to fight some Hyperion Soldiers in this area as well. They look and act similarly to Combat Engineers but they are much tougher and more accurate with their weapons so be careful. Sometimes, you'll find Auto Turrets that have been scattered by the Soldiers laying around. Try and take these out. They are pretty lightly armored but they can be distracting and change the tide of a battle if you leave them too long. With these soldiers will also be some Hyperion Snipers so make sure you watch the left side for them.
As you climb towards the top, you'll encounter some WAR Loaders, RPG Loaders and possibly ION Loaders as well. Take your time and kill as much as possible before moving up. If you are surprised by the number or composition of the enemies ahead, don't feel shy about retreating to a safer distance. Watch out for the grenades that the RPG loaders can toss at you because it can really disrupt your cover.
At the top of the road, you'll find a Constructor. This isn't anything different than what you've faced before but he might be a little more aggressive with constructing Shield Surveyors and Loaders so keep an eye out for these.
When the Constructor is killed, the door leading to the left will open. There are tons of crates around here so collect as much ammo and weapons as you can before moving on. When you are ready, head up the next road. You'll hit a checkpoint here. This road will be bombarded with Mortars similarly to how Slab Town was earlier. Make your way up the road and avoid the red circles so you don't get killed. At the top, there is a checkpoint on the left by the shipping crates.
Knock, Knock
Brick makes a pretty good reference to Contra at this point (I think) so check out the Easter Egg section for more information. Before destroying the turrets as suggested, get a good feel for the area. The best cover is going to be to your left but if you back up a little, you can use the rocky terrain to your right for good retreating cover. When you destroy the turrets, hang back because a small group of enemies is going to come out of the base. The trouble is that you don't have a whole lot of cover that you can retreat to so you have to be a little on the aggressive side.
You'll be attacked by some Soldiers and WAR Loaders. Try and take out the humans first because they are softer targets but they can do some big damage if they get the drop on you. Kill any left over Surveyors and then make your way up to the gate.
Ahead of you is going to be a rather large structure covered in balconies and staircases leading up to the apex. Get just inside the doors and some Loaders are going to drop onto the field. The first couple will be EXP Loaders and a couple of Surveyors. When you go up the first set of stairs, you will cause a Badass Constructor to spawn on the next level up.
If you are playing a long range game, you'll want to back up to the gates and use them for cover as you take out the Constructor from long range. Just make sure that you take out any ION Loaders near him first because the last thing you want is for the Constructor to spawn a Surveyor while an ION Loader protects him.
If you are playing a shorter range game, stick to the right side and make your way along the platform. You'll be attacked by all manner of engineers and Loaders as you make your way up (or perhaps you may want to go back to the gates just to clear the smaller enemies anyway). At the far side of this platform will be stairs leading up. At the top of the stairs, turn immediately to the right and you'll find more engineers and some Loaders (including EXP Loaders). To the left is a nook you can sink into for cover. From here, you can use the canopy above to protect you from missiles while you take down the Constructor.
Make sure that you aim for the eye of the constructor because he's got a lot of health and can soak up a lot of shots if you don't. Watch out for the Nukes that it shoots out of its back. If you are at the gates, you don't need to worry too much as it seems they can't track you at that range. If you want to try, you can try hitting one just as it launches to try and damage the constructor.
With the constructor finally down, you can make your way up to the top (if you haven't already). Make sure that you collect the loot from the constructor and watch out for any Loaders remaining. Go up to the final level and you'll see a grass path on the left side leading to your next destination. If you turn left, you'll see a rooftop with some electrical transformers on top. If you jump to that, there's a loot chest at the end. If you turn right instead, there will be a section of roof with a bunch of chests but you'll have to watch out because a Loot Wee WAR Loader will pop out of one of the crates.
Head back along your merry way. You'll pass by another checkpoint and then cross over a bridge. There will be a large door to the end. Go inside and it will take you to the top of the tower.
The Bunker
At the top, you'll have to walk around these sort of spiral stairs. If you watch to the left, you'll see a checkpoint and some vending machines. Hold on to a Rocket Launcher, sell loot and stock up on ammo while you're here. Climb to the top of the structure and you'll find the roof is a large central platform with an outer ring that circles just a little bit lower. In the middle of the roof, there will be a section that is a little higher than the rest. You can't jump up onto this section unfortunately.
When you get to the central section here, you'll find a large Auto Cannon on top. I'm not sure that it's practical with other classes but as Zero, it was worth conserving the ammo to just hit the turret with melee attacks. It did a surprising amount of damage. If that doesn't work, aim for the back of the turret and use Corrosive weapons to take it down. The red point on the back is the weak point. Whatever you do, hang on to the rockets though. When you destroy this turret, another one will appear on the roof. As you use up ammo, Brick will tell you that ammo is being dropped at a certain spot on the roof. Go to that spot and you should be able to find the ammo.
Continue killing turrets and the Loaders that drop down to defend them. After you kill the second cannon, lasers will appear in the area of the gun that you destroyed. If you touch the red fences or the lasers, you will take damage so try to jump over them and if there are nearby crates, jump on top of them to not get hit. Whenever there are Loaders around, make sure you take them out before the next cannon so that when you jump on crates to avoid the lasers, you won't be torn up by the Loaders.
As you destroy more and more cannons, the Loaders will get tougher and tougher with WAR, ION, and RPG Loaders eventually appearing. The Cannons will also start appearing in more unusual positions. Some of them will appear on the top section of the roof that you can't get to while others will appear on the side of the Bunker or possibly even the underside of a platform.
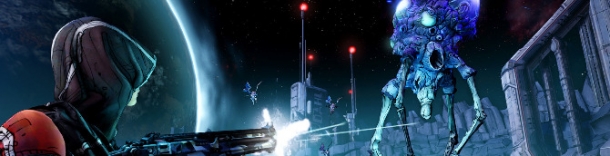
Once you've destroyed 11 Auto Cannons, something bad will happen. And that something bad is called BNK3R.
BNK3R isn't really too bad. If you've saved up rockets, this is definitely the time to use them. The little red eye like areas are all weak points so that's a good way to make the rockets really count. The BNK3R is also going to create Auto Cannons on the top of its hull. These aren't as tough as the others and can be destroyed by a rocket to the mid-section (provided the blast radius is big enough).
After you've hit it a few times, the ship will start to shoot explosives at you. These take the form of little red disks encased in red shells. Try to avoid the red shells or you'll set them off and try to run away from them as fast as you can so as not to get caught up in them. Not long after this point, the ship will also deploy a large cannon on the middle top of the ship. This cannon has to charge up before being shot and you'll get a good warning from Brick ahead of time. Try to hit in a soft spot a couple of times to disrupt it (or a rocket or two).
While all of this is going on, watch out for the Loaders that are still landing all over the place. If you happen to go down and you've almost killed the ship, use one of the Loaders for your Second Wind instead. Destroying the ship doesn't bring you back right away (or possibly at all) so you'll still die despite destroying it. Use the various pillars around the roof or even the area at the top of the waterfall for cover and chip away at the ship. Remember that there is an ammo dump just a little ways down from where you are and it might be worth buying up some rockets to make your life easier.
When the ship goes down, make sure that you collect all the loot it drops and then sell what you don't want. It's going to drop a lot, maybe even more than you have space for. You'll get plenty of Eridium as well. Once you are done with that, head back to the door that Angel told you about earlier. Go inside and do as the computer tells you (stand on the emblem, speak the password, etc,.) This will bring you downstairs to meet Angel. Go through the halls and open the doors to get to Angel's room.
Angel
Angel is going to be surrounded by a shield. To kill her, you'll have to destroy three Eridium Injectors that are likewise protected. Loaders will start coming into the area. These Loaders are going to be pretty tough and come in all shapes and sizes. As you run out of ammo, Angel will create boxes of ammo near the center of the room. After you take out the first few enemies, some Shock Field Generators will spawn. Until you destroy them, they are pretty dangerous but once you destroy them, they make great cover. In other words, be sure to take them down as soon as possible. Remember that you can also use Angel's shield in the middle to protect you from enemies across the room.
You will encounter some new Loaders called Angelic Guards. These are like much more powerful versions of GUN Loaders. You'll also see plenty of ION Loaders.
After you fight off a few groups of Loaders, Roland will show up and lower the shields for one of the injectors. Destroy the injector and then Roland will join you on the ground. From time to time, he will drop his turret and you'll be able to use it for help, cover, health, and ammo. Continue killing loaders and after a little while Roland will climb up and disable another shield. Destroy that injector too and then Roland will fall back down. The bridges will be out but Lilith will come to help. She'll take Roland up to the last shield panel. It'll take a while for him to lower the shield and in the meantime, Lilith will help you on the floor.
Fight off some more Loaders and a couple of Badasses will appear. When you take these guys down, the last shield will come down. Destroy the injector, stock up on ammo and loot, then talk to Roland to start Part 2.
Where Angels Fear to Tread Part 2
After the cutscene, you'll be returned to Sanctuary. Talk to Mordecai and that's really all there is to this mission.
- XP: 531
- Money: $136
- Gear: N/A