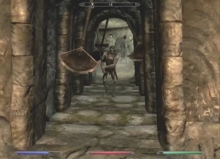
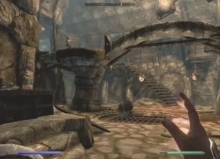
When you first get into the dungeon, start sneaking. Up ahead by the fire are a couple of bandits talking. Get closer and use your Bow to take them down. You should be able to get a bonus on the first enemy. Kill them but watch out for the skeevers running around. After killing them and maybe a few skeevers, head through the doorway behind them and follow the winding tunnels.
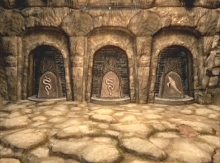
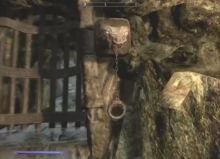
Eventually, you’ll come to a set of stairs leading down to another room and in that room is a man holding a torch. DO NOT ATTACK. Watch what he does and don’t do it. Go into the room and loot his corpse, then look above the gate in front of you. You will find three carved heads, two of which have symbols in their mouths and one which has broken. If you look down at your feet (by the lever), you’ll find the center carving has fallen on the floor. These three symbols are the password and if you turn left, you will find where to put them. There are three rotating statues here. Spin them so that they match the solution which should be: Snake, Snake, and Fish. It should require one spin, two spins, and two spins respectively. Once you’ve set those up, pull the lever to open the door.

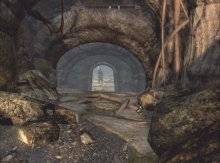
Go into the next room and you’ll be attacked by a few skeevers. Kill them and go down the spiral staircase. You’ll be attacked by more skeevers on the stairs. Make your way down to the bottom and through the next couple of rooms until you come to an archway blocked by spider webs. When you go into the room, watch out for a giant falling spider. You may not be able to kill it, it’s rather strong so I recommend going through the back of the room. There is another spider web there with a man trapped inside and this blocks your path. Cut him free (don’t worry about harming him) and get into the hallway beyond. In the next hallway, round the corner because the spider has a ranged attack but once there you are safe.
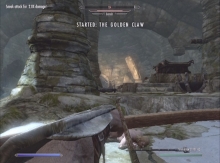
On the other side, the man you just freed will run. Pickpocket him or kill him for the Golden Claw that he has in his possession. Once you’ve done so, you can turn around and kill the spider for an easy kill. This is not required but it is pretty good experience.
When you move further into the dungeon, you’ll find yourself in some catacombs. There will be quite a few Draugr down here that you can either kite backward up toward the Spider room or you can use the trap in this room to kill them if they are too tough. After you clear this room, head downstairs for more of the same. You can kite them back up to the previous trap if you’d like or take them forward through a swinging axe trap however you have to pass them to get there.

Go through the swinging axe trap and down stairs to find another Draugr that will come to life in a standing coffin. Attack him or kite him back up the stairs to the swinging axe trap. Run through and let him follow to his death. Head back to where he came to life and in the next section of tunnel will be an oil slick trap. A few more Draugr will come to life so try to use the oil to your advantage. Any that are still alive that you don’t want to fight can be taken back to the axe trap.
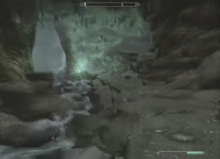
Finish going through the tunnels and you’ll come to a room with a stream and a single Draugr. Kill him and then follow the stream to a gate. Open the gate with the chain to the right of it.

Follow that stream to a tunnel. Go through the tunnel and then pick up the stream on the other side of the wall. Follow it through the large room and to a water fall. Watch for the Draugr on the bridge. If you wait a moment, it’ll notice you and try to come up to you. Then drop onto the bridge and you’ll have plenty of space to kill it.
Follow the bridge left and go up through the tunnel. You’ll eventually come to a new room with another Draugr but this one will be tougher than the ones you’ve faced so far. Use the numerous columns in the room for protection while you attack him with magic and arrows. Kill it and go through the next door.
Bleak Falls Sanctum
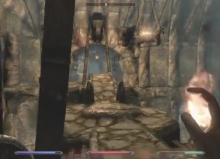
You will enter a set of caverns which will take you to a larger open area. You'll be attacked from the left and when you move towards the stairs at the far side, a couple more enemies will come down at you. Watch out for the oil on the floor and make good use of it. If you still need more help, don’t forget the axe trap you passed to get into the room. Go up the stairs and take the bridge over the middle of the room. Go through the doors at the end and then walk straight ahead until you come to another big door with glyphs and an indentation in the middle.
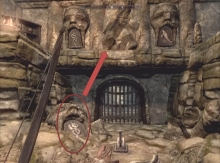
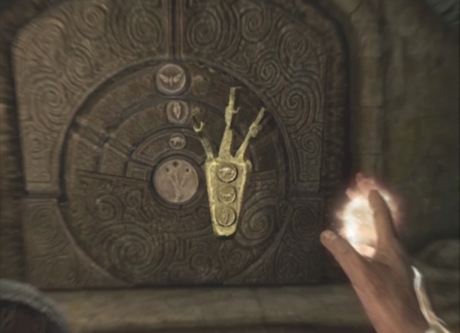
You've probably already guessed that the golden claw goes into the indentation in the middle but the glyphs take a little more work. Open your inventory and go to misc. Choose the Golden Claw and then press the right stick in to inspect it. If you flip the claw over, it will have three glyphs in the middle and you want to duplicate that pattern by activating each of the rings in turn until they match. The pattern is bear, butterfly, and cocoon from top to bottom. Once that is aligned, just use the keyhole in the middle to open the door.
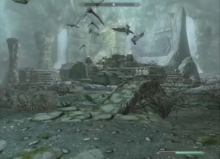
You'll enter an area that looks sort of like a shrine. Walk towards the light at the end and climb the stairs. Inspect the chest in the middle to pick up some good loot then turn around to face the big curved wall with the lines all over it. That's the language of the dragons. Walk up to the wall and you'll learn a new word of power. Head back towards the altar and the Overlord will appear. There is plenty of room to circle so take your time killing him. Be aware that he actually has the ability to use the same Shout you just learned (but can't yet use) so he does have a ranged attack but it seems to do a very minor amount of damage if any at all.
Once you are done with him, collect the stone tablet from his body and then walk up the stairs to the left of the wall with the dragon writing on it. Up the stairs you will find a strange handle that you can use to get out of the caves without going all the way back. Drop off the ledge on the other side and head out of the cave. You'll come out of the cave on the SW side. You now need to circle back to the east and north to return to Whiterun. This trip will be pretty similar to before. Head back there and bring the stone to Jarl's Wizard. Or you could just fast travel there by using the map.