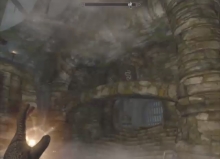
Make your way up to the top of the Eyrie. Be careful because there are small enemies and two dragons just in this first small section. Just go slow because the first one will attack you as soon as you get there but the second may wait until you’ve made further progress. Watch out of the Draugr in this area because some of them can shout and may disarm you if you aren’t over level 30 (the maximum disarm effectiveness).
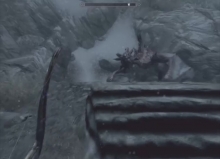
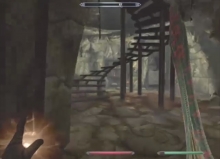
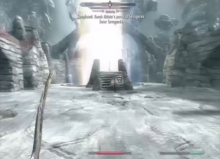
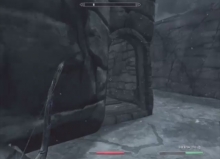 Head up the stairs to the right; this is usually where the second dragon attacks. Make good use of your Dragonrend now that you have it. It makes killing dragons far easier. You should be near the North and South watch towers (both in the same corner for some reason). If you head up the next set of stairs and then turn left, you should see a broken tower that you can enter. Do not enter the tower but head to the right side of it to get closer to the temple. Make your way up some more steps and past some Draugr to get inside Skuldafn Temple.
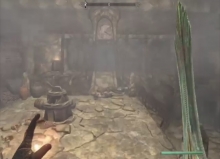
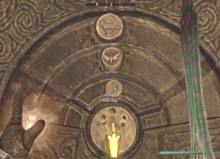
 Inside, follow the halls until you get to a big room with three statues to rotate. Each statue has a corresponding solution tablet across from it. For the left statue, the solution is on the wall to the left of it. For the right statue, the solution is to the right and for the central statue, there are two solutions. Look above each gate leading out of here and turn it to the appropriate face. The right gate should lead to treasure while the left gate should lead you further on.
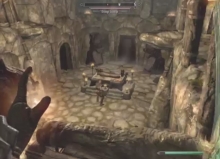
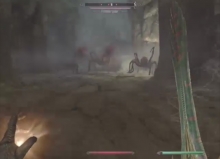 Further on, you’ll come to a room with two floors and steps down to the lower area. You’ll find a single Draugr by a coffin. Starting combat with him will summon a few more Draugr and one of them may be capable of shouting and/or conjuring frost atronachs. Dispose of them and head through the door on the far side of the room. Soon you will find yourself cutting through webs which can only mean more Frostbite Spiders. Thankfully, these never level up so, hopefully, at this point you’ll be able to cut through them no problem.
 Keep going through the halls, kill a few more spiders and you’ll come to some large doors. Open the doors and you’ll enter a large, two level room with another rotating statue puzzle. The first statue will be directly in front of you. Soon you will be set upon by more Draugr so deal with them as you wish but definitely use all the space and the two floors to your advantage (hint: Unrelenting Force is good for putting most of a crowd below you). The solution for the first statue is on the south wall of the first floor, below a draw bridge. The other two statues are on the second floor. Starting at the middle of the room, on the second floor, turn towards either bridge and you will find a large head on the wall with the solution to the statue below it. Arrange the statue and pull the lever to lower the draw bridge. Cross it and go through the doors to enter the next area of Skuldafn.
 The first room in this new section will have a chest in the middle and Draugr just beyond it. Kill it and then head up the stairs behind the chest. You will loop around and have to cross a bridge over the room. You will likely come across another Draugr here but feel free to push him off and move past him.
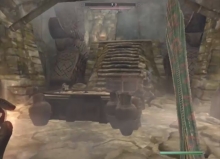
 You’ll come to a large spiral staircase but there will be oil on the bottom floor. Watch for a falling lantern and either quickly make your way up the stairs (the flames can reach quite high) or back track to avoid the flames. At the top, you will find a small room to the left (South) with a few Draugr, a bunch of oil and a lever. Light the oil on fire and then dispose of any survivors. Head into the room and pull the lever to open the gate to the north. Head through the hallways beyond. Watch out for a long hallway with an oil slick in it. It will lead slightly up a ramp and will bear a striking resemblance to the hallway you were in for the first golden claw puzzle. There will be a lantern hanging here. Make sure not to knock it down or you’ll be in a whole world of hurt/fire.
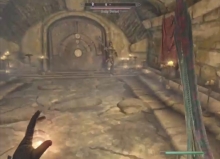
 You will be coming to the same style of door momentarily, which is why this hallway may have felt familiar. At the end of this hall is another claw puzzle and the person (thing) holding it is just to the right of the door. Kill the Draugr and loot the diamond claw from him. Solve the puzzle (Tiger, Moth, and Dragon) and move on. The next room will be rather empty save for a word wall. Make sure you learn the word here because you will not be able to return.
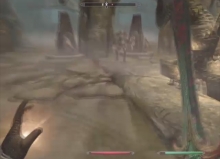
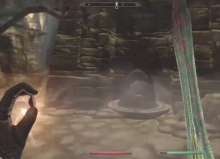
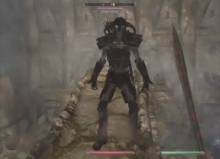
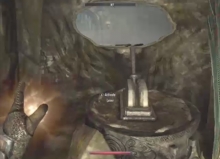
 Going to the left of the Word Wall will take you outside. Outside, you will be set upon by a group of powerful Draugr and possibly dragons. Once you kill them, wrap around the side of the building to the left and climb the stairs. You’ll find a Dragon Priest approaching a pedestal and a giant column of light beyond him. Try to kill the Dragon Priest before he takes the staff from the pedestal and he will never have a chance to attack. If he does take the staff, he will fight. Kill him; take his mask (an item for a different quest) and his staff. Plant the staff back where it was to reopen the beam of light. Jump inside the light.
Alternatively, you can simple come outside, skip fighting the Draugr, dragons or the Dragon Priest and run up the stairs. If you jump into the beam of light before the Dragon Priest pulls the staff out, you will save yourself a lot of fighting. Note, however, that by doing this, you forever miss the chance of getting the mask off of the Dragon Priest.