When you start up a new game, you’ll wake up on a horse drawn carriage with a group of other captives. Listen to some back story until you are let off the cart. After one of the Imperials asks you to step forward, you will be allowed to choose your race and appearance. Each race has its own bonuses and special power but none of them are game changers and help you more in the beginning than towards the end of your character development.
After you make your choices, you’ll be sent off to the chopping block when something terrible happens. Once you regain control of your character, go southwest into the nearest tower. Head up the nearby stairs and the Dragon will attack the tower. Watch out for the fire, and then jump through the hole in the wall to the next building.
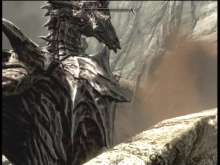

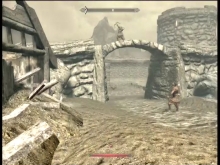
You’ll find yourself in the attic of the next building. Make your way to the far side and drop through the hole in the floor boards. Come out of the building and you’ll find a line of soldiers trying to fight off the dragon as a man on the ground gets toasted. Follow the corner to the left and into a burned out building. Head north through the building and east out of the building toward the main gates. Follow the path that leads to the left and under an archway. Go under the arch and turn right to enter Helgen Keep.
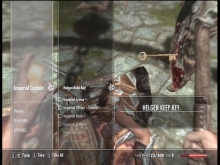
Inside Helgen Keep, Ralof will walk up to a body and say a few words. After he gets your bindings off, loot the body on the floor for some armor and a weapon. Equip these and then follow Ralof. He will try to open a door and fail, then a couple of Imperials will walk through. Kill them, take their things (including a key) and open the other door.
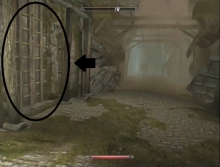
Go through the door and down the stairs. Turn right and you’ll see a long hall with two guards at the end. The ceiling will collapse on them and to the left of the debris will be a door. Go through this door.
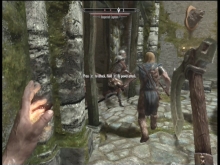
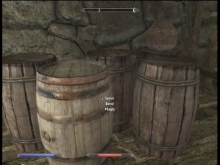
In the store room, you’ll encounter two guards. One will be wearing some pretty heavy armor while the other will only be in leather. I highly recommend using your Flames spell on the heavily armored enemy and physical attacks on the lightly armored enemy to save magicka. Take them out and search the room for supplies. Of particular note is a collection of barrels, one of which will have several potions.
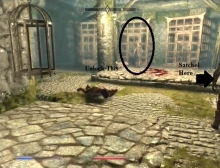
Go through the door to the west and follow the hall down some stairs to the torture chamber. You’ll find a couple more guards here, one of which is a mage. If you can get close to him, he will switch to a dagger and try for melee combat at which he is very poor. Try to take him down and then use magicka if you like on the other enemy. Once they are both dead, search the room for a satchel with lockpicks in it and then use those to unlock the central cage. Collect the money on the ground and the book next to the body.
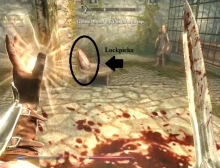
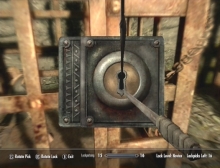
Lockpicking is something like a game of a hot and cold. You want to move the pick until you find the right spot that it unlocks the door. The way you test how close you are is by using the knife to the left to simulate turning a key. Be careful though, once it stops moving, the pick will shake and can break if you don’t let off the pressure. The further left the knife goes, the closer you are to having the right spot so let of the pressure and move the pick a little bit to the left or right and see if you get closer. Keep readjusting and trying until you find the sweet spot and the lock turns all the way.
|
This is the starting position with pick on top. |
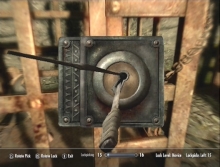
Moved pick too far left so lock only turned a little. |
|
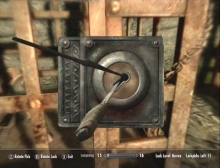
Move pick back right, getting closer. Lock turns a little more. |
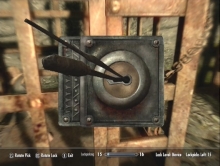
Move the pick right a little more. Turn the lock and it unlocks. |
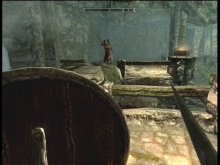
Remember to release the lock (don’t be turning it) before you move the pick. When the pick shakes from a failed attempt, it will actually shake in the direction of the sweet spot. Make sure to take the cash, the spell tome for a new spell, sparks, and loot the body for a pretty good robe. Take the exit out of the room to the right and follow the hallway. It’s pretty straight forward until you come to a large room with a bunch of imperial archers. I highly recommend that you use the shield from the last room to close the gap. Try to make progress in between shots.
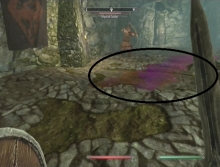
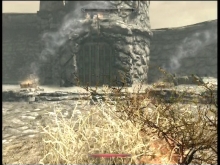
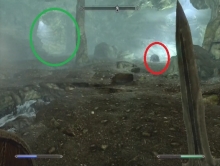
In the second picture, you should notice a colorful pool on the floor that resembles an oil slick. That’s because it is. Use a Flame spell to light it up and cause massive damage (as in near instant death even on Master difficulty).
Head for the exit to the west and you’ll find a draw bridge blocking your path. Pull the lever to the right to lower the draw bridge. Follow the cavern and drop down to the stream below. Follow the stream to the right and eventually you will come to a large room with spider webs all over the place.
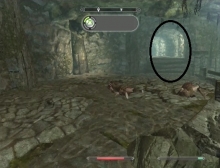
When you walk into the room with the spider webs, you’ll be attacked by a group of Frostbite spiders. There will be two smaller spiders and two larger “mama” spiders that will all have the same name, you can only tell by the size. Fire is definitely a viable strategy but they aren’t particularly tough for melee combat either. Just keep backing away and strafing in a circle. If you are not going with a fire spell (or perhaps even if you are), I recommend equipping a shield to block their projectile venom attack. If you get hit with it, heal quickly because the venom can do a considerable amount of damage.
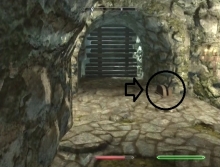
Exit the Spider nest to the east and you’ll come across another stream which will lead you to a larger room. Watch out for a large bear in this room. You can sneak by him if you are slow and careful. Remember to change into some lighter form of clothing/armor to minimize the sound you make and to sheathe your weapons, particularly if you have a spell out because these will cast light on you, making you more visible. Head to the south and you’ll find a cavern that gets progressively colder. At the end is a door leading outside.